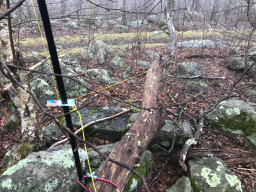
The reason for making this antenna was the desire for a vertical (hence DX-ish) antenna that would cover at least 20m that would fit on my 5m fishing pole. A 1/4wave GP wont fit onto a 5m pole as the radials need to slope down at 45degs from the feed, with a 5m radiating section, the 5m pole is too short. Reading assorted reports over the years the common feature was that a few elevated radials seem to have lower loss than laying a few on the ground. If you can bury a huge great mass of wire then that will be better. The need for elevated radials further reduced the ability for a 1/4wave to fit the pole. The final requirement was that it had to be quick and simple to erect.
After much digging about the 'net, I noticed that many US SOTA activators were having OK to good results using Buddipoles/Buddisticks. I have a problem opening my wallet and the Buddi antennas would require it to be opened quite wide which put me off. Also there’s a fair amount of weight involved and I’d like something lightweight. I did find some DIY Buddistick articles and thought I’d give one a bash. You can follow the articles on the net or build one like this. I claim no originality other than trying to make mine light and simple. The first one I built matched the dimensions given on the net exactly. The next one ended up slightly different when made with different materials. So these measurements are given as a starting point, you may have to experiment.
The antenna described will cover 20/17/15m by altering the length of the elevated radial and by inserting/removing a loading coil. It wont cover 20m or 15m in one go without a tweak to radial but all over 17m is covered.
Best match: 20m: 1.5:1, 17m: 1.1:1, 15m: 1.7:1
Ingredients:
- Top section, PVC covered wire 290cm (9.5ft) long
- Bottom section, PVC covered wire 61cm (2ft) long
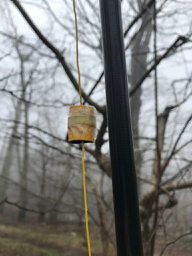
- Loading coil, 6 turns hookup wire on 20mm PVC conduit. See picture http://www.moosedata.com/pictures/SOTA/coil_20m.jpg
- Radial section, PVC covered wire 625cm (20.5ft) long
- Cable mount BNC socket.
- Plastic rod approx. 1m long to support far end of radial.
- Hacksaw, hand drill, soldering iron etc.
It’s useful if you have something like an MFJ-259 as this makes the calibration/tuning so easy. All the materials are easily worked with hand tools.
Method:
-
Make a small eye hook out of stiff copper wire that fits over the fishing rod but is small enough to stop some where near the top.
-
Attach one end of the top section wire to this eye hook.
-
Attach a male spade connector to the other end of the top section wire.
-
Make the coil. I used a piece of 7/31 PVC hookup wire I have used for antenna elements to wind the coil. You need about 45cm (1.5ft) to wind the coil and make the connection tails. Wind 6 complete turns. Terminate the wires in female spade connectors. (See pictures)
-
Attach a male spade connector to one end of the bottom section of wire.
-
Attach the other end of the bottom section to the centre of the BNC socket.
-
Attach one end of the elevated radial wire to the shield of the BNC socket.
-
Fill the BNC with PVA “hot glue”. The BNC is designed for coax and 2 thin insulated wires would fatigue. Filling it with hot glue holds everything secure but can be removed if you need to fix things. Potting compounds are as good but permanent and offer no rework potential. You may want to wait till you have proved everything before doing this.
-
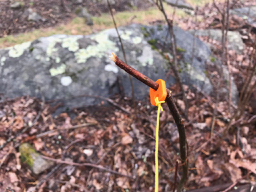
Make another eye hook and attach it to the other end of the radial. The eye needs to fit over the rod used to support the radial. Excess radial wire is wound about this rod to adjust the length and tune the antenna.
Testing:
-
Set up fishing rod somewhere where you can play with the antenna.
-
Drop top hook over top of rod, attach to coil, attach coil to bottom section. I use a piece of elastic shock-cord to stop the wire flapping about.
-
Extend radial to full length, attach to rod. The aim is to get the radial about 60cm above ground. On 20m, its weight will cause a the centre to dip nearer the ground. Height about ground affects the tuning.
-
Connect the BNC feed to the radio or antenna analyser. In use I have a 2m RG58 BNC-BNC lead to connect the 817 to the antenna.
-
Stuff some RF at 14.060MHz (if you want this for CW) or 14.285 (if you will use SSB). Note SWR. Adjust length (and height AGL) of the radial to bring the match to an acceptable point. You will need to experiment to find this point but it shouldn’t take more than a few minutes to find a good match. Mark the length of the radial with a knot in the cable or a tie wrap etc. Mine will tune to 1.5:1 easily.
-
Short out the coil, set the exciter to 18.110MHz. Wind up the radial around the rod so it is shorter. Check SWR, keep shortening the radial till the SWR is acceptable. The match on 17m is good on the 2 antennas I made so far, 1:1! Mark this length.
-
Set the exciter to 21.060 (or 21.xxx) and shorten the radial again. Another SWR dip will be found but it’s not so sharp or deep. On mine it’s 1.7:1. Mark the radial length.
-
Unwind the radial and start again! Check that you can repeatedly set the antenna to an OK SWR using the marks on the radial. Don’t forget to include the coil for 20m only.
-
Once you are happy you can set the antenna up without an analyser etc., fetch your mike/key, pick a band, tune up and check out the performance. When tuning mine on average propagation days I’ve had no problems having SSB QSOs using about 4.5W from an 817 with stations in Sweden, Slovenia, Croatia, Finland, Ukraine, Portugal etc. on 20m/17m and 15m. Nothing DX or remarkable for an early spring afternoon but asking for real reports got me 56 to 59 reports. One SM station dropped his kw linear off and we had a natter for 20mins. He was a big, big signal using just a StepIR beam and 100W and gave me 58QSB reports. Not technical but covering EU from Scotland is easy with this setup.
This is the second version I’ve made. The first used steel tape measure material for the radiating elements. I had this left over after making a 2m VHF DF Yagi ( Tape measure Yagi for ARDF ) and it worked well. The large flat elements should give a broader bandwidth than thinner PVC wire. However, it was unmanagable in more than a gentle breeze and was quite a lot heavier. I have on one occasion been unable to get the new 20m setup to match at all. That was on Tinto SS-064 when there was 15cm of snow under the radial.
The entire antenna including its winder ( http://www.moosedata.com/pictures/SOTA/antenna.jpg ) and the coil weighs 100g. I can cope with 100g to add 3 more bands to my activation armoury ![]() The winder is large enough for me to hold and use when wearing gloves. For reference and so to give a worldwide understood scale there’s an AA cell, a 2EU coin, a US quarter and a UK 5p coin in each photo.
The winder is large enough for me to hold and use when wearing gloves. For reference and so to give a worldwide understood scale there’s an AA cell, a 2EU coin, a US quarter and a UK 5p coin in each photo.
The whole thing is trivial to make and setup (Tinto and snow excepted) and it works as I can get across the pond every activation I have tried on 20 or 17m CW. I’ve worked all over Europe/Ukraine on 17m SSB. All at about 4.5W output. The Buddistick articles have the feed point at 122cm (4ft) but my pole is too short for that so my feed is about 60cm AGL. The loss may be better with a higher feed point and possibly the take off would be better. Something to try if I ever acquire a longer fishing rod.
Please note, this is not my design. This is nothing more than how I built a Buddistick that works for me on SOTA on 3 bands. There’s a lot of fun to be had from playing with antennas and it sure beats paying real money for something ready made. Check my logs for November 2011 onwards for 20/17 to see what I’ve been working with this antenna.
Andy
MM0FMF


