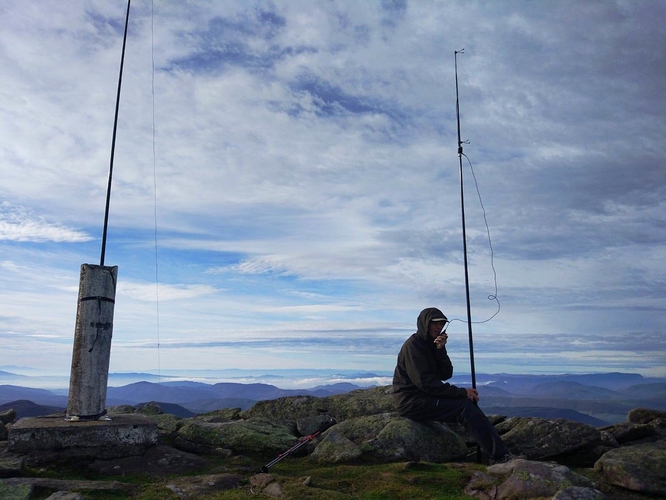
Flowerpot antenna U.K. dimensions

Perhaps some very newbie questions, but that’s befitting an M3.

I think I’ve decided that I’m going to make a flowerpot antenna over a Slim Jim for SOTA work with my HT (they seem equally good with a cigarette paper between them) but all of the instructions are for the original Australian design with the SWR lowest at 146MHz. Does anyone have any better dimensions for best results at something like 145.5?

I also don’t know why those antenna elements are the length they are, both supposedly shorter than a 1/4 wave at 2M. I’ve been unable to find much discussion on it. Does anyone have anything to contribute on that such that I can choose my frequency? They do scale apparently, so I could graph it, but some ideas on what formulas to look at would be helpful.

Finally, I assume I can just zip tie the antenna (if I don’t put it in a pipe) to a fibreglass pole? How do people normally attach antennas to makeshift masts temporarily?

This is assuming the extra height is worth it on a summit, of course. I am wondering how much of an improvement it’ll be over a 1/2 or 5/8 directly on the HT at human mouth-level.

Hi
additional details on the design of this antenna are available at https://www.vic.wicen.org.au/?page_id=1353 . Hopefully these will assist in answering your queries.
As for height I recall the advice given to our school radio group many years ago by our Elmer - you want as much metal as high up as you are able to get it.
73 Mark VK2XMB

1 Like

It will work fine at 145.5 MHz. No need to sweat over such a small dF.

73
Ron
VK3AFW

Hi Mark,

I’ve built a few of these antennas, but Andrew VK1AD has built more.

The wavelength is calculated from the formula L = 300/f where f is in Megahertz and L is in metres. Each part of the antenna is approximately a quarter wavelength, but reduced due to the end effect of a wire antenna with an open end. You can calculate the wavelength on each frequency, 146 and 145.5, subtract one from the other, then take a quarter to calculate the quarter wave equivalent difference, then subtract 5% for end effect.

The simple way to calculate the change in dimensions in the antenna is to first consider whether you want to move the design to a lower frequency or higher. A lower frequency has a longer wavelength. So the change would be given by 146/145.5 = 1.0034 or an increase of 0.34%.

The amount of difference is therefore .34% of the existing antenna length; as the existing antenna is about a half wave on the 2m band, it’s about 1m. So the change is 3.4 mm for optimal resonance, if it was originally resonant on 146. IMO, it’s unlikely you’ll be able to measure and cut to any closer accuracy than 1mm.

As Ron says, in practice if the antenna was optimal on 146, it is going to work fine from 145 to 147 without any practical degradation. But go ahead and add the 3mm to the design length for 146. If the design frequency was 146.5, add 6mm as the amount of change is twice what was calculated above.

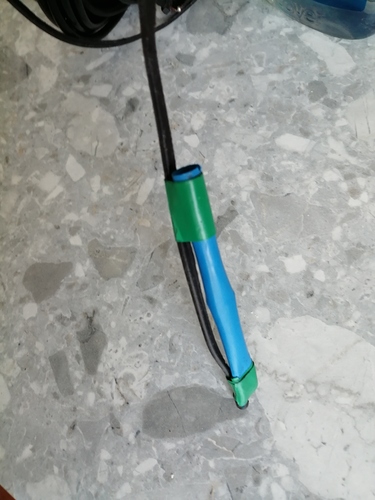
I have one of mine mounted inside a poly pipe, but the other is rolled up and carried in a sotabeams antenna bag for safety. I attach it to a fibreglass pole using plastic tape (aka electrical/insulating tape).

As for performance, I find that the antenna on a 4m pole, about 2m above where a whip would normally be on a HT, that it performs ‘vastly’ better.

In addition, I can place the radio on the ground and plug in a speaker-mike to it, so I don’t have to hold the radio while making contacts.

73 Andrew VK1DA/VK2UH
1 Like

Try this Australian version for 145 MHz. Scroll to the end of the post for the portable version.

73 Andrew VK1AD

2 Likes

Double side Velcro cable ties and elasticated shock cord in my case. Reusable and cheap. Also manageable even when you wear gloves.

1 Like

To attach my “roll up” antennas to a fishing pole, I’ve taped a few inches of sleeving to the top end of the wire, with the top end of the sleeve folded over. This just sits on the tip of the pole. Very quick to put up and take down.

73
Adrian

8 Likes

Hi,
I made few of these antennas and they all work very well. For SOTA I am using 2x 5/8lambda as a roll up version, only balun part is on the PVC tube. I use UltraFlex 7 to make them.

I had to correct couple of them to have good SWR on 145.500MHz but this could be down to my workmenship. What I done is loosen coax on the former and move cable up/down. Of course I made winding titght again afterwords and put the heatshrink tubing.

I use both fibreglass mast or tree to deploy, depending on situation. I read somewhere that it is good to have 2lambda below antenna, so 6mtr mast or strong throw over the tree branch does it. If antenna is lower it will increase take off angle and reduce potential range.

73 Marek

1 Like

The clever bit is the choke, this in not just any choke, this is a self resonant choke. That is to say its inductance and inter-turn capacitance is parallel resonant at 145.5 megs. I use RG174 for my flowerpots and that includes the choke. I find that 8.5 turns close wound on on a 22mm dia plumbing fitting is just right. To get the correct dimensions, make a coil, as per above then cut off the tails. Then use an aerial analyser with 1 turn coupling loop and look for resonance. It should be 145 ±1MHz. if high, try with a another 1/4 turn etc.
As to effectiveness, I did some tests, 8 years ago, comparing the flowerpot with the rubber duck on my IC 92D. it was superior by 10dB. Best DX, Blencathra LD?? to Southampton on 5W.
You mention the element lengths. The distance from the top of the coil to the tip should be 1/2 an electrical wavelength, allowing for end effects and the tube dielectric. I use glass fibre fishing rods to mount it in. The offset “feedpoint” is to provide 50Ohms impedance. Resonance is affected by the tube dielectric. So it must be set up inside the tube. After a couple of hours of trial and error the VSWR should be less than 1.5:1. You will find the feeder is dead as far as RF is concerned, when you touch it the VSWR does not change, the choke is doing its job.

Regards
David
G0EVV

2 Likes

I made one up to the details that you gave me David. No antenna analyser required - SWR 1.1:1 as built. Works a treat, even with the bottom of the antenna close to the ground. I am waiting for one of my poles to break so I can build another. :grinning:

Hello,

I built one for 145 FM and works great.
I use to hold it on my fishpole (glass fiber) at about 3 m up above ground:

My dimensions (made with RG-58):

upper unshielded center conductor: 45,7 cm
lower shielded coax: 44,7 cm
coil below the lower section: 9 turns of coax over a 25 mm cylinder.

Then about 2,5 m RG-174 to the handheld (not ideal but light).

Cheers 73 de Ignacio

2 Likes

Thanks everyone, this is excellent. I think I’ve been recommended that 145 dipole before @VK1AD

The discussion on the lengths due to end feeding is also just what I was after. Wondering if it’s worth throwing a dimension calculator up for this antenna as there appears to be none online but loads for other types.

Edit: Specifically if there’s a difference between lengths for this and for a standard dipole elements, I mean

PS the point about sitting down is why I want to do it. Sitting down kills your signal even 1000ft up sometimes.

@G0EVV sorry, just to confirm: if this isn’t in a pipe it won’t work properly according to those dimensions. Does this suggest I should be changing dimensions anyway if I want to just zip tie the antenna to the side of a fibreglass tube?

Edit: straight away with the links here there are huge differences between the bottom section lengths in the designs, which I think (with help via email from @GM0AXY is down to the velocity factor). We’ve got 10 cms difference here between the original and WICEM link - that’s a lot.

The dielectric effect from the tube on the aerial will be, that for a given dipole, it will be resonant at a lower frequency when within the tube. So if it is spot on in free space, it will resonate on a lower frequency when within the tube. Cut and test is my way of getting it as close as I can. Please note that the choke and the radiator are both resonant circuits that are coupled and will affect each other. That is why I suggest you resonate the coil first before coupling it to the radiator.

When I was activating the Wainwrights using a Flowerpot ant. in my rucksack, the tip was over 1.5m above my head. I could carry out the activation whilst standing on the summit. On several occasions I activated 10 summits in one day. These days I still carry a flower pot ant. and slip it over the top of my 6m dipole support pole, the radiator is 20ft above ground level.

Regards
David
G0EVV

2 Likes

+1 for the flowerpot. Simple and very effective. Mine is with RG58 and uses a 3mm glass fibre rod to keep it straight. It is mounted on a piece of blue water pipe and it sits nicely on an upturned walking pole now. It used to sit on some pvc pipe out of the rucksack until I dropped them last weekend. I’ll be looking for them as they were really useful!

As in, make the coil in the coax, test it, and then finish cutting the coax further up? Or are you saying to physically make the two separately, test the coil, and bring them together for final tuning? Sorry if this is a little verbose.

I’m going sans-PVC. I’m literally just going to zip tie it to a fiberglass pole, I don’t want the extra weight of the pipe and would rather roll it up

Make a TEST coil of 8 turns, without tails. Check it’s resonant frequency, add or subtract (using new bits of wire). When this component is within 1 MHz. build the “controlled radiation dipole” using the same number of turns. Adjust the length for resonant frequency, adjust the feed point for minimum VSWR.
Alternatively just make the coil as 8.5 turns on 22mm dia. and then adjust the dipole as above for best VSWR when inside the tube…

Note:

If the if the diameter is too small it may be impossible to make a self resonant choke at 145mHz.
Also, fastening it to the fibre glass tube will also reduce the resonant frequency due to dielectric effects.

Regards
David

1 Like

Stop faffing around and build the portable version to the dimensions shown in my blog.

Just build it!

73 Andrew VK1AD

9 Likes