I entered a prompt to LLM GPT5 Mini which came back with:
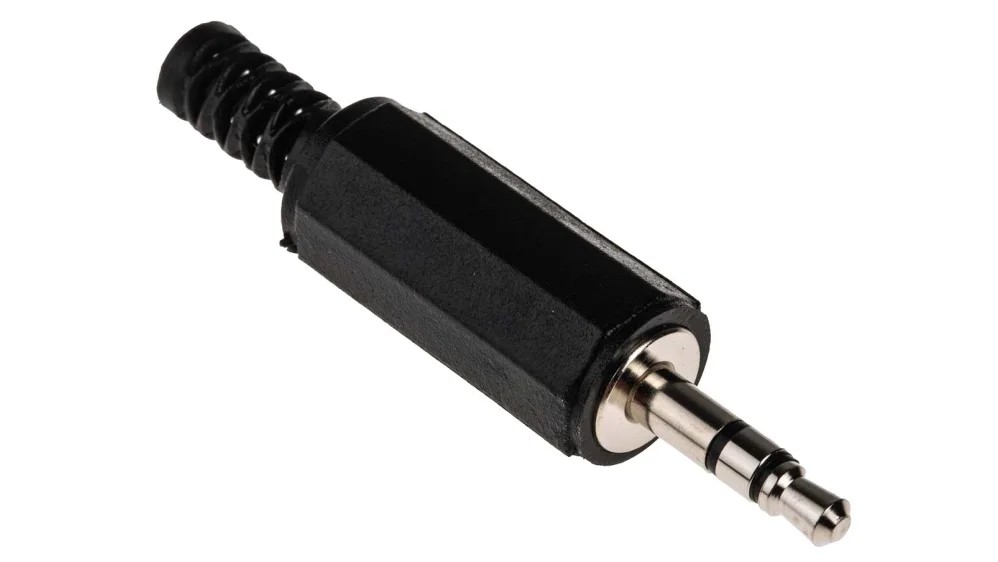
Bold answer up front: You can turn 50 bare 3.5 mm stereo plugs into repair parts, prototyping/building supplies, classroom kits, DIY audio gear, art pieces, or sell/give them away — with a little insulation or a simple housing they’re very useful.
Below are practical ideas grouped by use, with quick how‑to notes and safety tips.
Audio repair / replacement plugs
Use them to reterminate broken headphone cables or make short patch cables. Slide heat‑shrink over the cable, solder tip/ring/sleeve, then insulate and strain‑relief with more heat‑shrink or hot glue. This is exactly the common “hack a headphone jack” workflow.
Prototyping & test adapters
Make many short adapters (jack to pigtail or jack to header) for breadboard/dev boards so you can easily inject or measure audio signals. A simple breadboard adapter is a common DIY project.
DIY audio switch / selector boxes
Build passive source selectors, A/B boxes or a multi‑input selector by wiring jacks to switch contacts and mounting everything in a project box. People use 3.5 mm jacks this way for simple audio routing.
Splitters & simple passive mixers
Create Y‑splitters or parallel headphone outputs by wiring tip/ring/sleeve appropriately and potting the join in an enclosure for strain relief. DIY splitter guides show how to do this safely.
Modular patch bay / synth patching
Mount rows of jacks on a panel or wooden strip to make a compact patch bay for synths or effect loops; use rubber grommets or 3D printed collars as bushings.
Educational kits / soldering practice
Turn them into student kits for learning identification (tip/ring/sleeve) and soldering. Instructables and beginner tutorials cover step‑by‑step builds for learners.
Circuit‑bending / instrument hacks
Add jacks to old toys or keyboards as external patch points for bending or adding effects — a fast way to expose signals for experimentation.
Art, decor & small crafts
Use them as industrial decorative studs, jewellery cores (with an insulated LED/coin‑cell), or sound sculptures (suspended jacks as tactile elements). Seal contacts if you add batteries or LEDs.
Stock for a small workshop / sell or trade
Keep them as consumables for future repairs or sell/give them to local maker groups, schools, or repair cafes.
Quick materials & methods to make bare jacks safe and usable
Slide heat‑shrink tubing over each solder joint (do this before soldering) and apply 2–3 mm overlap for mechanical strength.
Use hot‑melt glue or epoxy to pot the rear for permanent strain relief and to prevent shorts.
If you want a finished look, buy inexpensive moulded covers or 3D‑print housings that fit the jack body and snap or glue on.
For repeated plug/unplug use, add a short rubber boot at the cable exit (improves lifetime).
Below are practical ideas grouped by use, with quick how‑to notes and safety tips.
Audio repair / replacement plugs
Reterminate broken headphone cables or make short patch leads. Slide heat‑shrink over the cable, solder tip/ring/sleeve, then insulate and add strain relief with extra heat‑shrink or hot glue. This is the standard “hack a headphone jack” workflow.
Prototyping & test adapters
Make many short adapters (jack → pigtail, jack → header, jack → breadboard) so you can easily route or measure audio signals during development. Breadboard/adapter DIYs show how to wire and insulate these.
DIY audio switch / selector boxes
Wire several jacks to a rotary or toggle switch inside a project box to select sources/outputs. Instructables and DIY guides describe wiring 3.5 mm switch projects step‑by‑step.
Splitters & passive routing
Build Y‑splitters or parallel outputs by wiring tip/ring/sleeve in parallel and housing the junction. DIY splitter guides cover safe wiring for dual headphones.
Modular patch bay / synth patching
Mount rows of jacks on a panel (wood, aluminium or 3D‑printed face) to create a compact patch bay for effects or modular synth setups.
Circuit‑bending / instrument hacks
Add jacks to old toys or keyboards as external patch points for bending or adding effects — a common maker technique for exposing signals.
Educational kits / soldering practice
Use them as student kits for learning tip/ring/sleeve identification and basic soldering. Beginner guides and simple connector builds are great classroom projects.
Art & decorative uses
Use jacks as industrial studs, parts of sound sculptures, or jewellery bases (insulate contacts first). They add a tactile/industrial aesthetic.
Stock for a small workshop / give or sell
Keep them as consumables for future repairs or offer them to local maker groups, schools or repair cafes.
Materials & quick safety/finishing tips
Always slide heat‑shrink tubing over the wire before soldering, then cover each solder joint. For long‑term use pot the rear in hot glue or epoxy for strain relief.
For a cleaner finished look, use inexpensive moulded covers or 3D‑print small housings that fit the jack body; these protect contacts and give strain relief.
If the jack will be plugged/unplugged often, add a short rubber or PVC boot at the cable exit to reduce bending stress.
Useful tutorial types and references used to assemble these ideas: general jack guides and specifications, DIY connector builds (how to make adapters and breadboard interfaces), audio switch projects, splitter and headphone hack guides.
If you want, tell me which direction you prefer (repair kits, classroom kits, a patch bay, art pieces, etc.) and I’ll give a short parts list and step‑by‑step for making a batch of 5–10 items.