Furness Amateur Radio Society club member and SOTA activator, Rob G4RQJ passed away last year, while helping to clear out his treasure I came across quite a few micro switches.
I thought it would be a fitting tribute two use them to make a Morse key or a paddle as a club project.
Does anyone know of any designs out there that could be built in a club evening. I guess designs using PCB sheet or 3D printing would be typical. I have plenty of PCB material and several members have 3D printers , who could possibly be talked into printing the parts beforehand.
I’ve just ordered the parts to make this (I am going to use slightly different thrust bearings though). It looks mega. Hopefully have it printed and built by the weekend. Thanks!
I did a test print yesterday in PLA with the finest nozzle settings. It turns out incredibly well. I can see how it all fits together now and test fit it as I have all the screws required already. Just waiting on the bearings and switches which should arrive today. Also ordered some special PETG filament for this one for a bit of fun.
Hopefully it keys really nice (my terrible operator limitations aside). @G0HIK I reckon this key @WU7H suggested will be a really nice project and a quick club build for you and a great way to use the microswitches as a tribute.
Little tip for building. I’ve built a test model in PLA to test fixtures and fittings.
Don’t follow the other bloke in the Thingiverse comments on that build. He’s talking absolute Chambourcy Nouvelle.
The smaller thrust bearings are good but still loose. The pivot screw tightness drives the responsiveness of the paddle squeeze and rebound reaction. And he is wrong about using an M4 20 for a pivot. It doesn’t fit and you’ve to drill out the holes or file them out to fit. Makes no difference in my opinion, just use an M3 18 or M3 20.
I have all the right screws to mix and match anyway but for folks who don’t, maybe buy a box of assorted sizes to fit how it feels best for you. The thrust bearings I’d say just get the recommended 10 4 8 ones. I’ve another set on the way.
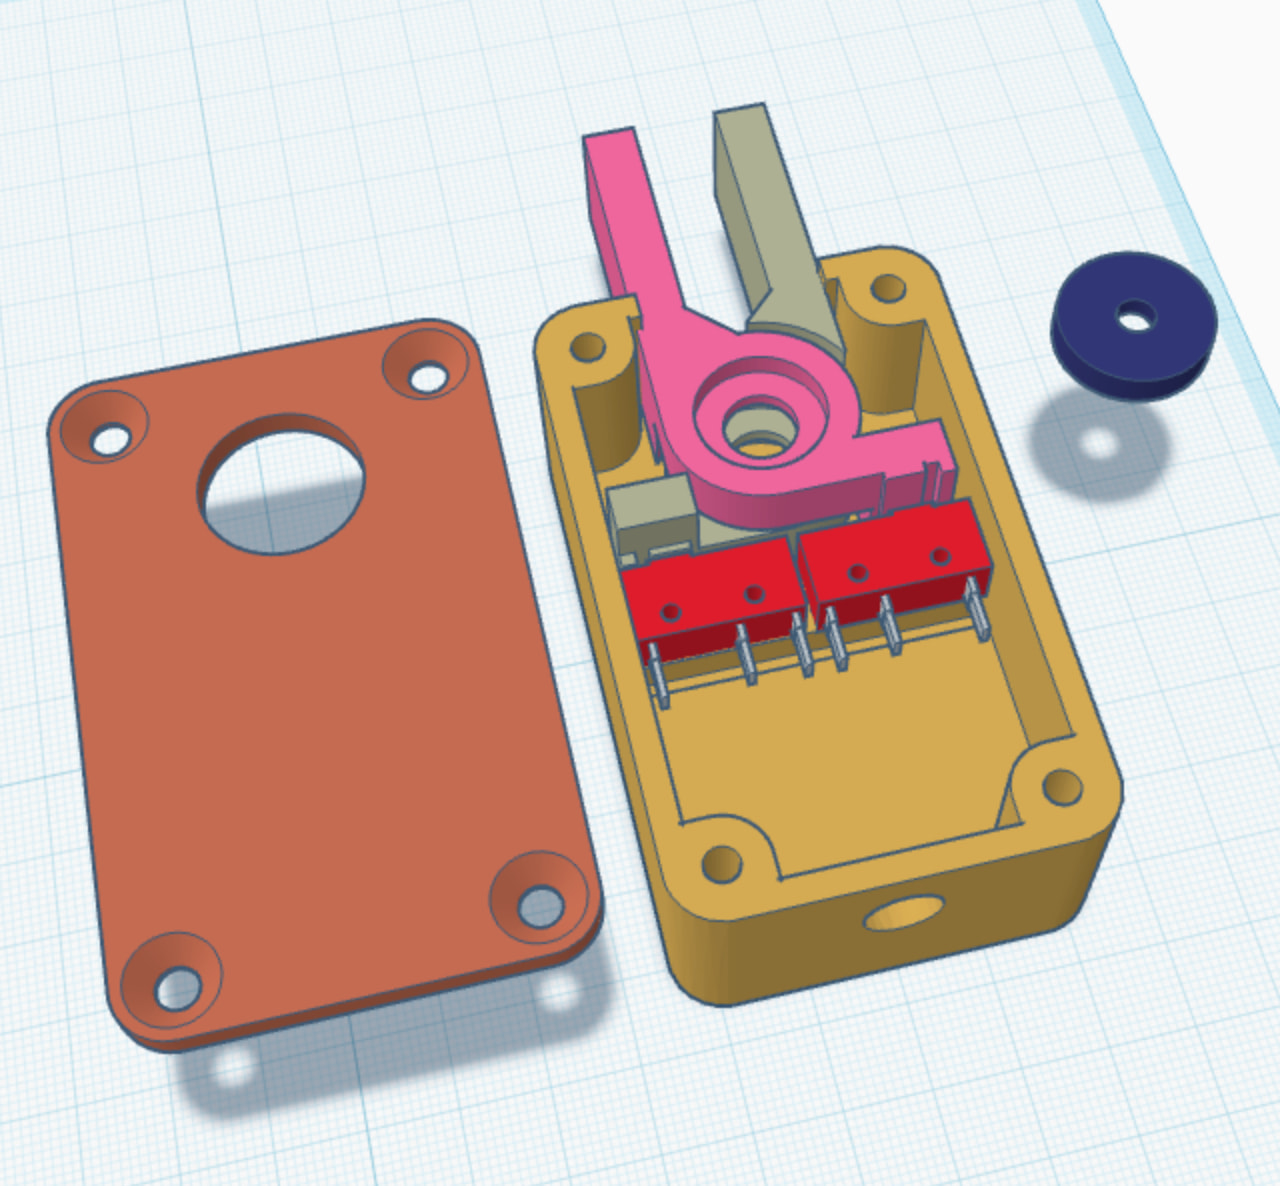
Also, each paddle lever has a groove above each microswitch. I think it is supposed to align with each but both are way off so I am unsure. It doesn’t matter anyway as each paddle hits each switch so it’s all Perrier water under the bridge.
I’ll rebuild it again in PLA for another test. If I can get the AMS working. The special PETG i bought wasnt super dry and broke off in one of the tubes now its stuck!
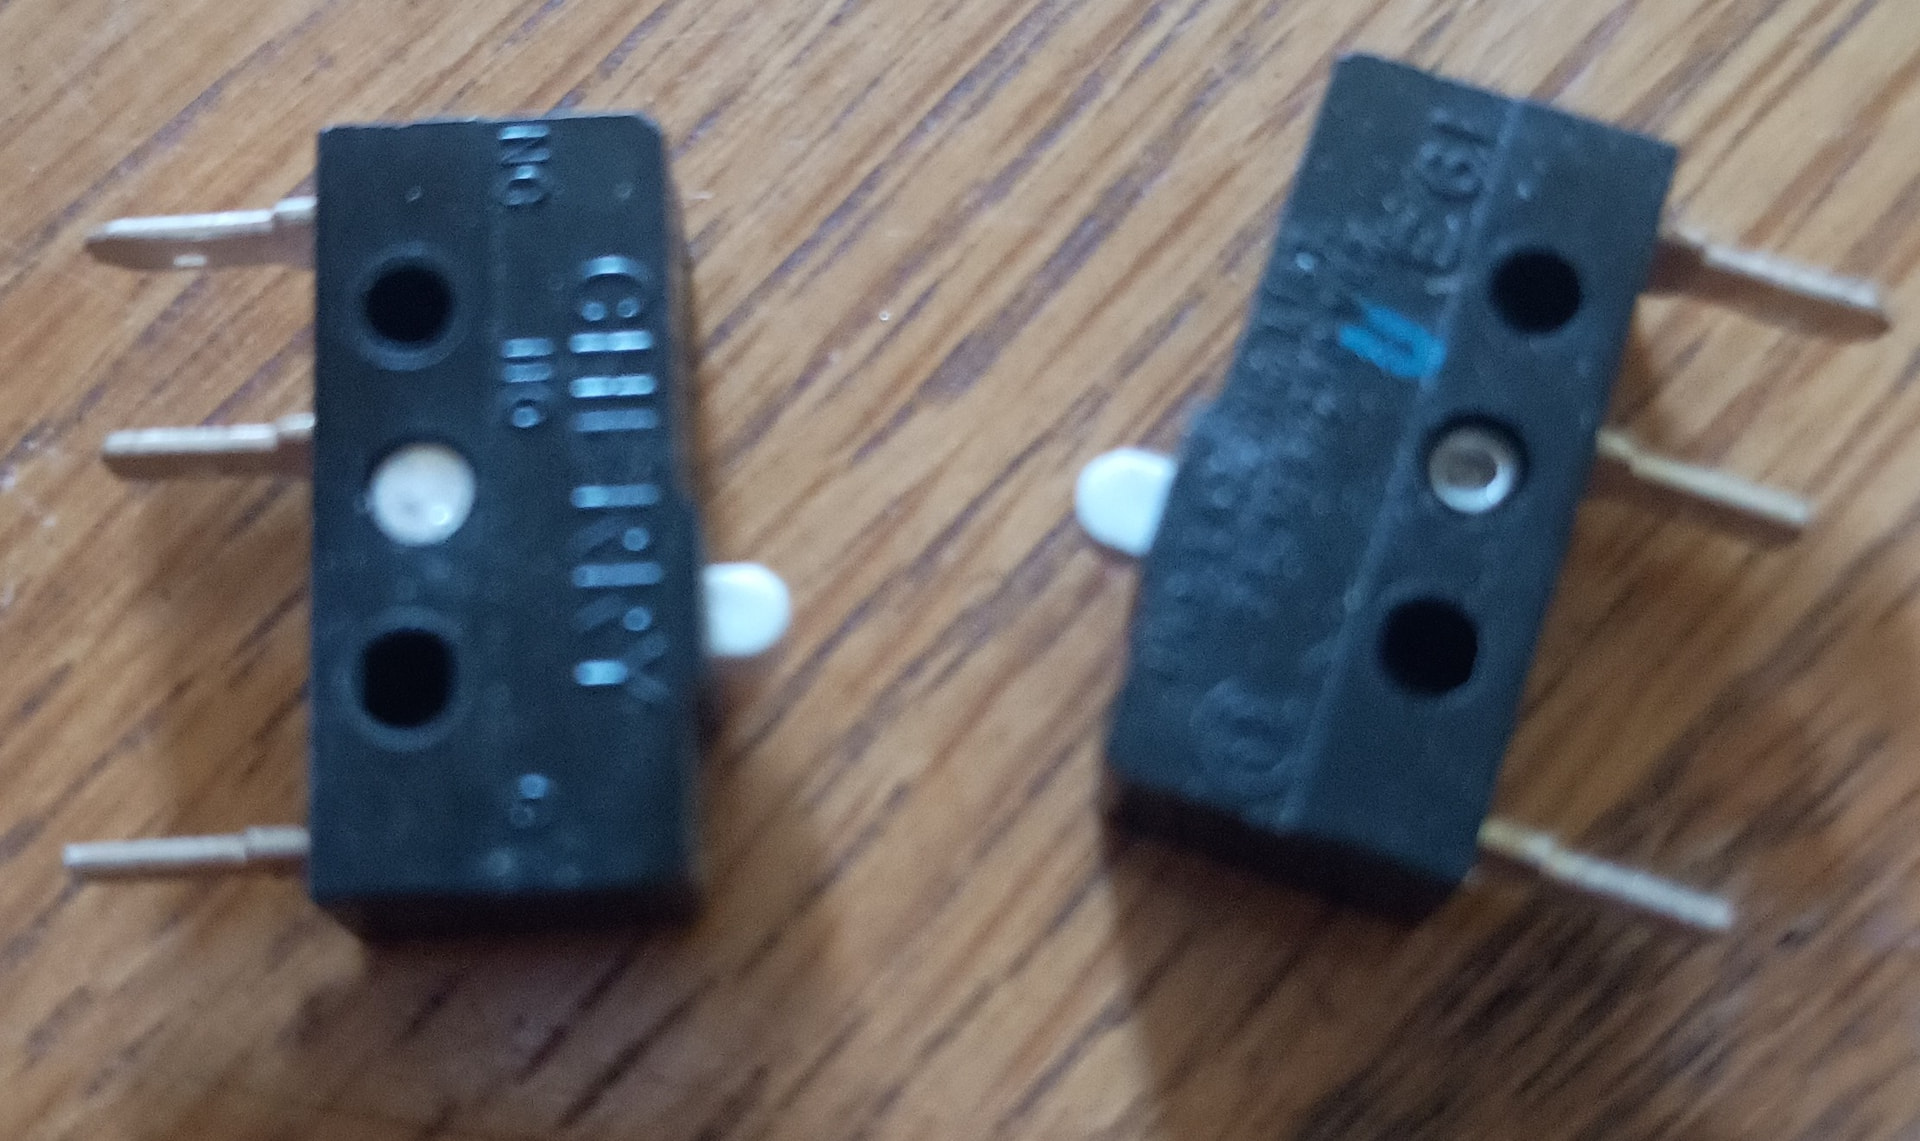
I’ve volunteered on Nick’s behalf to whip the design into shape for the fancy Cherry microswitches he has a batch of, so all useful information thanks Ian. It feels like they are fairly linear (a bit like cherry red keyboard switches) so I think they should have quite a nice action, compared to traditional non-linear microswitches.
No worries Mark. I’m hoping to finish the build today (if I can safely unblock my AMS!). Just waiting on the bearings to arrive.
The paddle action is nice. It reminds me a bit of my Pico. There’s little room for throw adjustment though due to the reliance of the pivot as the adjuster.
I’ll try and post some snaps and tips etc once I have it built and if it actually works properly. Will hopefully save you guys from wasting time, resources and those important microswitches (which this is all in aid of ) if this thing turns out to be a load of old pony.
I’ll play it safe and print in Bambu PETG for now (again, if I can get my AMS sorted safely) and save the snazzy Creality Hyper PETG for another day once I work out why it managed to give my AMS a Connery!
Also, if it helps, I’ll post Amazon links to the bearings I used, screws etc so if you want to replicate like for like and know it will work then the option is there. We’ll see how it works out anyway!
Nice work there Mark. Are those cherry switches bigger than the ones I’m using (per the build instructions)?
Good news, I found the issue with my AMS. It wasn’t the AMS at all. Some filament broke off in the extruder so after taking the AMS apart, which wasn’t to blame at all as the tubes were all empty, it turns out the culprit was the nozzle.
All sorted now. Here’s the doodah for the hoojammieflip if anyone has a similar issue:
I’ll try printing my snazzy PETG Hyper again but this time I am going to feed it from the Creality 2 spool drier up to the PTE 4in1 and bypass the AMS entirely.
Side note, Creality Hyper PETG comes on cardboard spools so you need to print a spool adaptor for it. Or, transfer it to a spool holder - this is what I did as I printed spares a while back for other filaments.
Anyways, I’ll try and have this built today or over the weekend. If I can help at all with any of the other stuff, let me know.
DEFINITELY go with the recommended bearings (I’ll post a link to the ones I am using later). They fit like a glove and hug the pivot just enough without ballsing the paddles up.
Watch your tightness with the pivot screw. It doesn’t need fastening down like you’re expecting a tornado. Make micro adjustments once it’s seated until you are happy with the paddle throw. I guess this is a negative over a traditional adjustable paddle. Whatever tickles your pickles. Personally I like how it throws.
Run a test print first. Use the very finest detail settings you can so that everything comes out nice and precise as your printer is able to produce.
Enjoy!
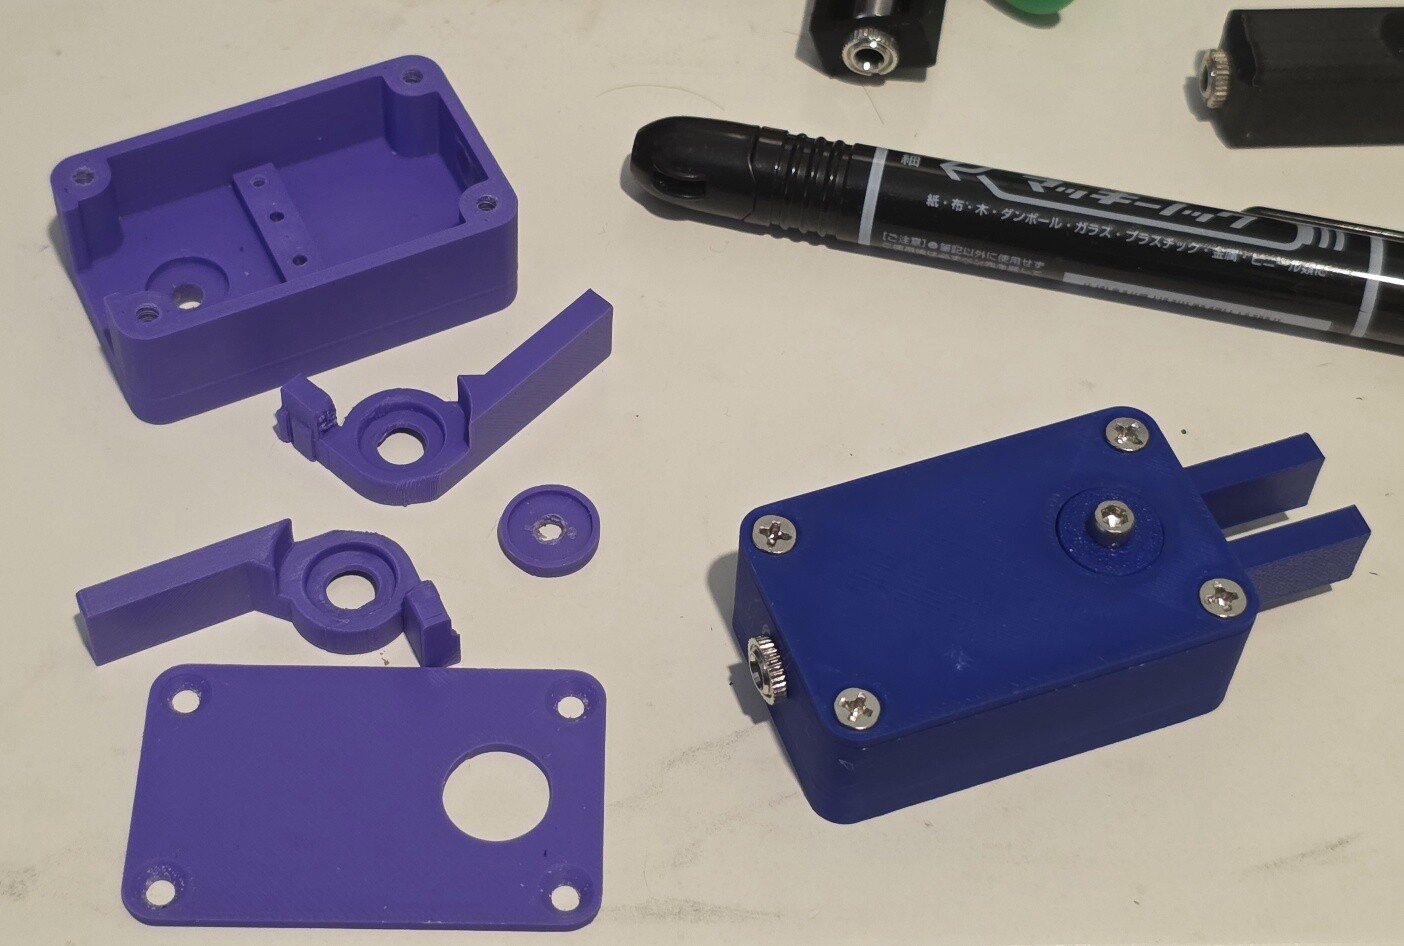
In my photo my PLA tester is on the left. I printed in stock Bambu PETG HF on the right, the final test build. I don’t really like the machine head pivot screw so might change it out so it sits less proud to the paddle outer casing.
Good news. I fixed my AMS and got my Creality Hyper PETG to print. It’s currently printing the (hopefully) final product, and is hopefully going to look MEGA SNAZZY!
From my PETG HF test build I have to say this thing is lovely. Almost in Palm Pico territory in terms of how it feels to operate. It probably won’t be for everyone, but hats off to the designer of this thing, it’s a lovely little thing and gives me a nice little hit of CW goodness to feed my CW addiction for a few minutes!
Once I have the final ‘snazzy edition’ button up and ready for some juicy CW NC-17-rated action, then I’ll post the full BoM and all the rest of it. So you can decide if you want a plain colour with standard filament, or a snazzy version with the right settings so you don’t end up ruining your printer.
Looks good! I made mine with PETG and it has been a great paddle. It has been in service as my main shack paddle since Oct. 2024 and has not missed a beat or needed any maintenance. I had an old broken Dell mouse that I harvested the switches from. I agree, the designer did a great job with the design.
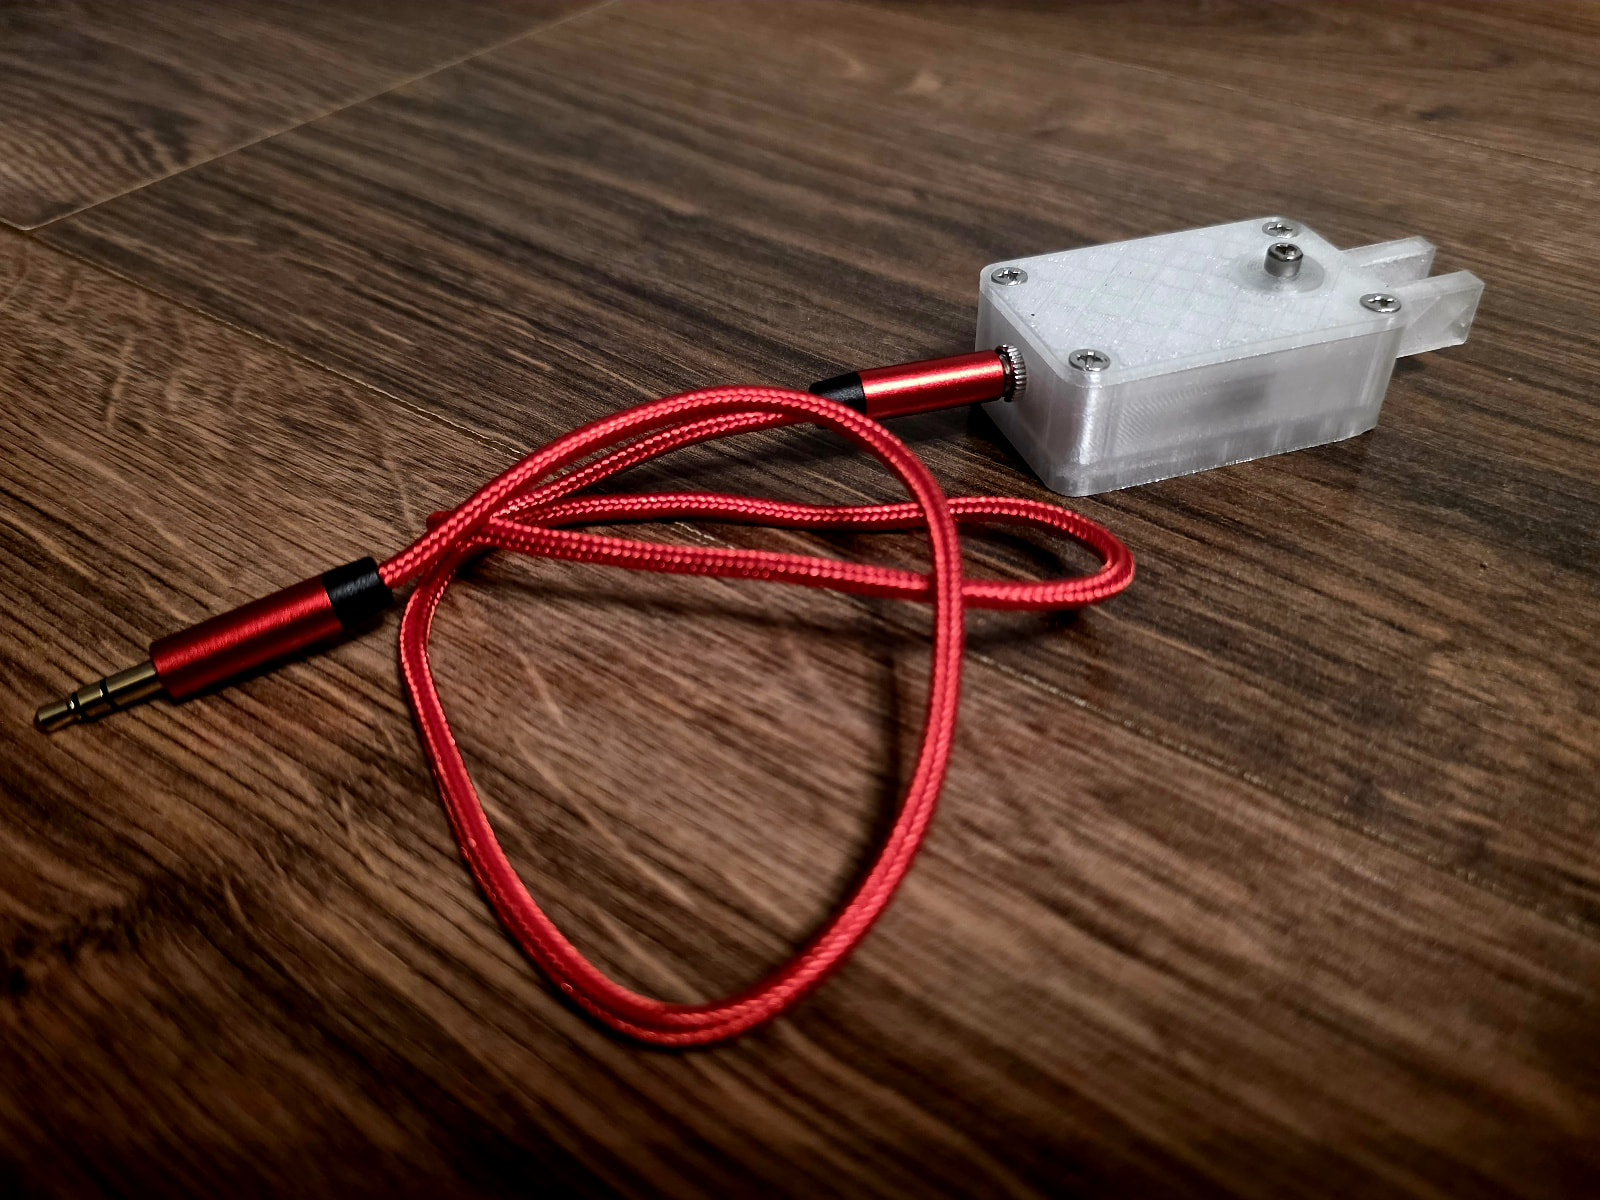
I used Hyper PETG Transparent Crystal filament for this and a jazzy red aux cable I had in my KX2 go bag.
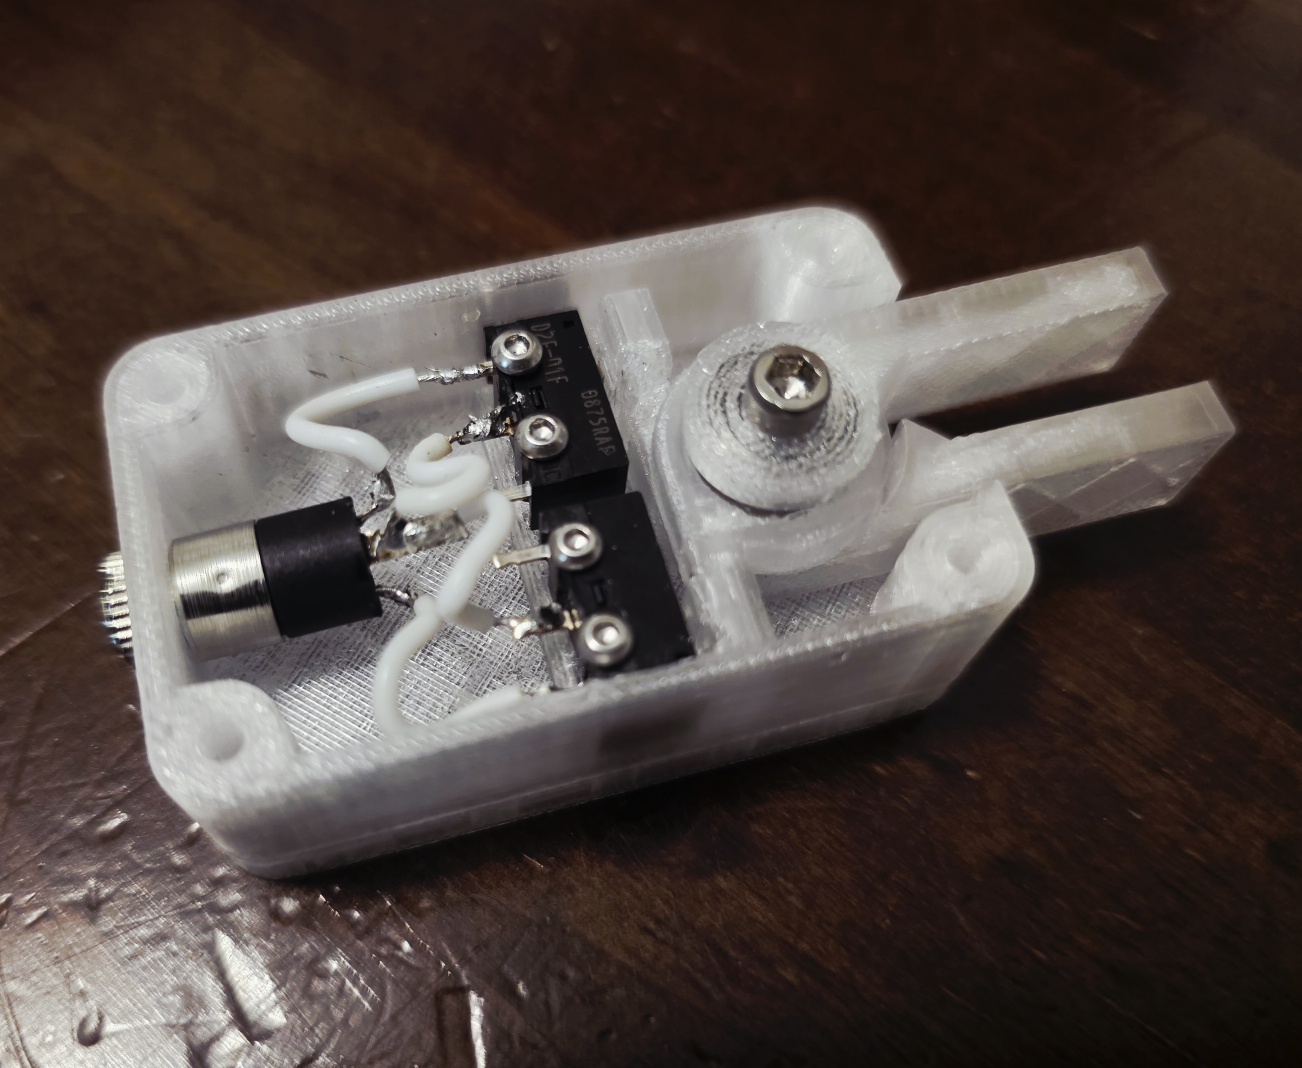
I used 26 awg hookup wire, in white to match. Not the best wiring job but it is late and I am tired!
Buttoned it all up. The transparency effect looks lovely. You can just about see the inner components with a slight frosted effect. It is more clear than white, the overhead light in the photos takes away from it a bit. It is more like clear glass with slight frosting.
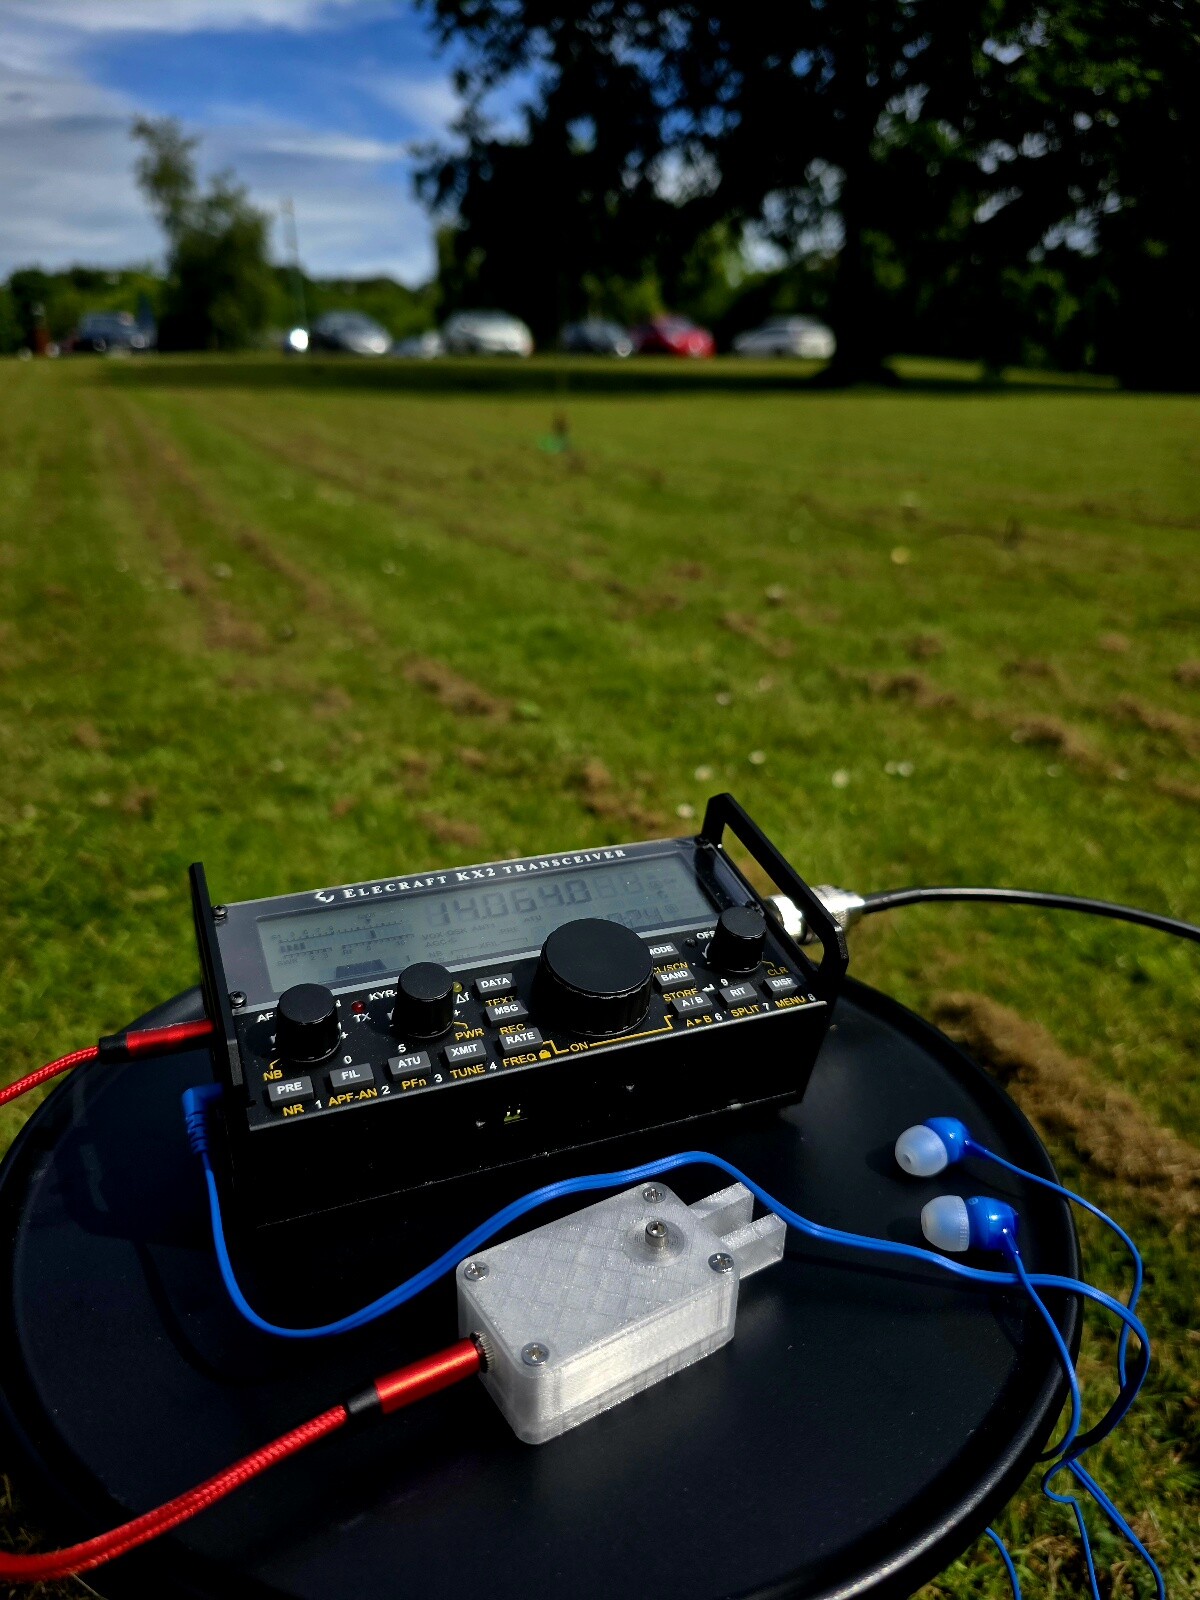
Tested it with my KX2 with VOX MD disabled and this thing is so responsive! It has more ‘key’ to it than Lloyd Grossman on Through The Keyhole!
BoM tomorrow when I get the links etc. This is a lovely key and I think will be a top use of those microswitches in tribute to the late G4RQJ (SK) in my very humble opinion.
…and now she has just activated a park. Worked virtually flawlessly. A little sketchy occasionally so probably wants a tiny adjustment on the pivot but otherwise spot on!
Side note, conditions today are pretty pants. Also there seems to be a CW contest on 20m so it took an age to get the park activated. Had to hop to 17m and also do some QRP SSB. Then the heavens opened so I had to pack up fairly quickly and go QRT.
11 QSO’s (2 were QRP SSB) and that was it. A slog, tough conditions but got it done and the key came through just fine. FB!