Well, July is upon us again and with it the end of the govt.nz contract year. So time for another month off playing SOTA whilst we wait to see who gets awarded the next year of work. Is it really 12 months since I last wrote that?
Parental house-moving (and the associated list of chores for offspring) mandates a trip to Nelson, so another nose around the Richmond Ranges seems appropriate. The recent ‘ex-tropical-storm’ that devastated the region has wiped all signs of snow off the ranges, and left them clean and crisp for some winter tops tramping
(yes - damaging tropical storms, especially reaching 40+ degrees south should not happen mid-winter. Changing times …)
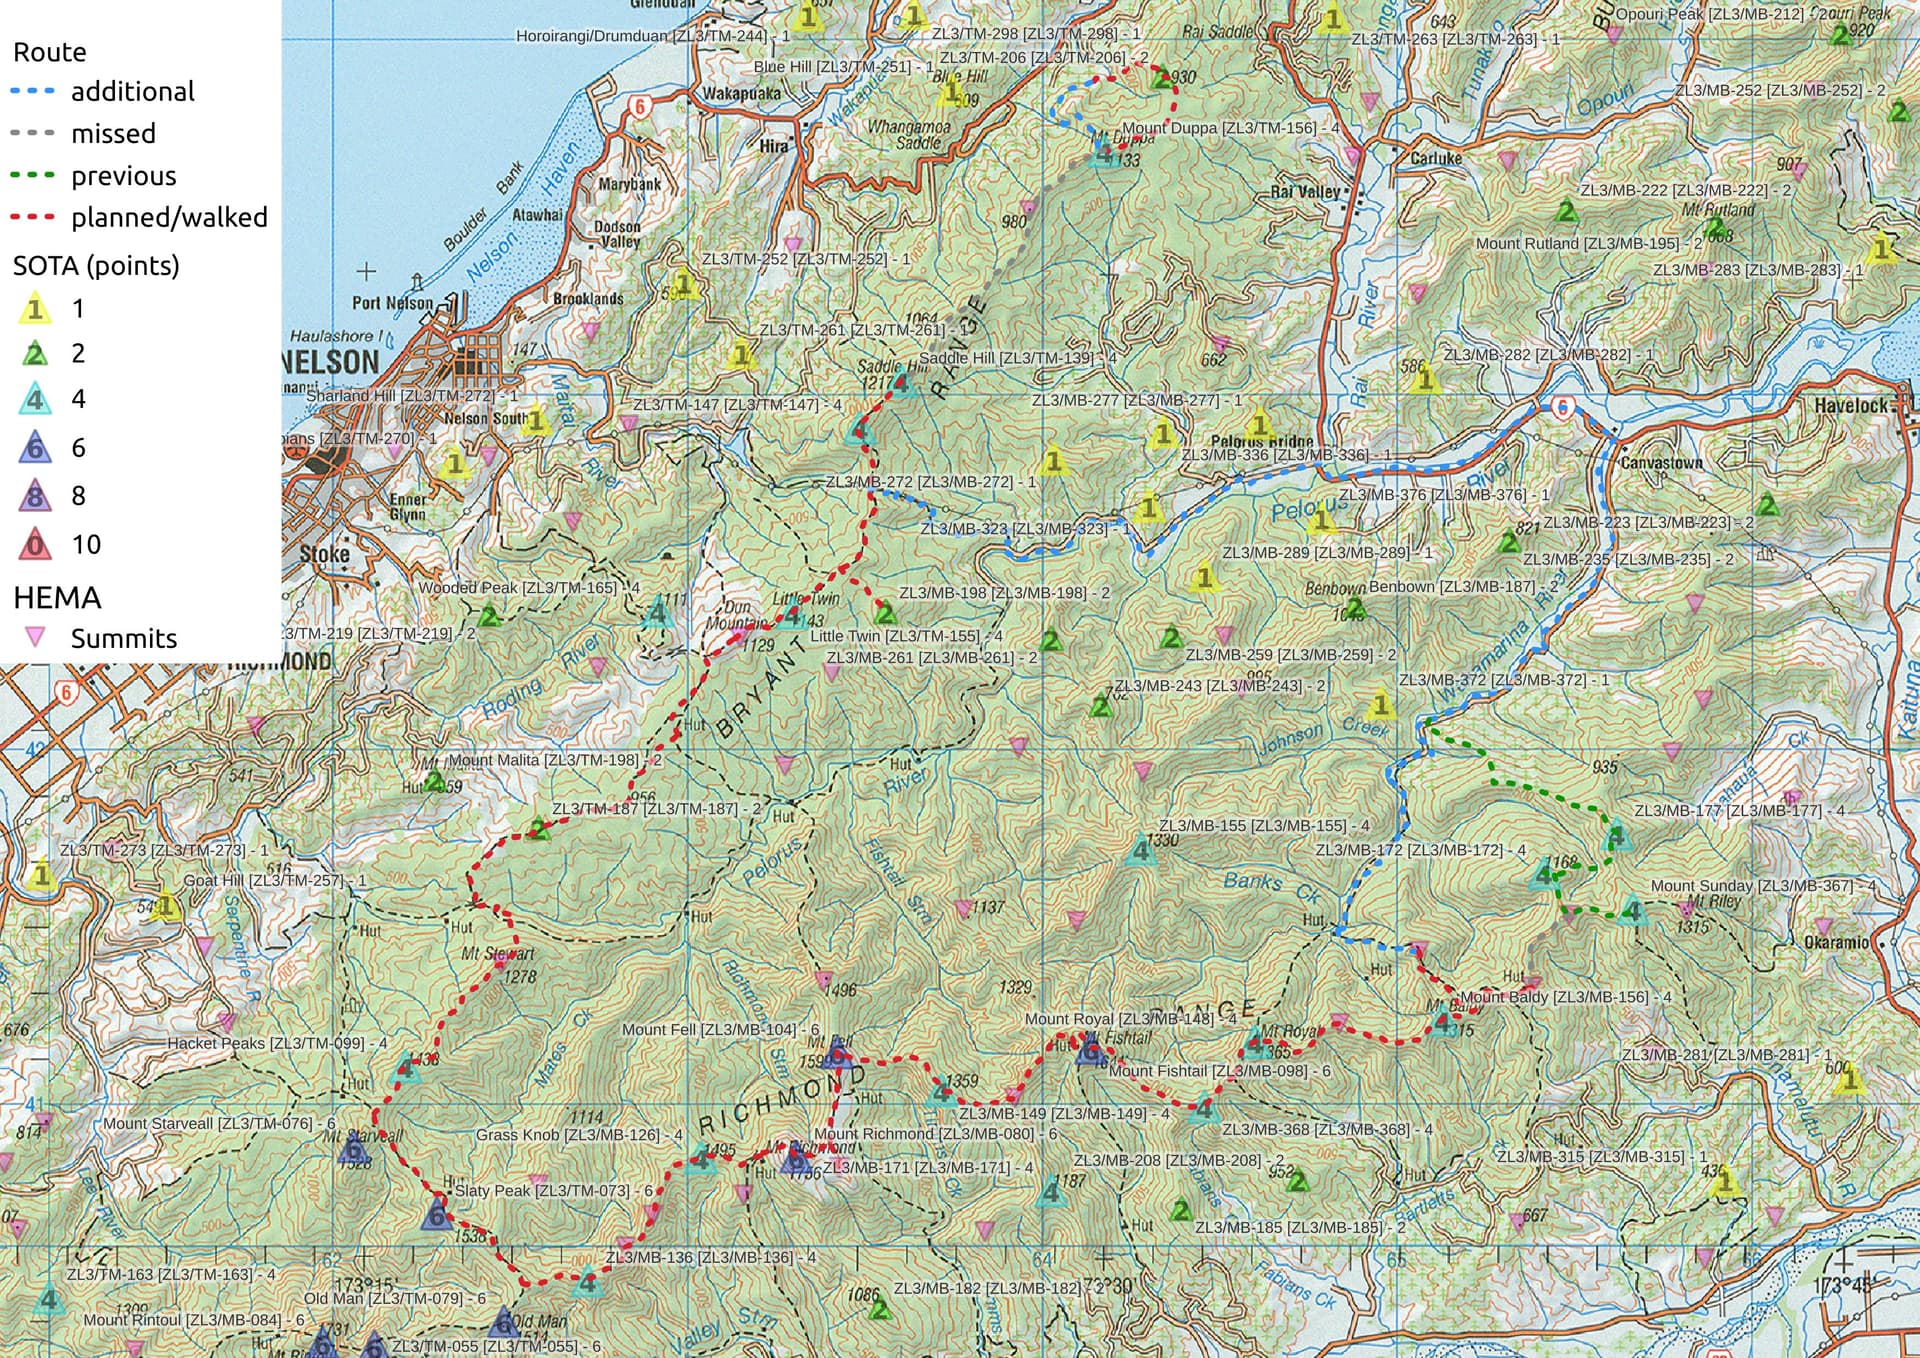
The ridgeline delineating the Pelorus River catchment contains 23 SOTA summits - of which I’ve previously only activated six. These range from 1000m to 1700m, with the bushline this far north sitting around 1300m - making for an interesting mix of open tops, scrub and forested ridgelines. Seven huts, bivs and shelters are unevenly scattered along the route, providing good winter shelter on all but the northern-most section. Even more appealing, only about 30% of the ridgeline is tracked, making this a good, challenging winter tramp.
The plan is to drop the caravan at the southern Wakamarina Valley (Butcher’s Flat) roadend, drive the truck to the Mt Duppa roadend and then cycle the 50km back to the caravan for the night before starting.
Day 0
Things do not go to plan.
A stone through the window from a passing stock-truck on the drive up adds delays and it’s late afternoon, rather than late morning, when I arrive at the Pelorus Tavern, Canvastown, roughly in the centre of the planned loop.
A quick recce shows that fords up the Wakamarina Road have been scoured out by the recent storm and are not caravan friendly.
So, carefully laid plans get discarded in favour of last-minute improvisation. I leave the caravan in the Pelorus Tavern’s rear carpark; drop the truck at the start of the 4WD Maungatapu Road; cycle the 25km back to the tavern in the last of the day’s light. I’ve added a 14km road walk the next morning up the Wakamarina, and the truck is now a day short of the planned end-point. But at least there’s a good pub feed to be had, and we can get out of the truck and start walking something in the morning!
Day 1
A 7am start from the tavern sees us heading up the Wakamarina Valley road, torch in hand. The valley is littered with old mining remains - this was a major gold-mining area - but we press on rather than linger and investigate, reaching the Butchers Flat roadend at a respectable 9;30am. An easy walk follows for a further 7km through forest, still recovering from century-old logging / mining days, along old benched miners’ pack-tracks above the upper Wakamarina River. Devils Creek Hut, at the last major forks, provides a pleasant shelter for lunch as the sun labours to melt the morning frost off the grassy clearing outside. Bagging Devils Creek leaves me just 2 huts left in the Richmond Ranges to visit - another key driver for the trip!
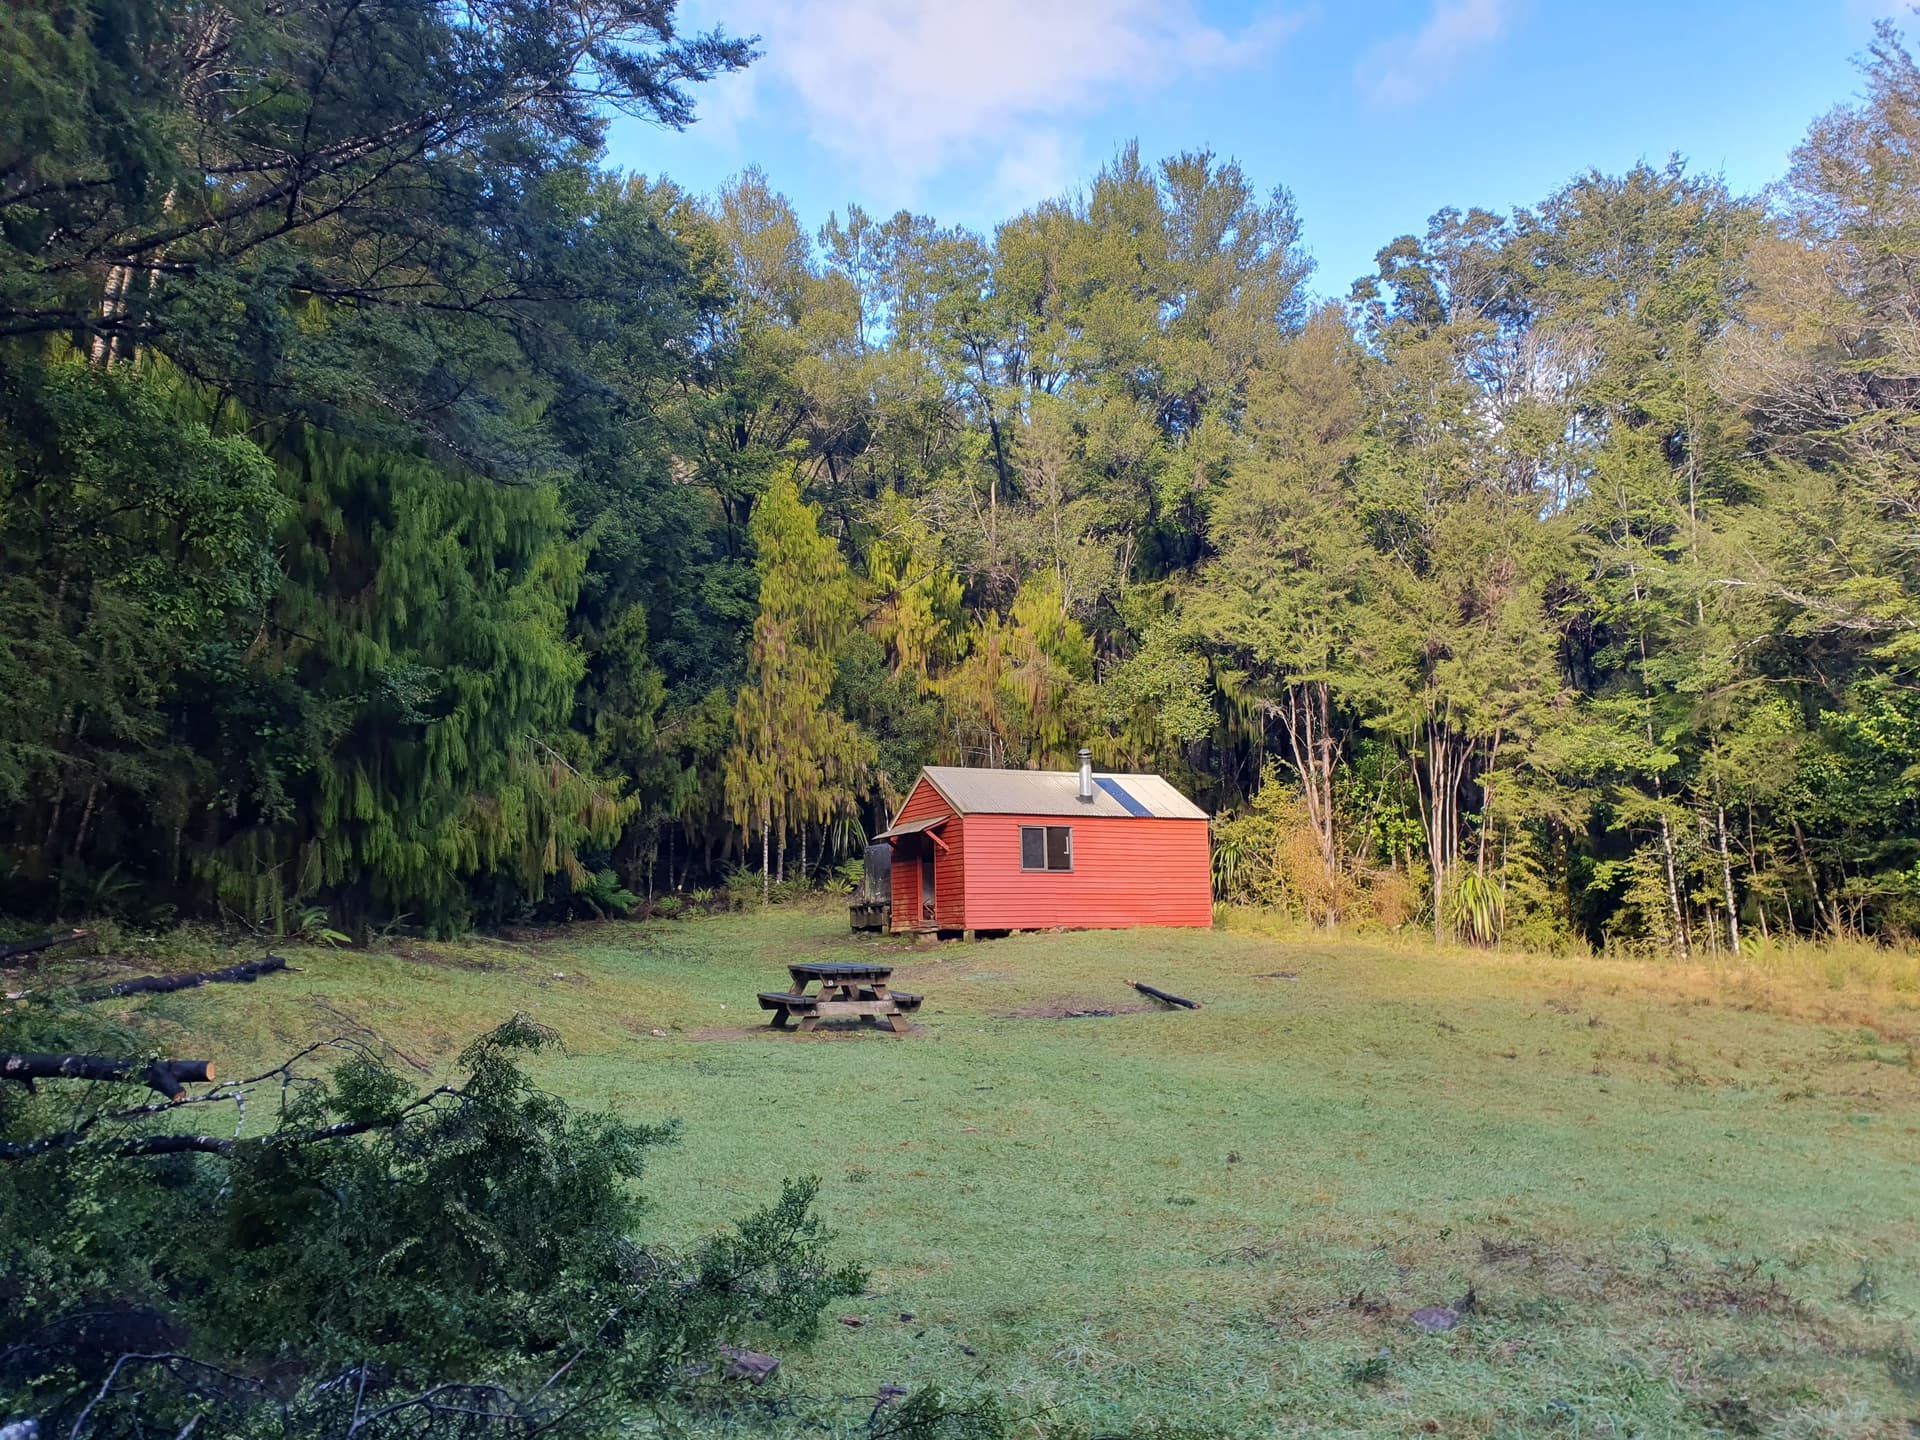
Devils Creek Hut - ZLH/MB-013
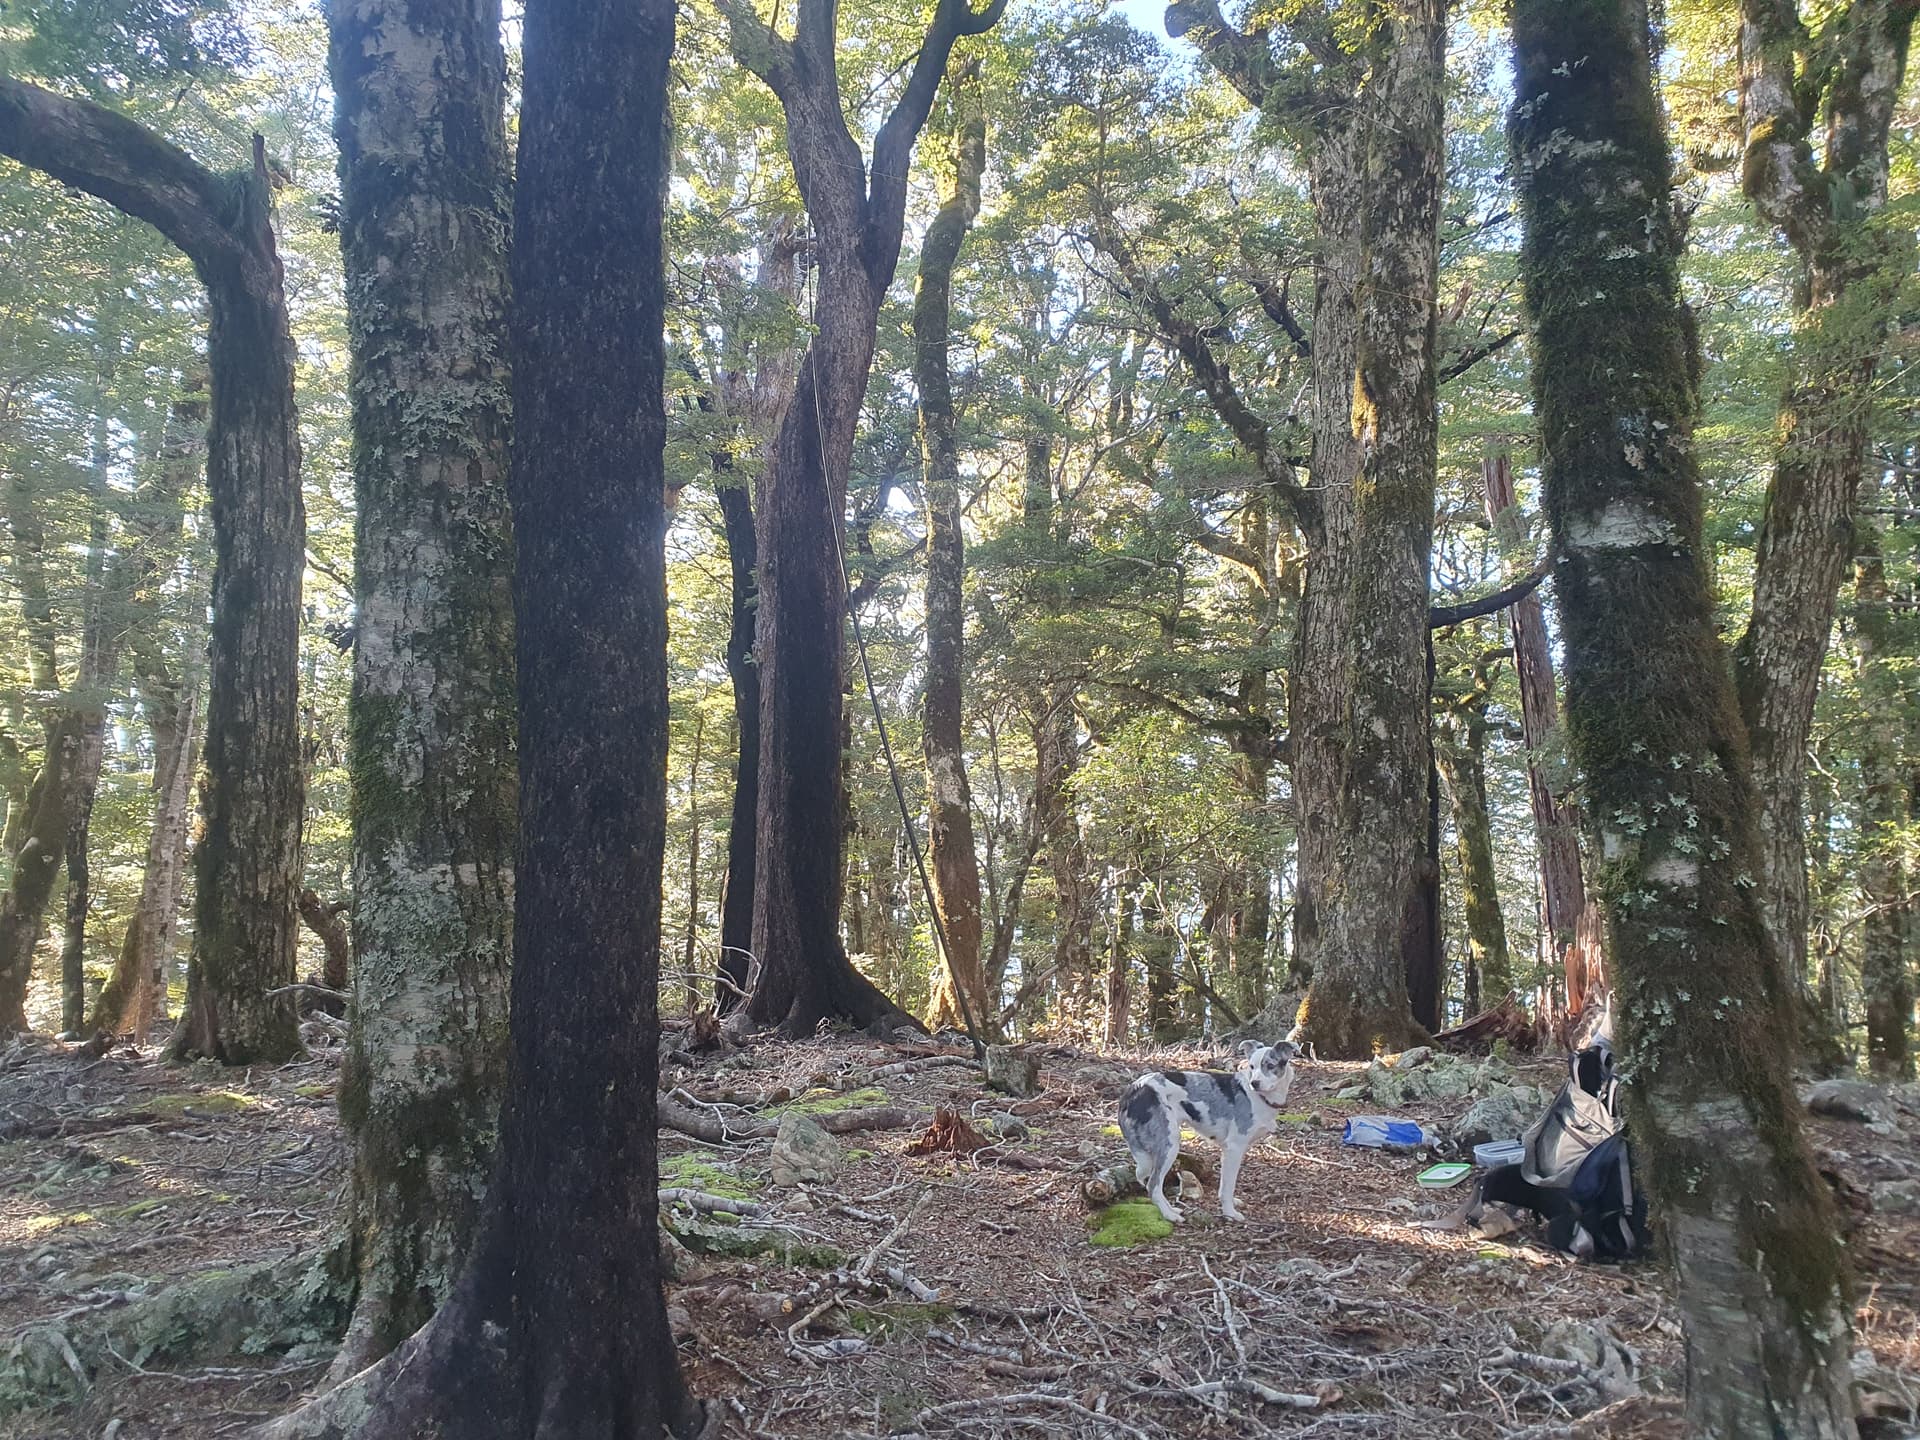
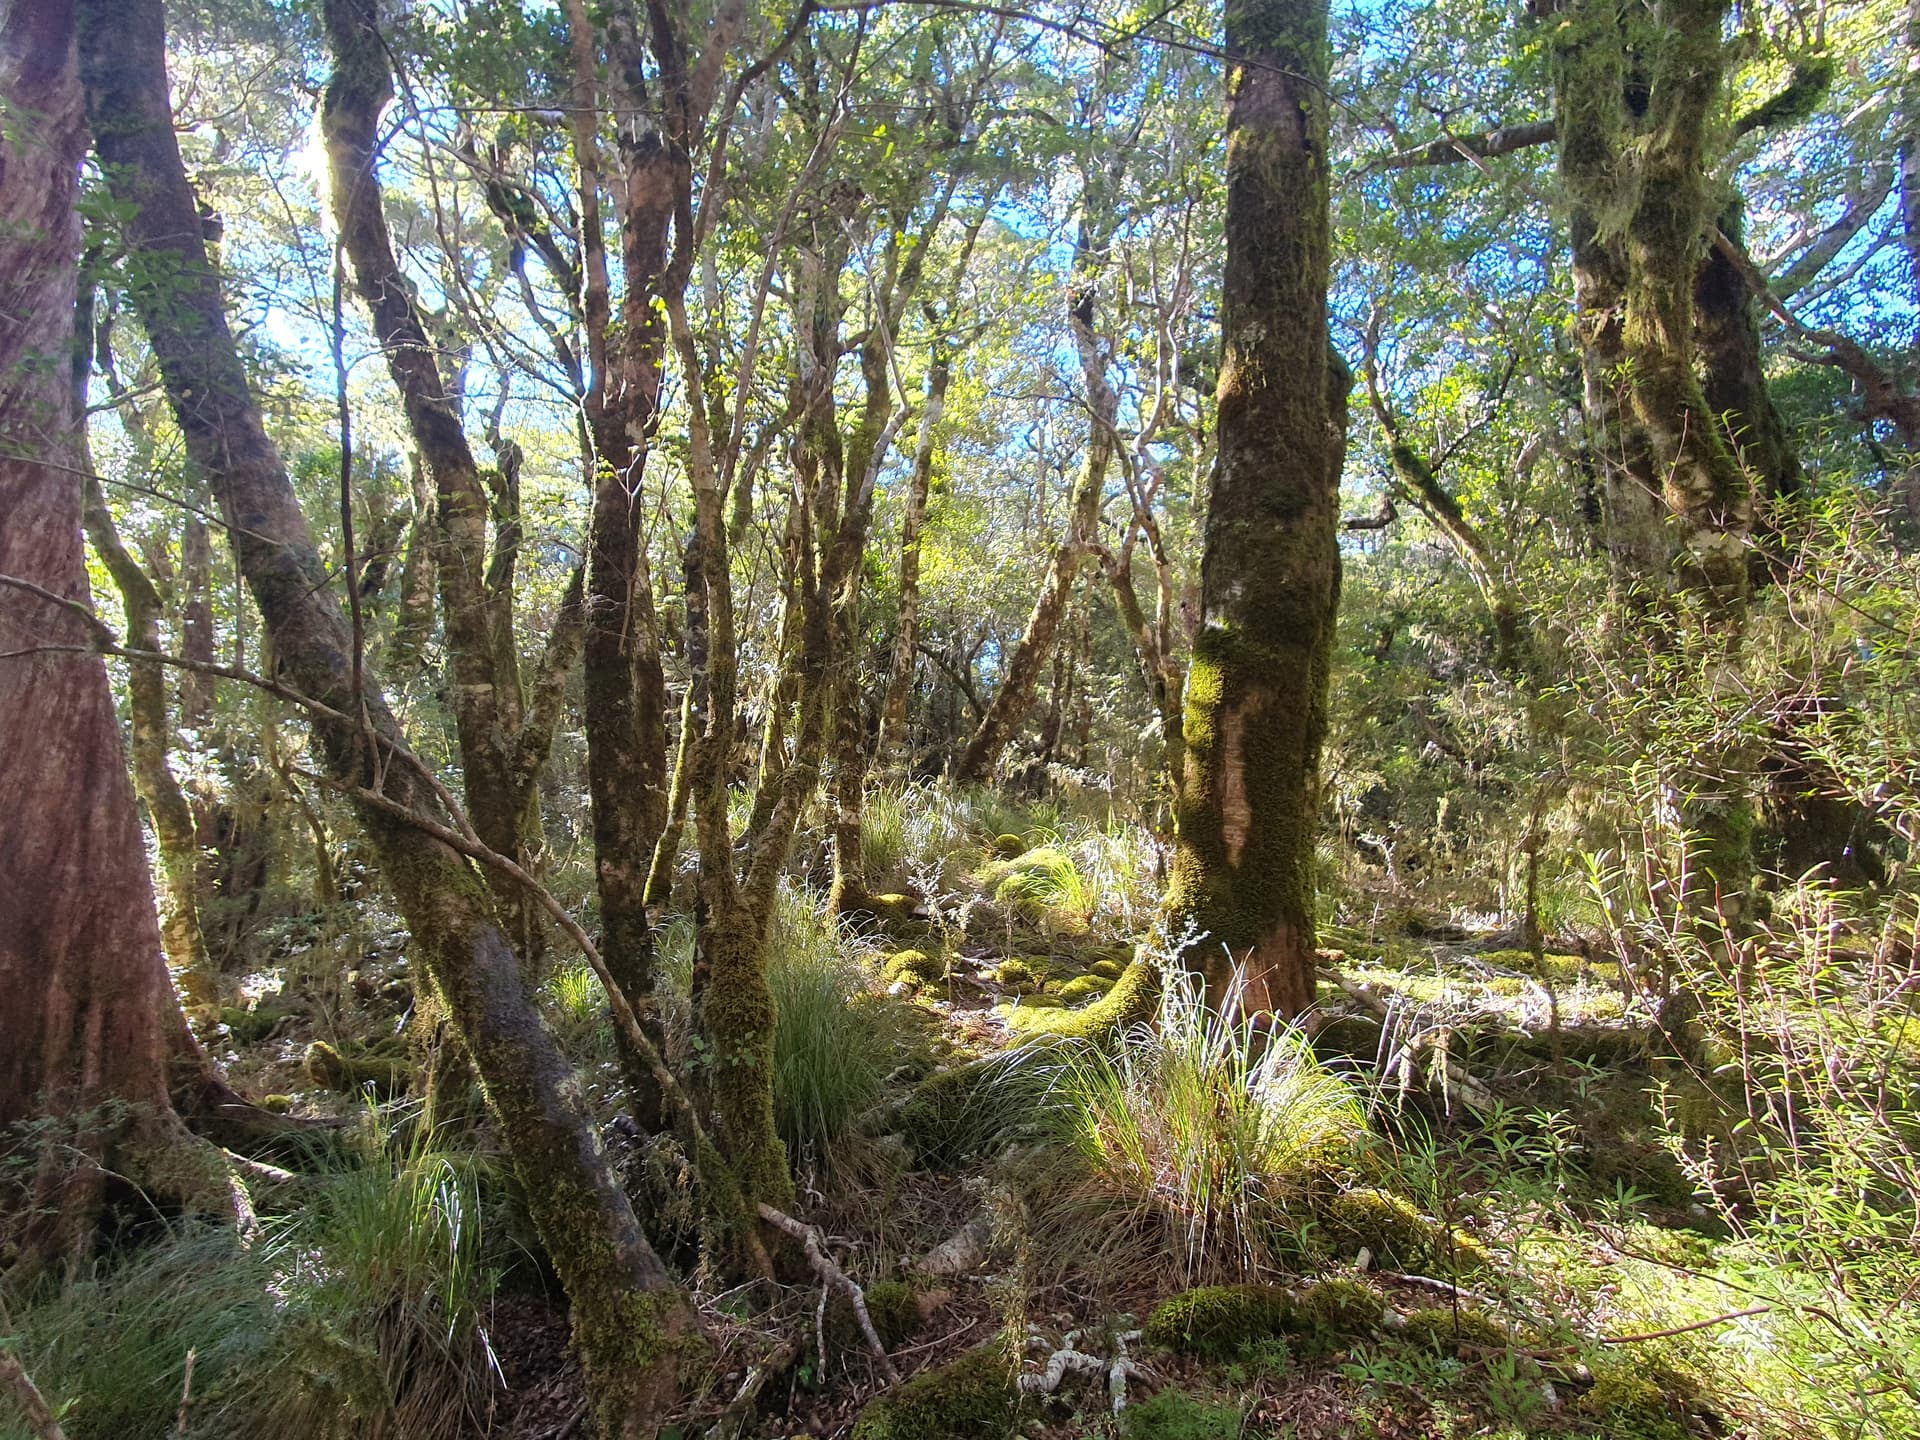
We’ve gained just 200m in the 22km route-march from the sea-level Pelorus Tavern, but now the ascent starts in earnest and the pace drops off. The first 1066m summit of the trip lies just 2.5km from the hut. The pack contains 7 days provisions for both of us, plus 3 days emergency supplies, full winter gear including tent, ice-axe and crampons, and the usual SOTA bumph. Thankfully we have a track to follow for the ascent, and the beech forest is open and good going. We reach our first summit - the unnamed HEMA hump ZL3/HMB-144 - at 1:45pm with 25km and 1060 vertical meters under our belts (collars). Not too bad going.
The mossy beech forest of the summit is open and makes antenna deployment simple - though there are only so many photos you can take of masts in trees. The 40m band is working well within ZL, though 20m fails to bring in anything further afield. Still, 15 contacts in the log for a ZL HEMA summit is good going and a great start to the trip.
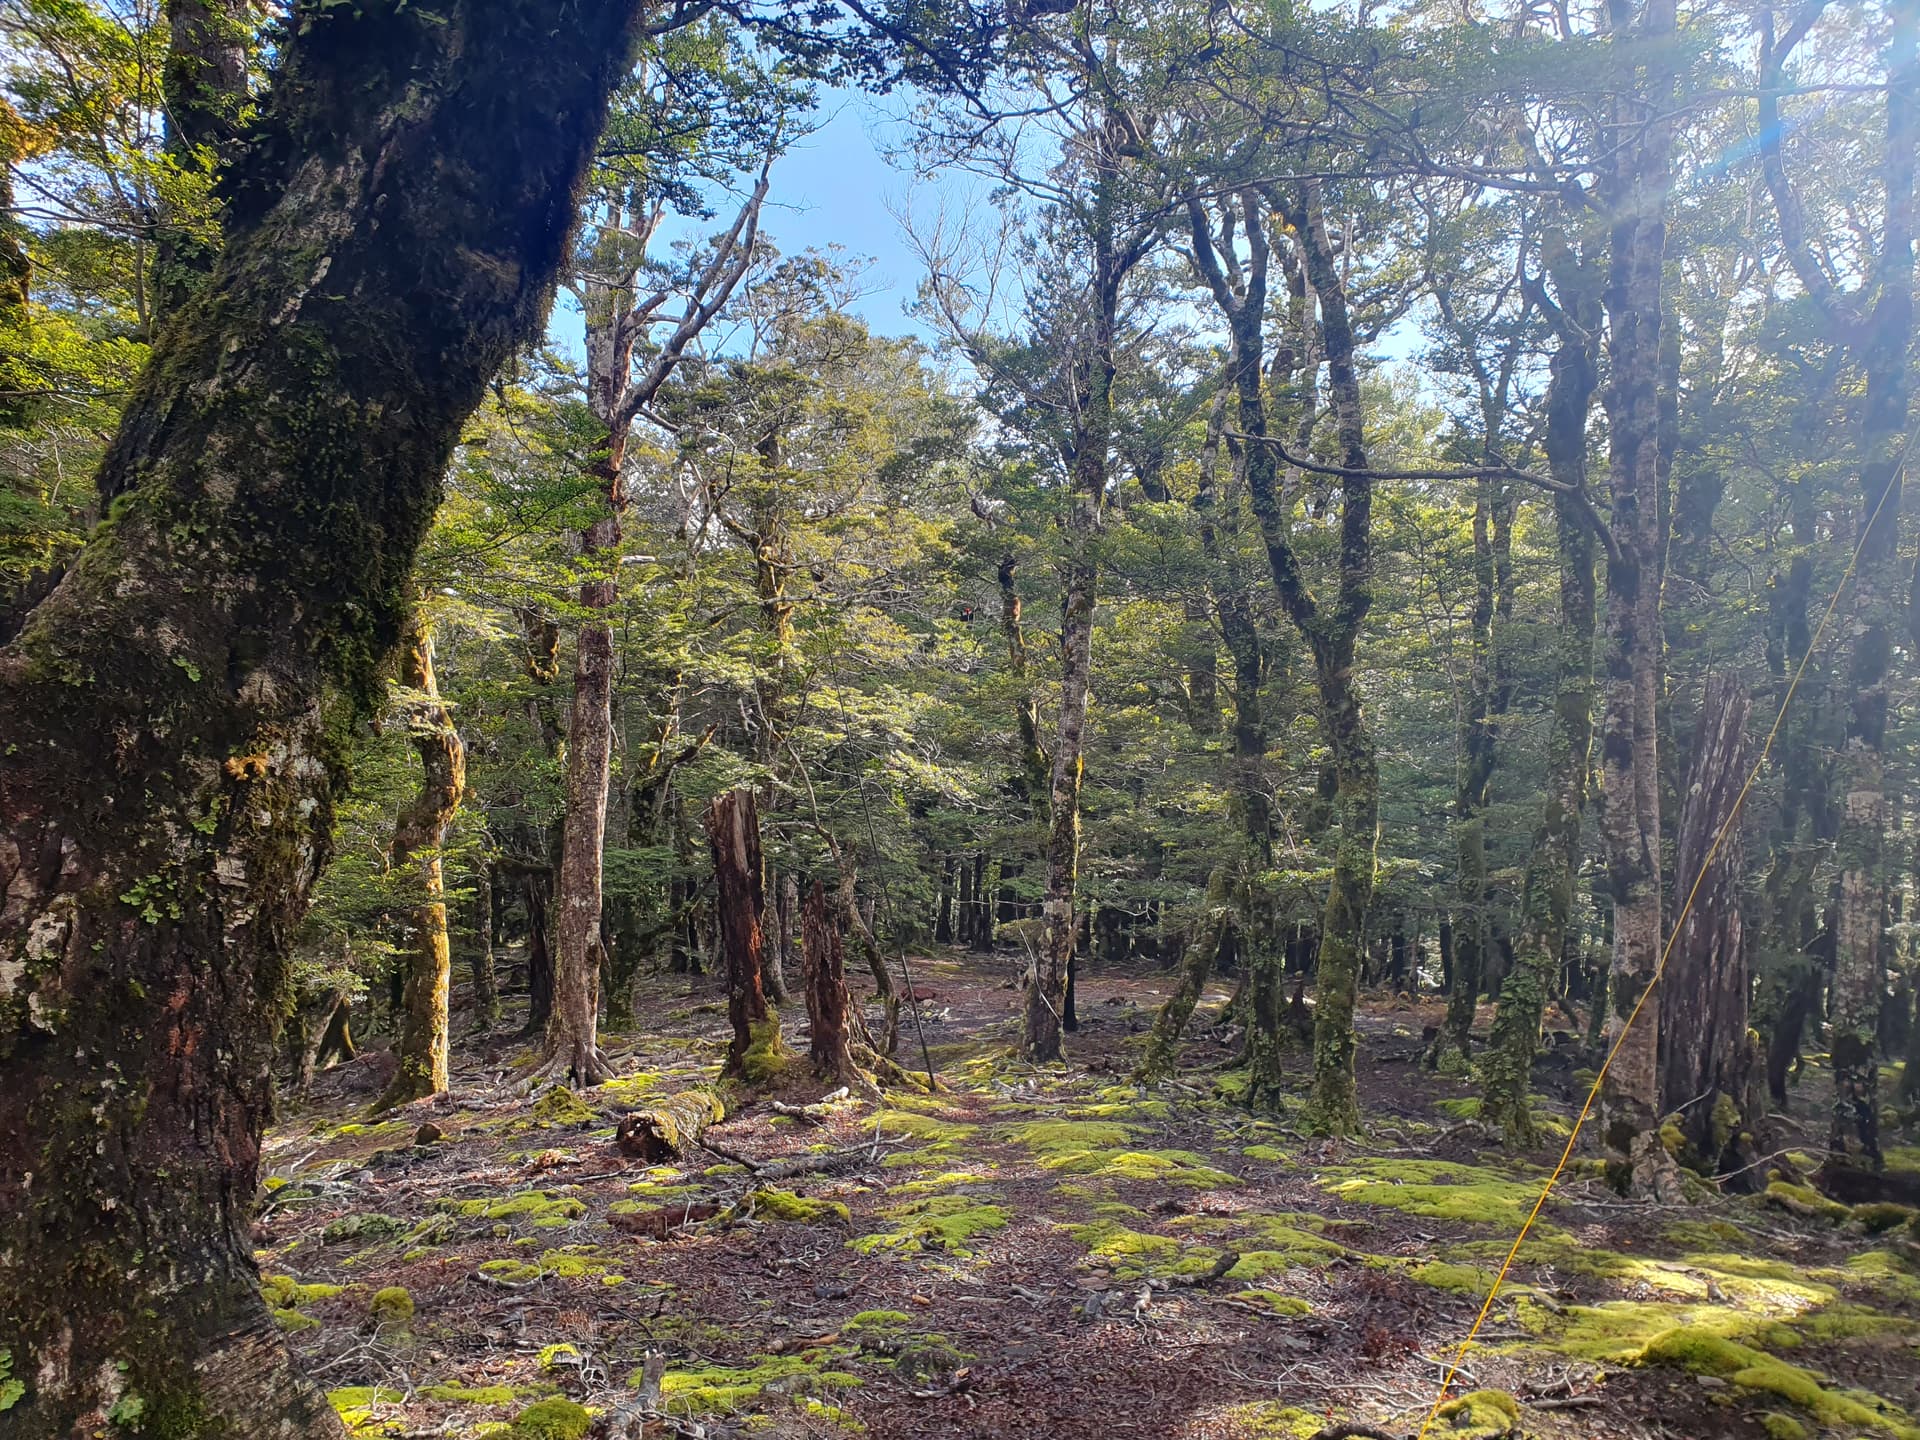
ZL3/HMB-144
From the summit, the track to Fosters Clearing needlessly discards 300m to sidle the face directly to the hut. I contemplate looping instead along the untracked ridgeline - but there will be time enough for off-track walking later, and so grudgingly make the descent, sidle and re-ascent to the hut hut at 1130m on the main bush-clad ridgeline.
The second HEMA summit of the day, ZL3/HMB-128 is named after Fosters Hut [ZLH/MB-016], but in actuality the hut lies 5m below the AZ for the 1160m peak. Thankfully the huts-on-the-air rules allow activations from within 100m of the hut, and we are able to find a spot within the AZ for both and combine the activation - but a more generous deity would have arranged the landscape such that we could have activated the summit from the comforts of the hut. The evening grey-line brings in a good number of local contacts on 40m and mix of VKs and scattered DX on 20m, including the indefatigable F5PYI and KG5CIK and the Ukrainian call UY7VV.
Fosters (Clearing) Hut - [ZLH/MB-016]
Fosters Clearing provides stunning views down to the sounds and east to the Kaikoura Ranges, with ZL3/MB-001 prominent on the skyline. There’s a good stock of dry firewood in the hut, and abundant options to replenish it on the surrounding forest floor - so soon the pot-belly is roaring, the billy boiling and we settle in for a warm pleasant night.
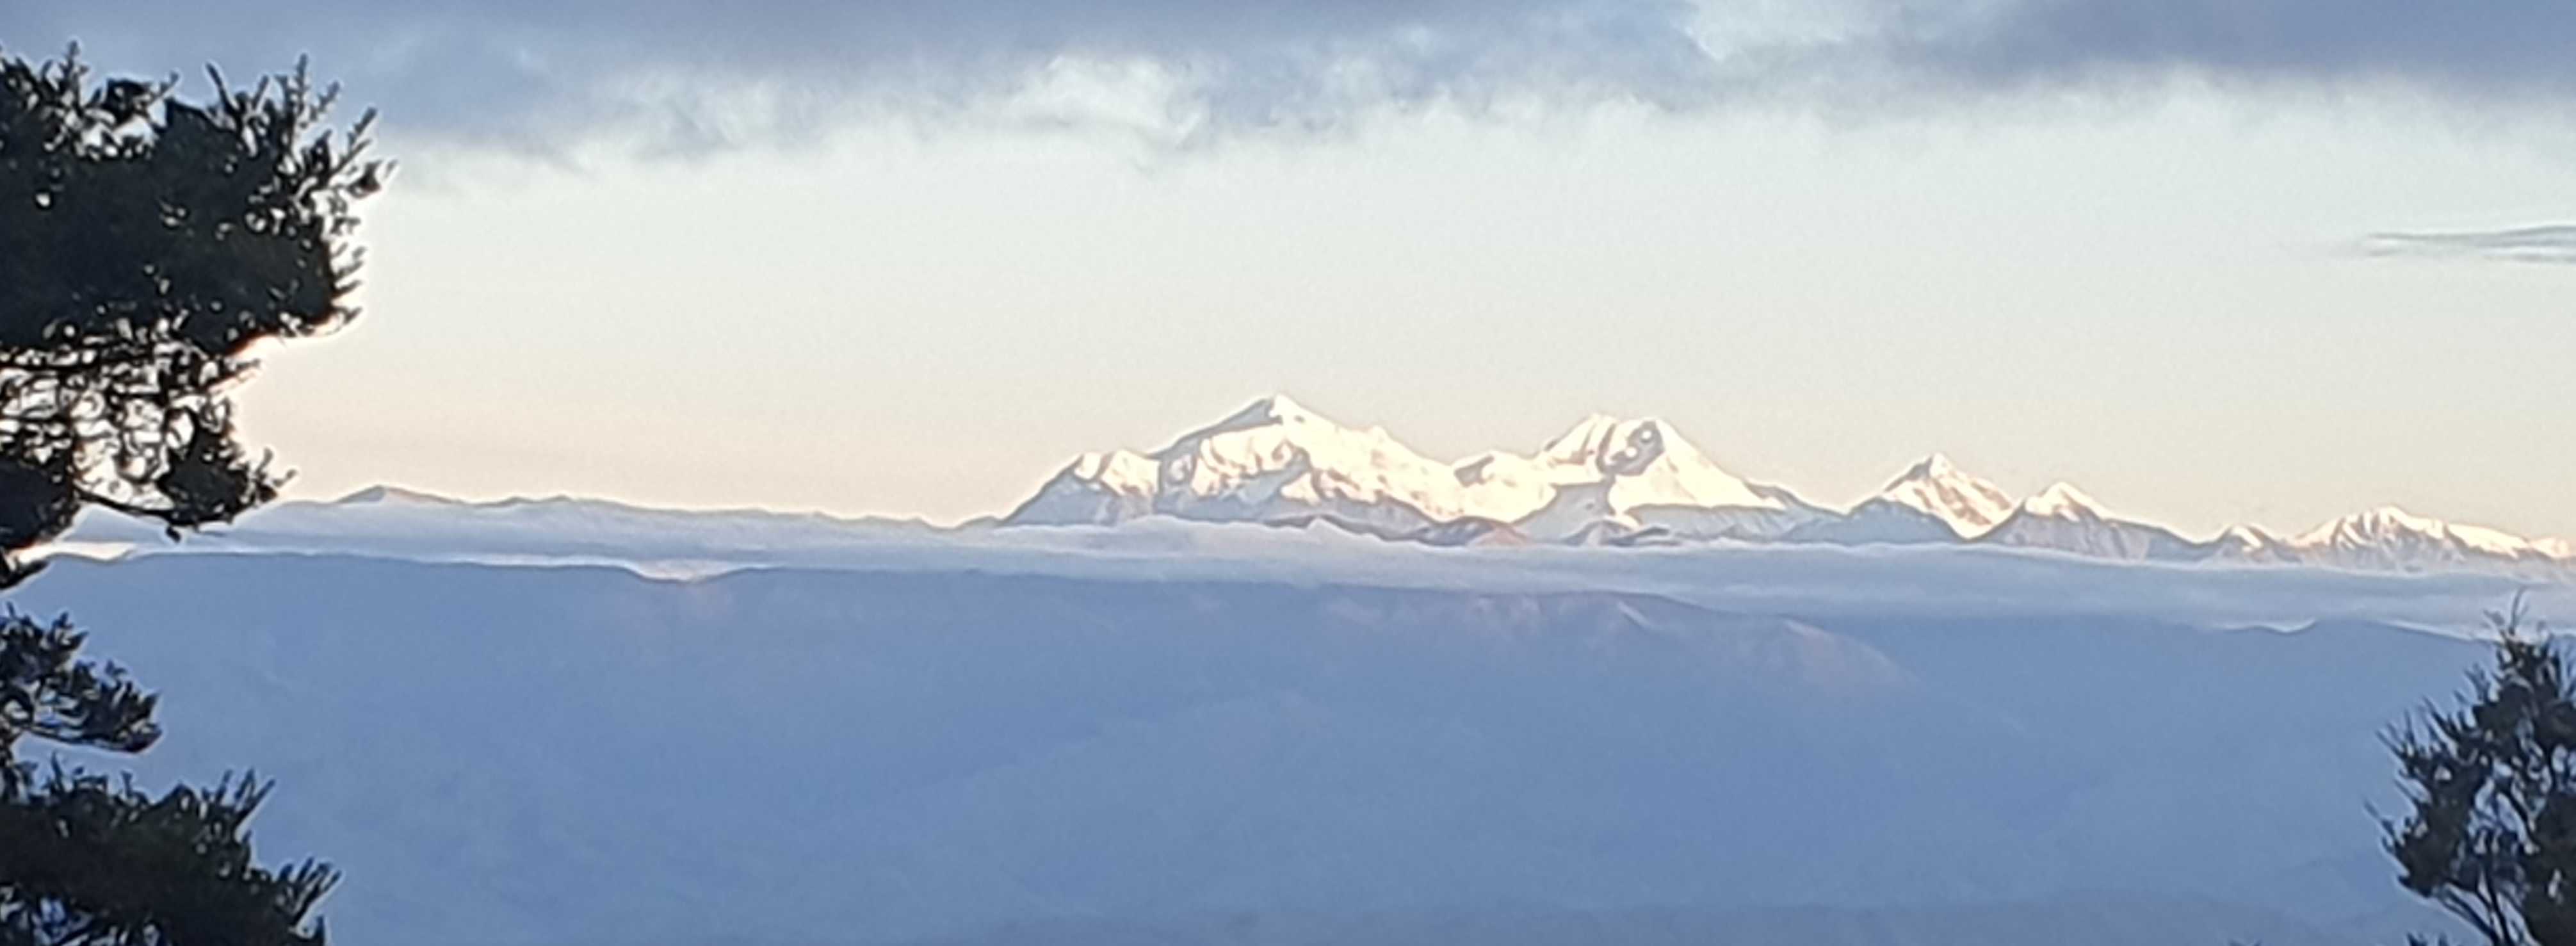
ZL3/MB-001 - Tapuae O Uenuku - from Fosters Clearing.
Distance: 29km
Elevation gain: 1360m
HEMA: 2 summits, 37 QSOs
SOTA: nil
ZLOTA: Fosters Clearing Hut, 21 QSOs
DX: F5PYI, KG5CIK, UY7VV
Timings: 7am - 4:30pm
Day 2
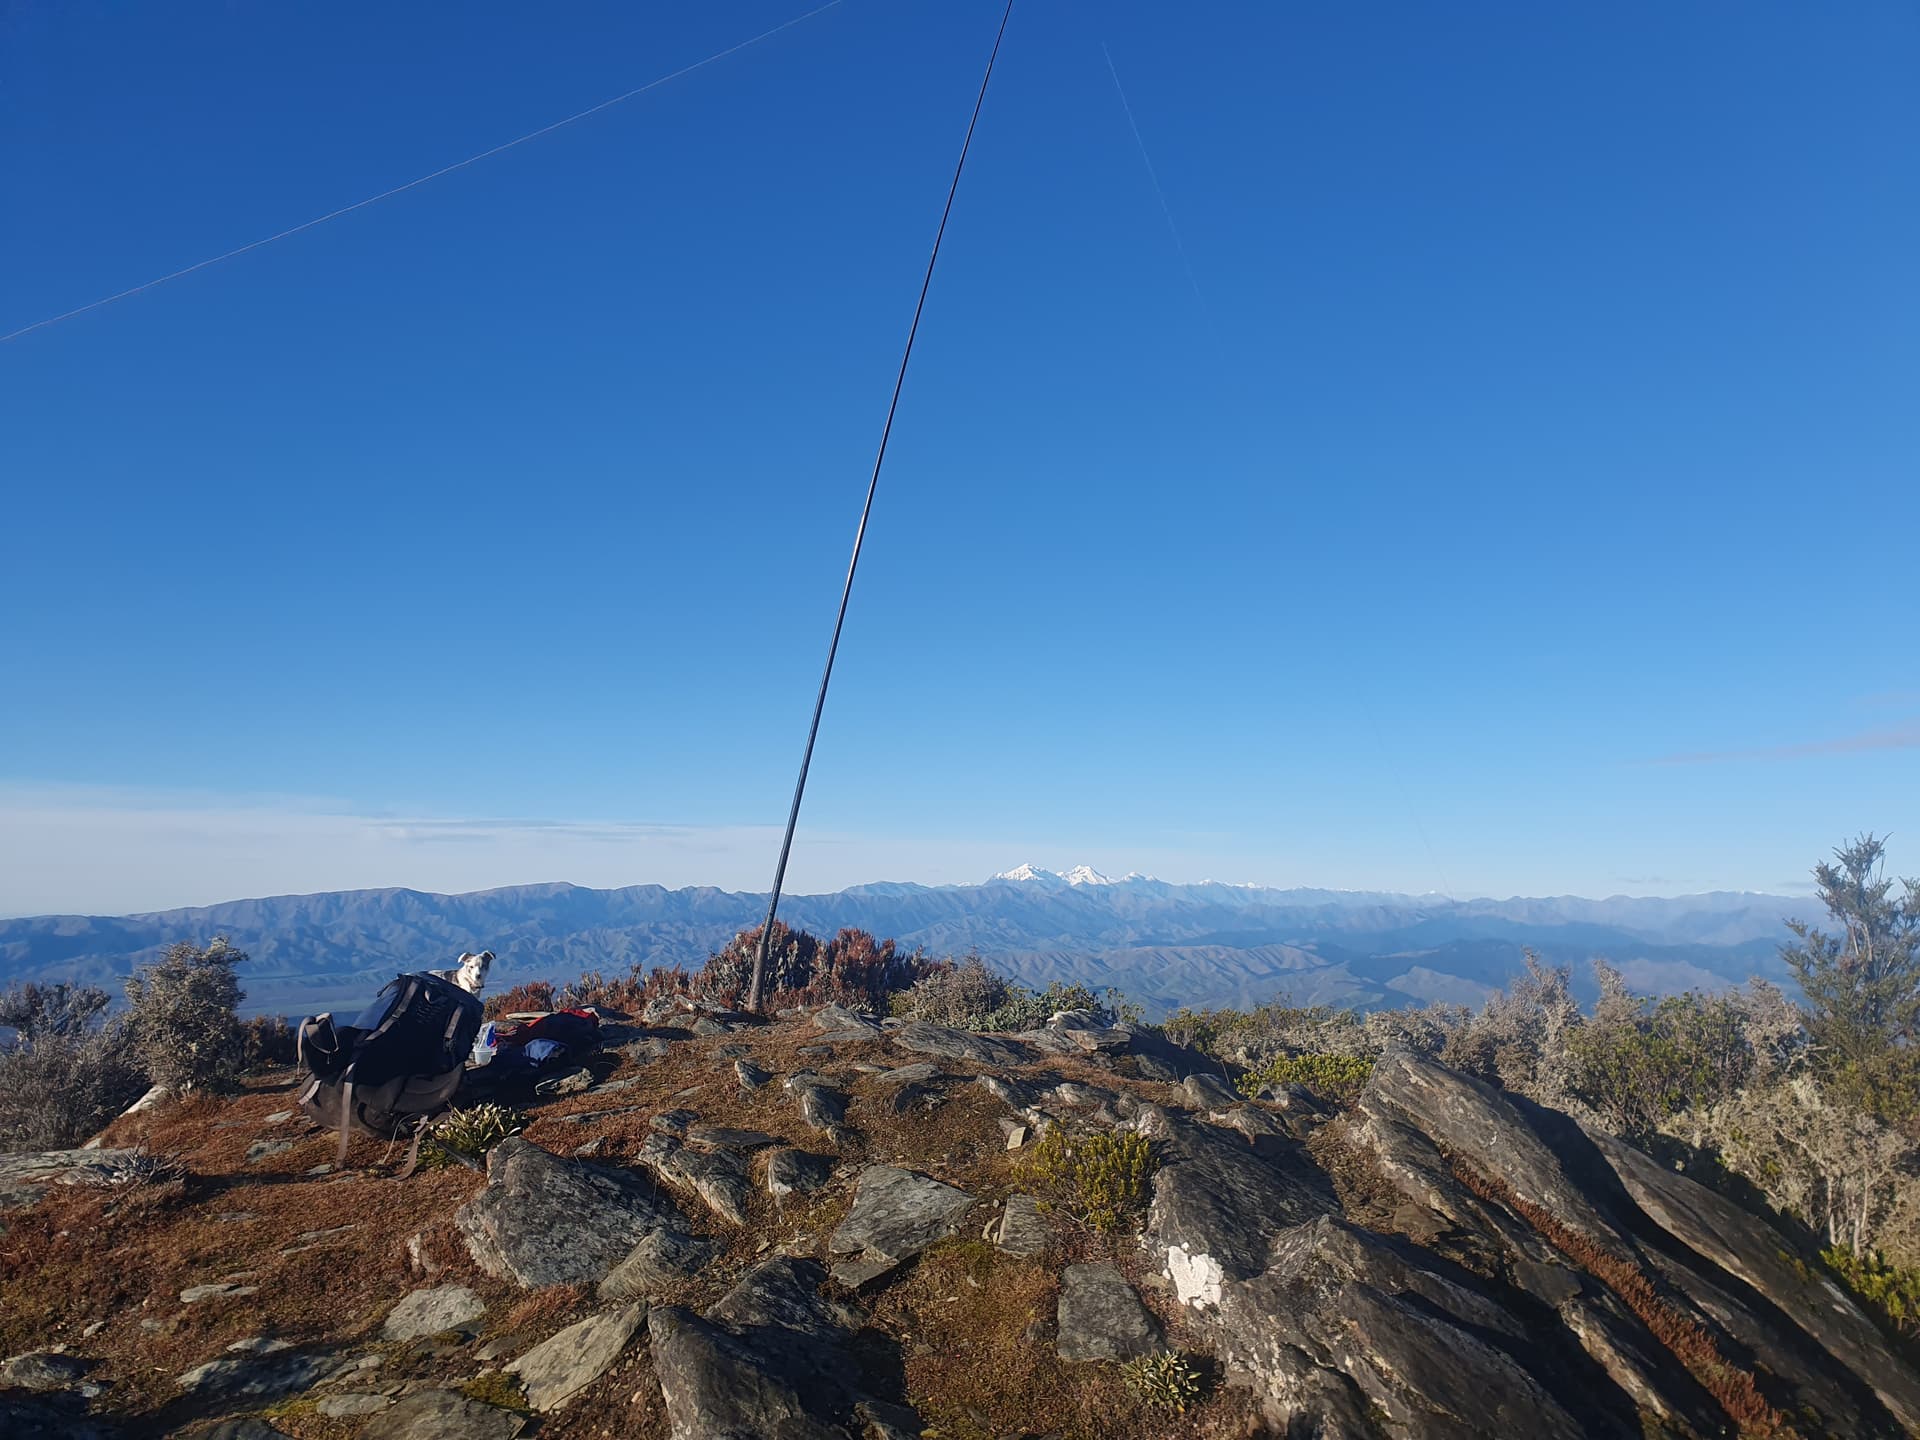
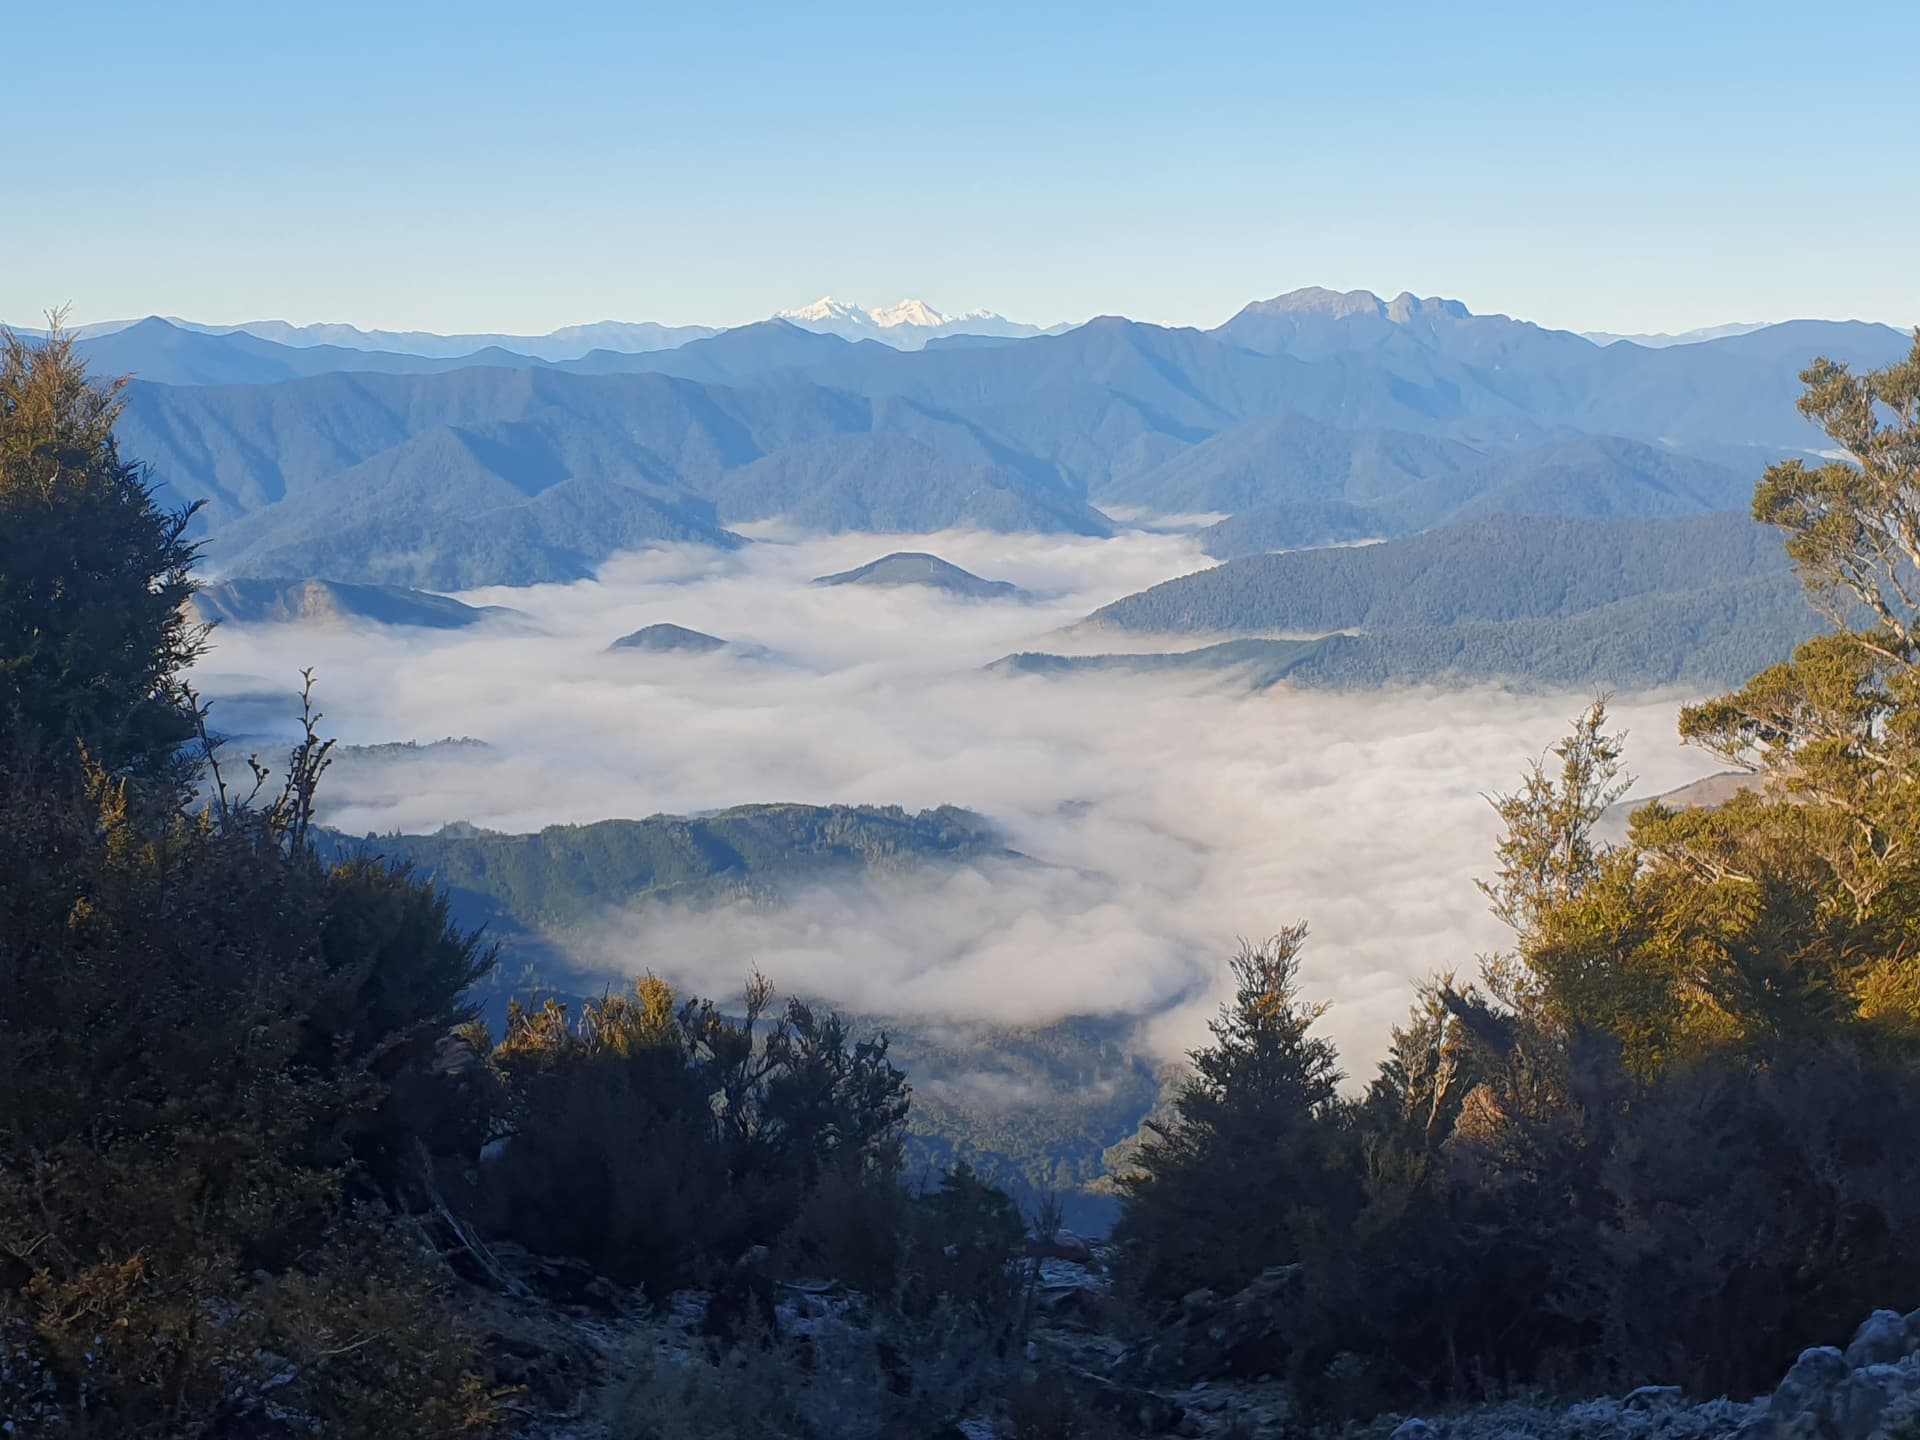
A warm breeze keeps off the overnight frost and we awake to clear blue skies more reminiscent of 5am on a summer morning than 8am mid-winter. Cloud fills the sounds below us, but up here on the roof of the world, all is perfect.

Marlborough Sounds from Mt Baldy
Whilst several tracks cross the main ridgeline south of the Pelorus valley, none follow it and so we leave behind the luxury of easy kilometers of turn-off-the-brain and follow-the-markers travel and start the off-track tramp for real.
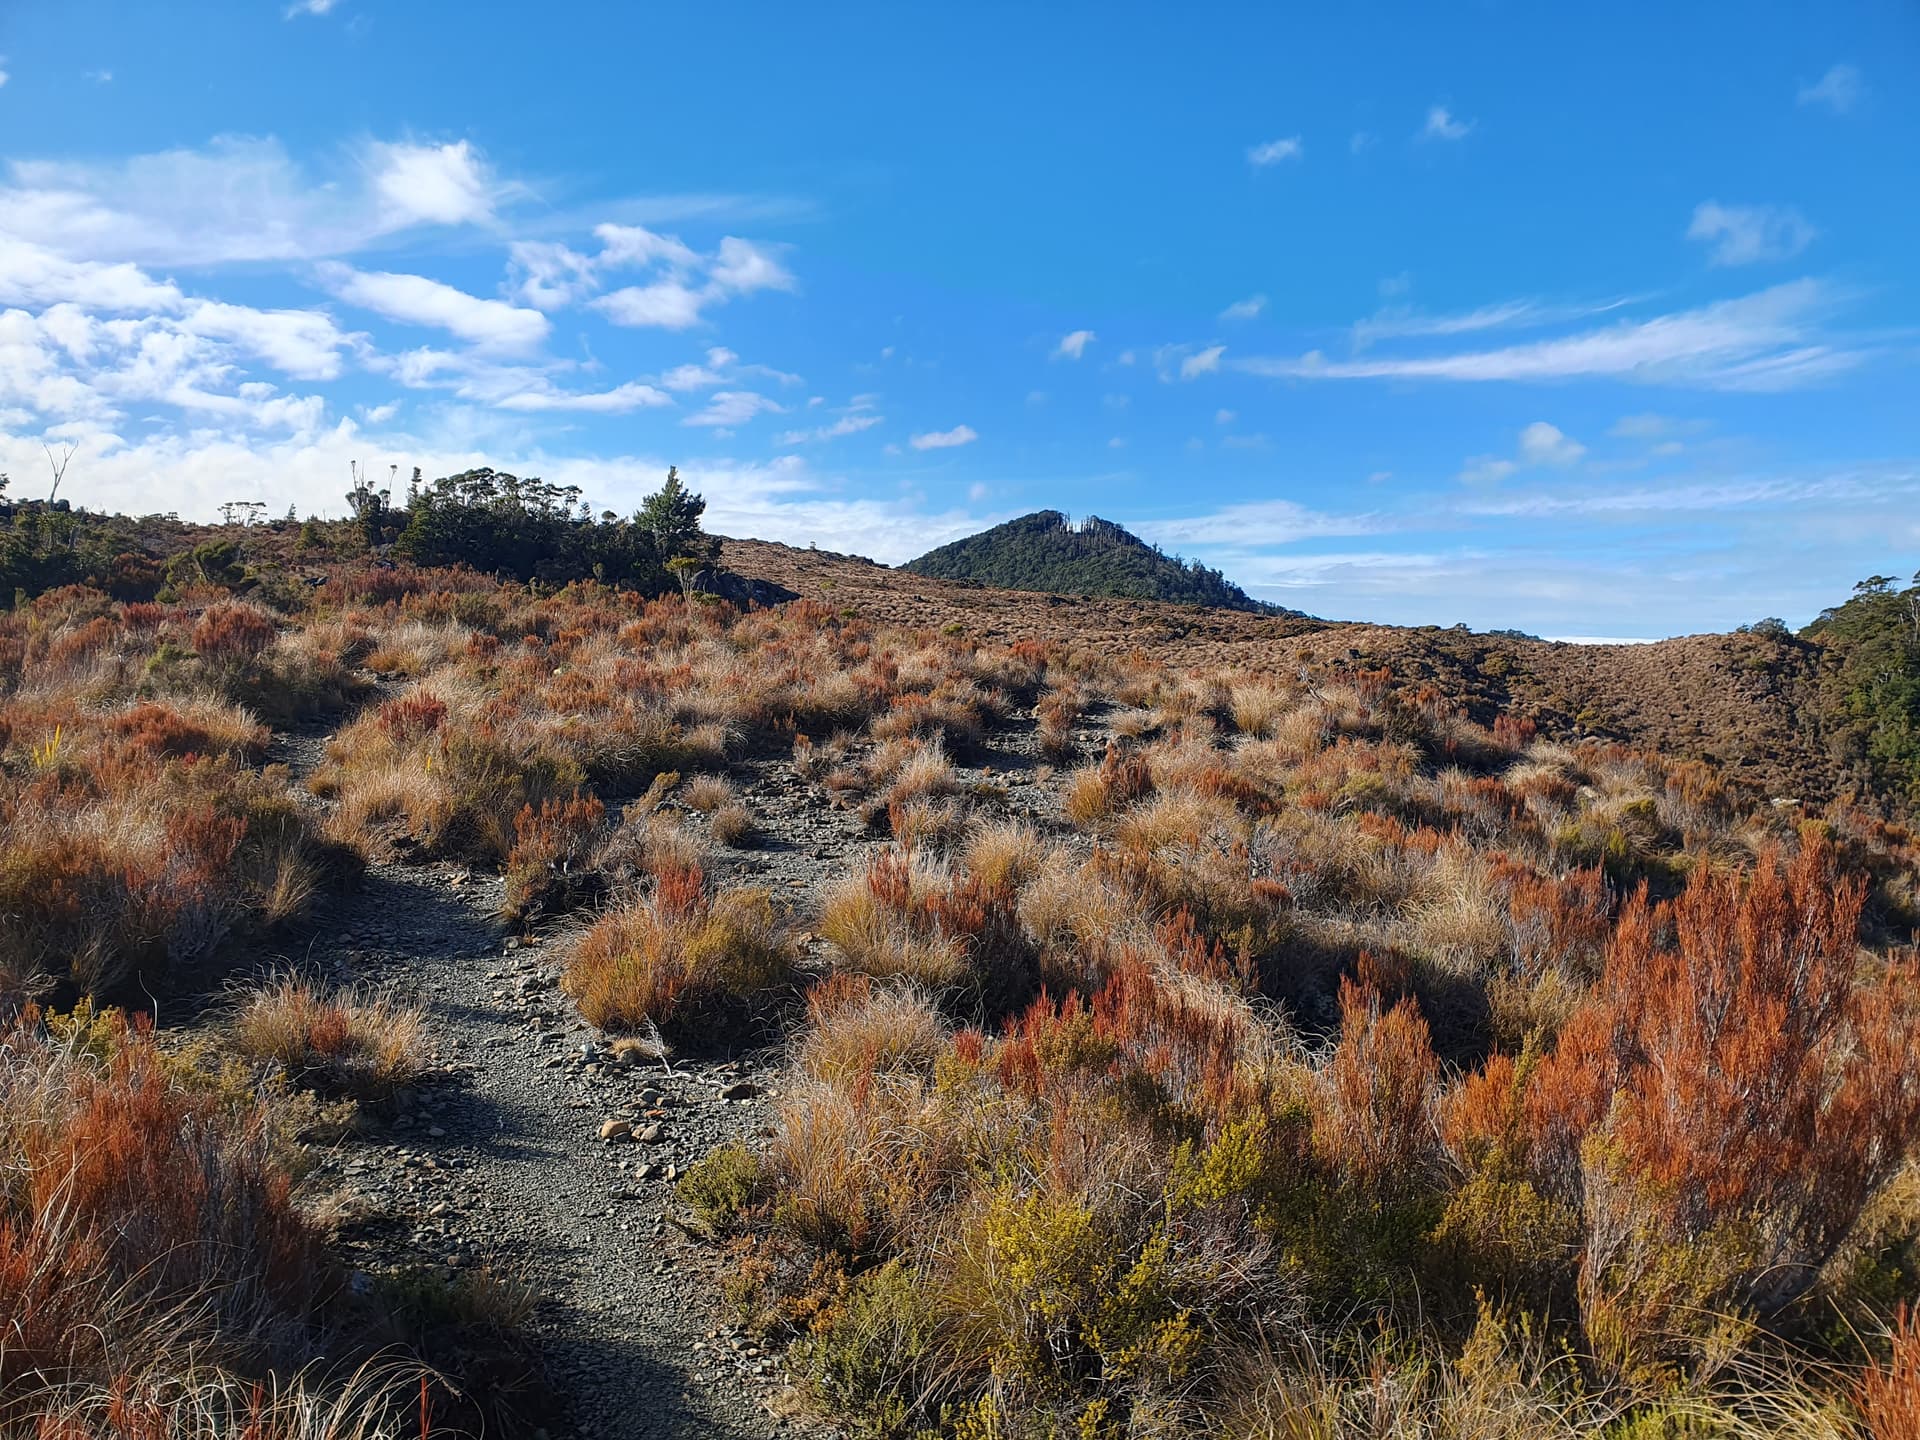
That said, Mt Baldy is well-visited, and a well travelled ground-trail leads west through the mature forest of the ridgeline from Fosters Clearing to emerge onto open tops on the first SOTA summit of the day - the aptly named Mt Baldy [ZL3/MB-156]. Conditions on 40m are excellent, with 59 reports from the length of ZL. The hour still being early for or VK neighbours I opt to move on rather than pause and try higher bands.
Mt Baldy - ZL3/MB-156
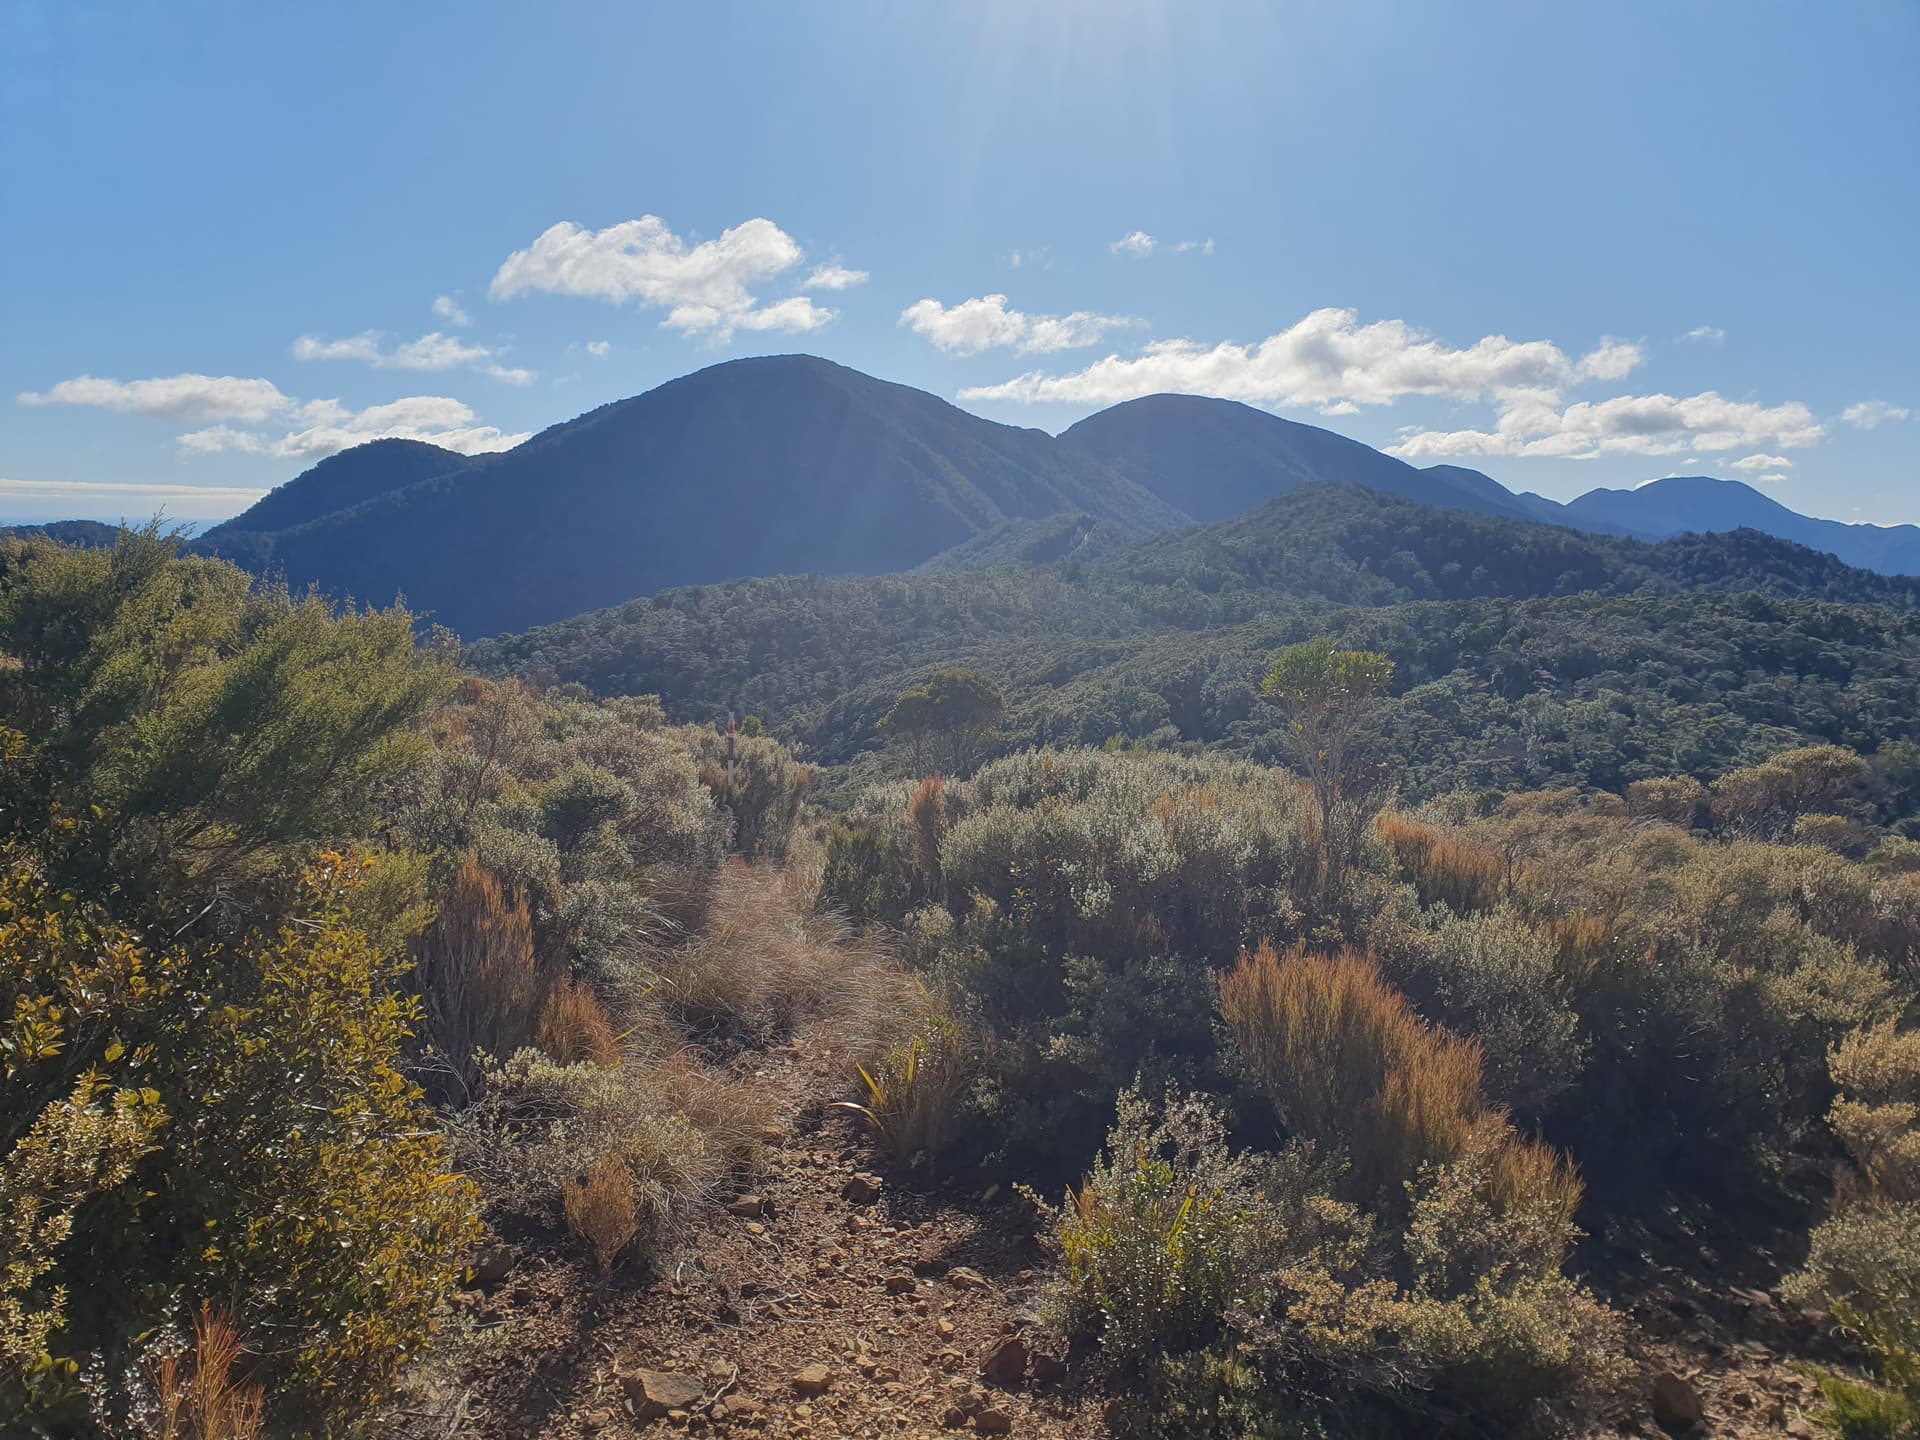
From Baldy the ridgeline drops back into the bush, meandering over a series of low peaks of which only Mt Royal breaks the bushine, before a final evening’s climb to the 1700m Mt Fishtail - the 1st 6-pointer of the trip. The dry porous geology means that water is unavailable on the tops, and our only options for the day are to reach Mt Fishtail Hut, or make a long unnecessary descent into the tight valley-heads below to camp. The well travelled foot-pad is gone, but ephemeral game trails and mostly- open forest provide reasonable travel.

Ridgeline to Mt Fishtail from Baldy
The bushclad HEMA summit ZL3/HMB-140 is the second summit of the day, and I make my usual daytime two-band activation on 40m and 20m for a mix of ZLs and VKs. It is only when I break onto the tops for the third peak, Mt Royal, that I begin to realise that the usual approach is just not going to work. It’s 12:45pm, I’m barely half-way through the distance, have all the most challenging ridgeline sections ahead of me, 3 more summits to activate and only 4.5 hours of daylight remaining.
The give-everyone-a-chance activation strategy: ‘get the best possible antenna deployment, work at least two bands, work each until I’m sure no chasers remain’ gets chucked over the bluff. The newly minted ‘SOTA Sprint’ policy of ‘chuck the antenna up the fastest way available, work a single band for 10 mins max, snack as I activate, tear down, depart’ is enacted and remains in-place for all but the last day of the trip.
The handle this end is George. We’ve had a low of -3 overnight, but heading for a top of 5 degrees. My operating conditions are …, interested to know what you’re running that end …'. Aaargh!
Mt Royal - ZL3/MB-148
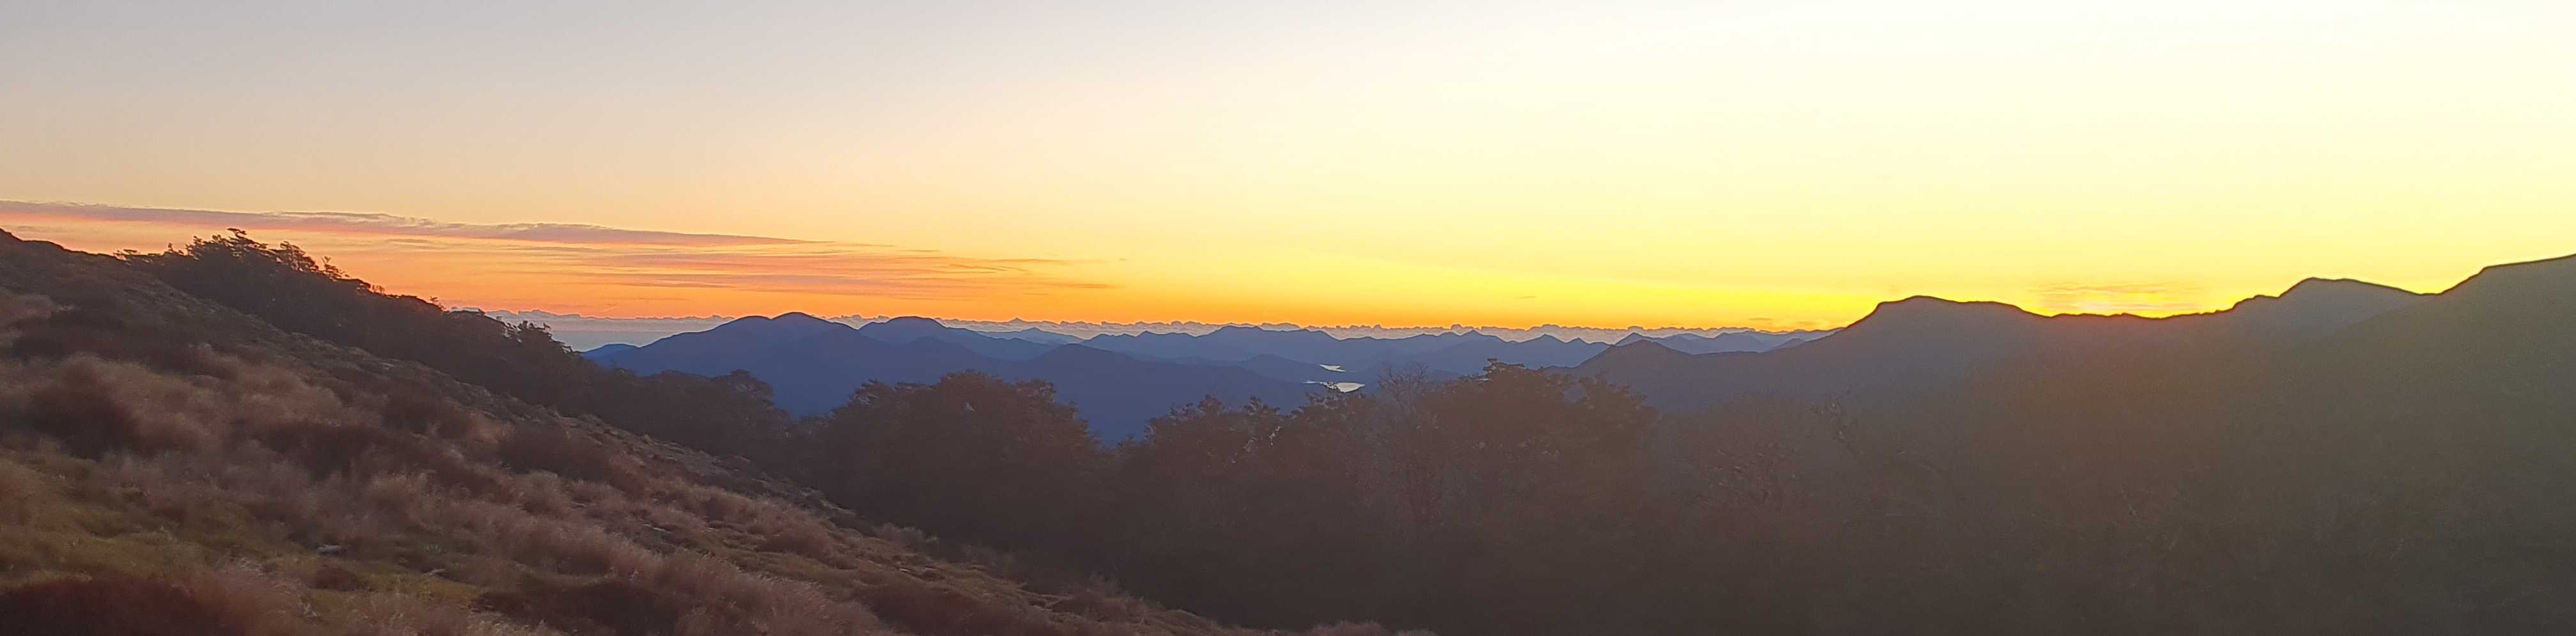
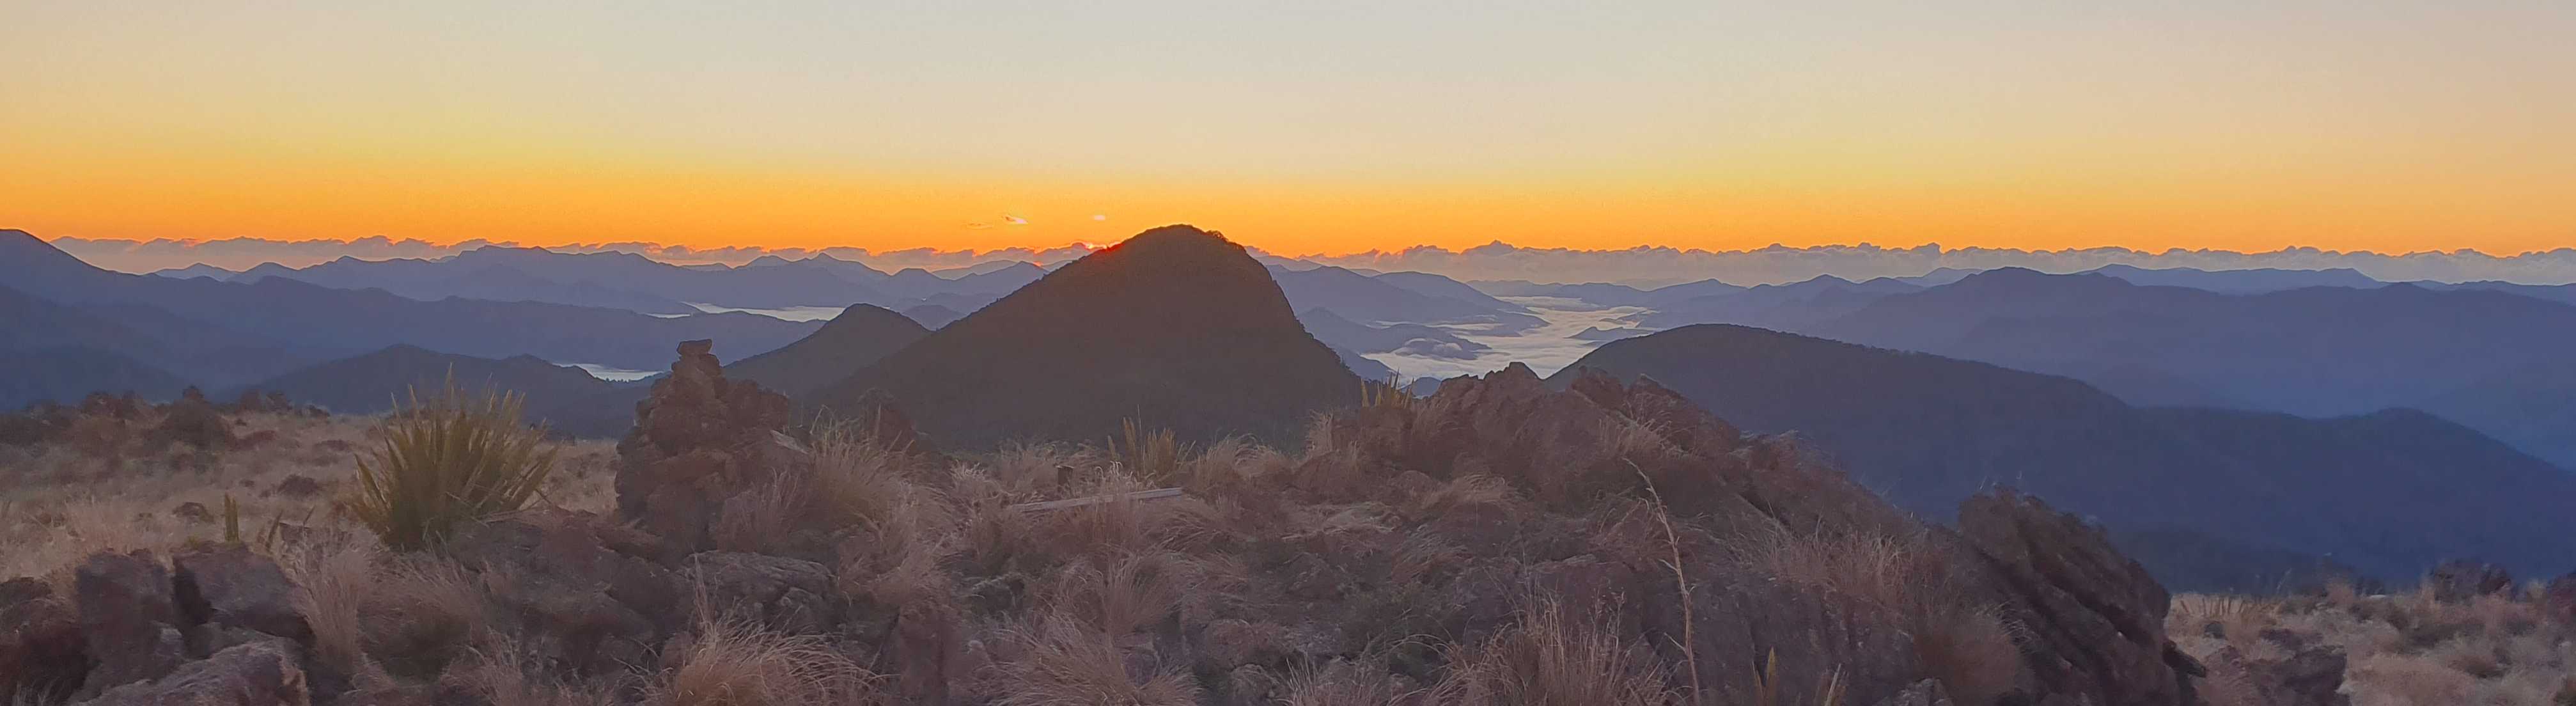
The lack of water along the ridgeline and the unaccustomed heat of the winters day are taking their toll on me by the end. The descents off Mt Royal and the 4th summit of the day [ZL3/MB-368] are bluffed, circuitous and challenging. Energy flags as each ascent takes its toll. It takes a full hour to travel the final 1km of the 500m ascent to Mt Fishtail [ZL3/MB-098]; with stops dropping to every 50 breaths by the time I crest the summit. I’ve not felt this unfit in at least a decade. But we make the summit for an apocalyptic sundown, completing the fifth slurred, clumsy activation of the day with unresponsive jaw and numb fingers in the fiery evening light.
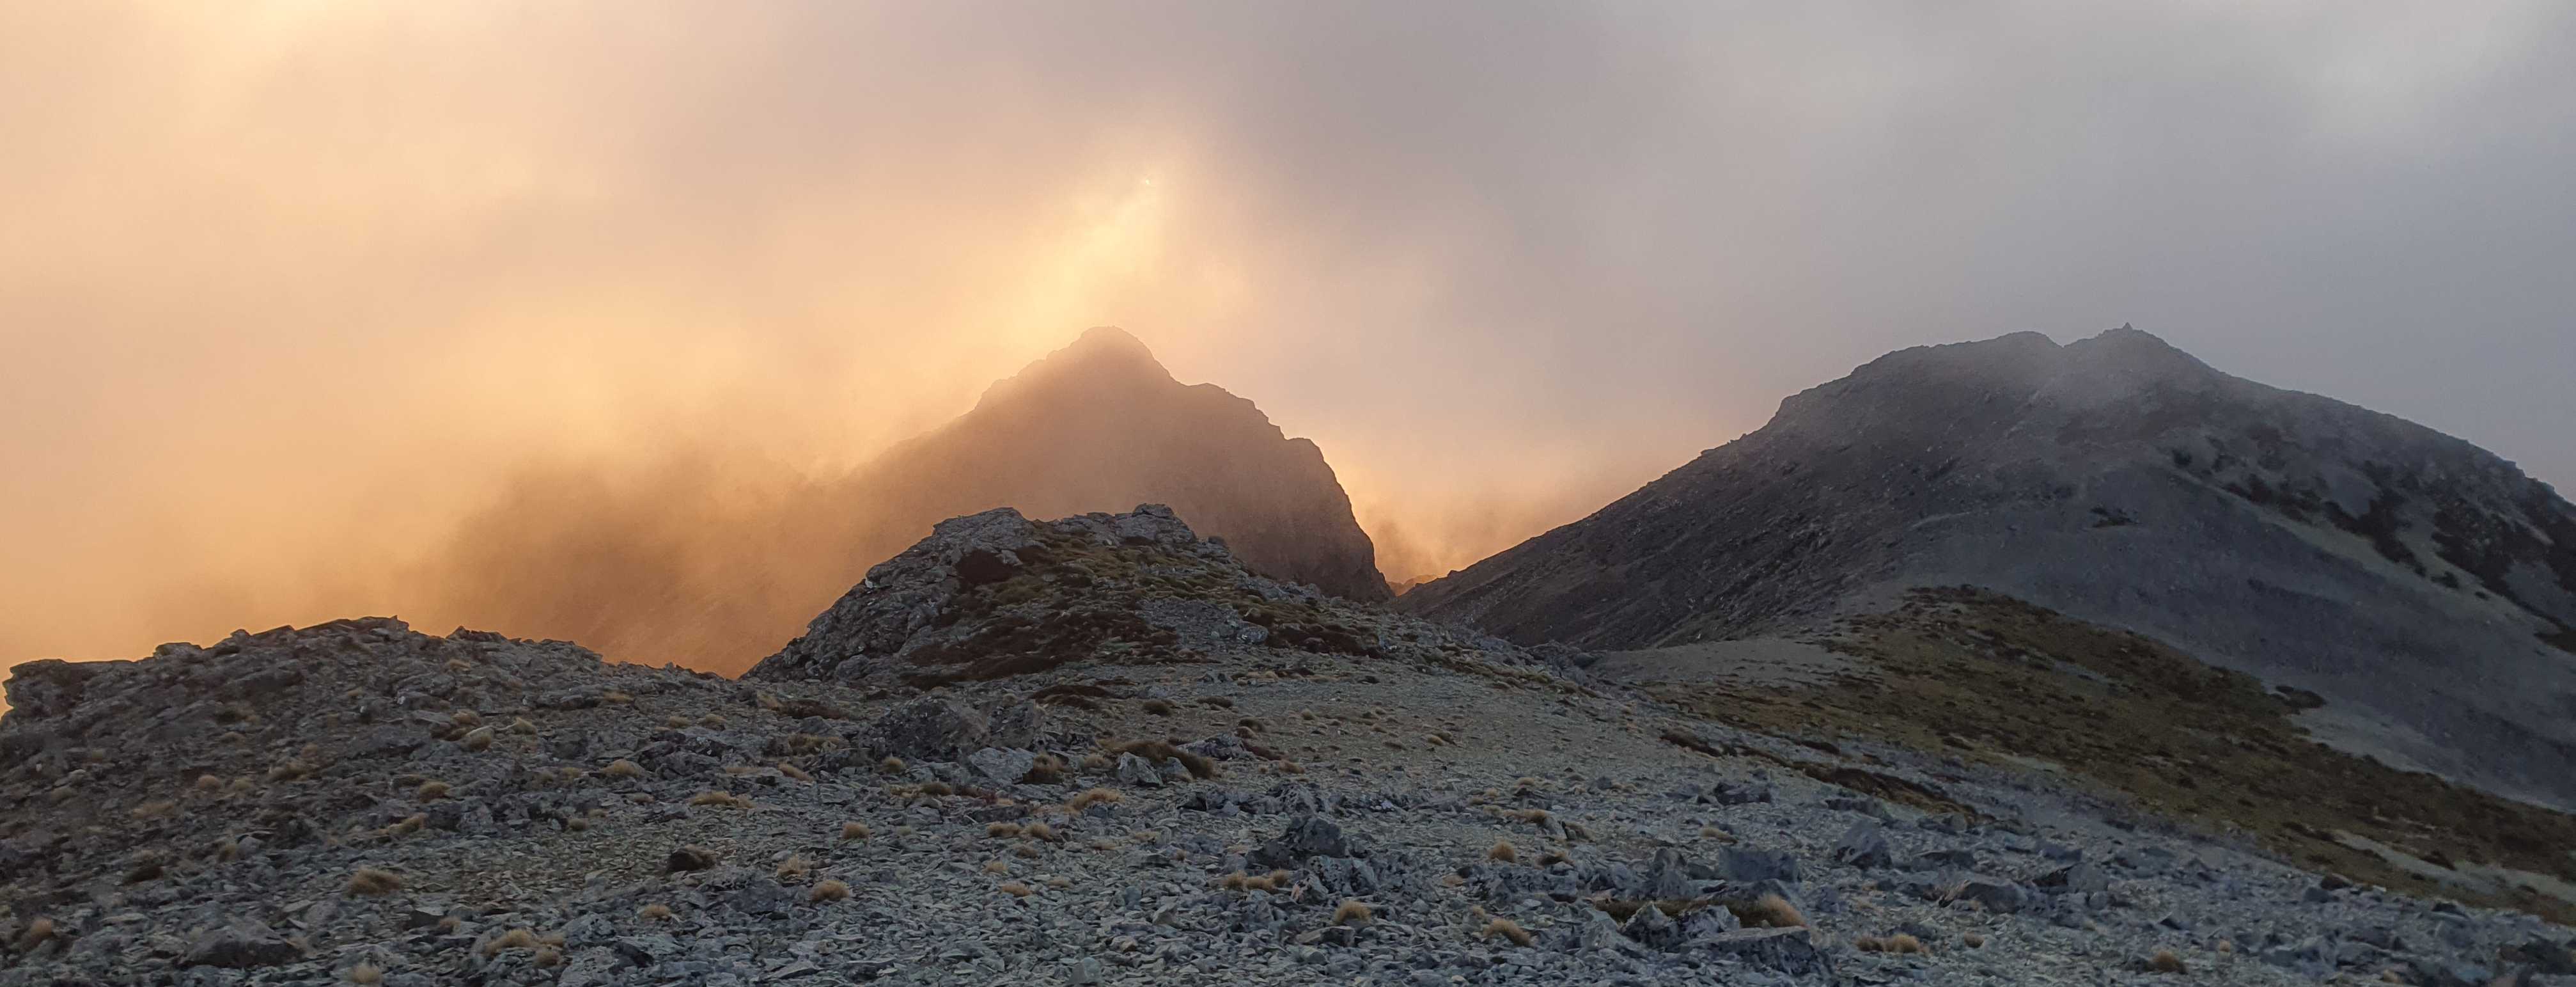
Mt Fishtail - ZL3/MB-098
Mt Fishtail Hut is a simple alpine bivvy, well above the bushline - so no prospect of a warming fire. The hut lies just 400m from the summit but at the base of impassable bluffs on it’s southern flank. Thankfully visibility holds for the circuitous 1.5km descent through scree faces to its west and back to the hut on treacherous frost-coated rocks. 5:45pm: the ice-axe is required to break through the coating of ice on the water-tank, and rather than erecting antenna and deploying radio to activate the hut, I get the billy boiling on my gas stove, crawl into my sleeping bag and drink a warming soup as I contemplate the prospect of emerging from my cocoon to cook dinner.
Distance: 20km
Elevation gain: 1800m
HEMA: 1 summit, 15 QSOs
SOTA: 4 summits, 38 QSOs.
ZLOTA: nil
DX: F5PYI, VK3PF
Timings: 8:00am - 5:45pm
Day 3
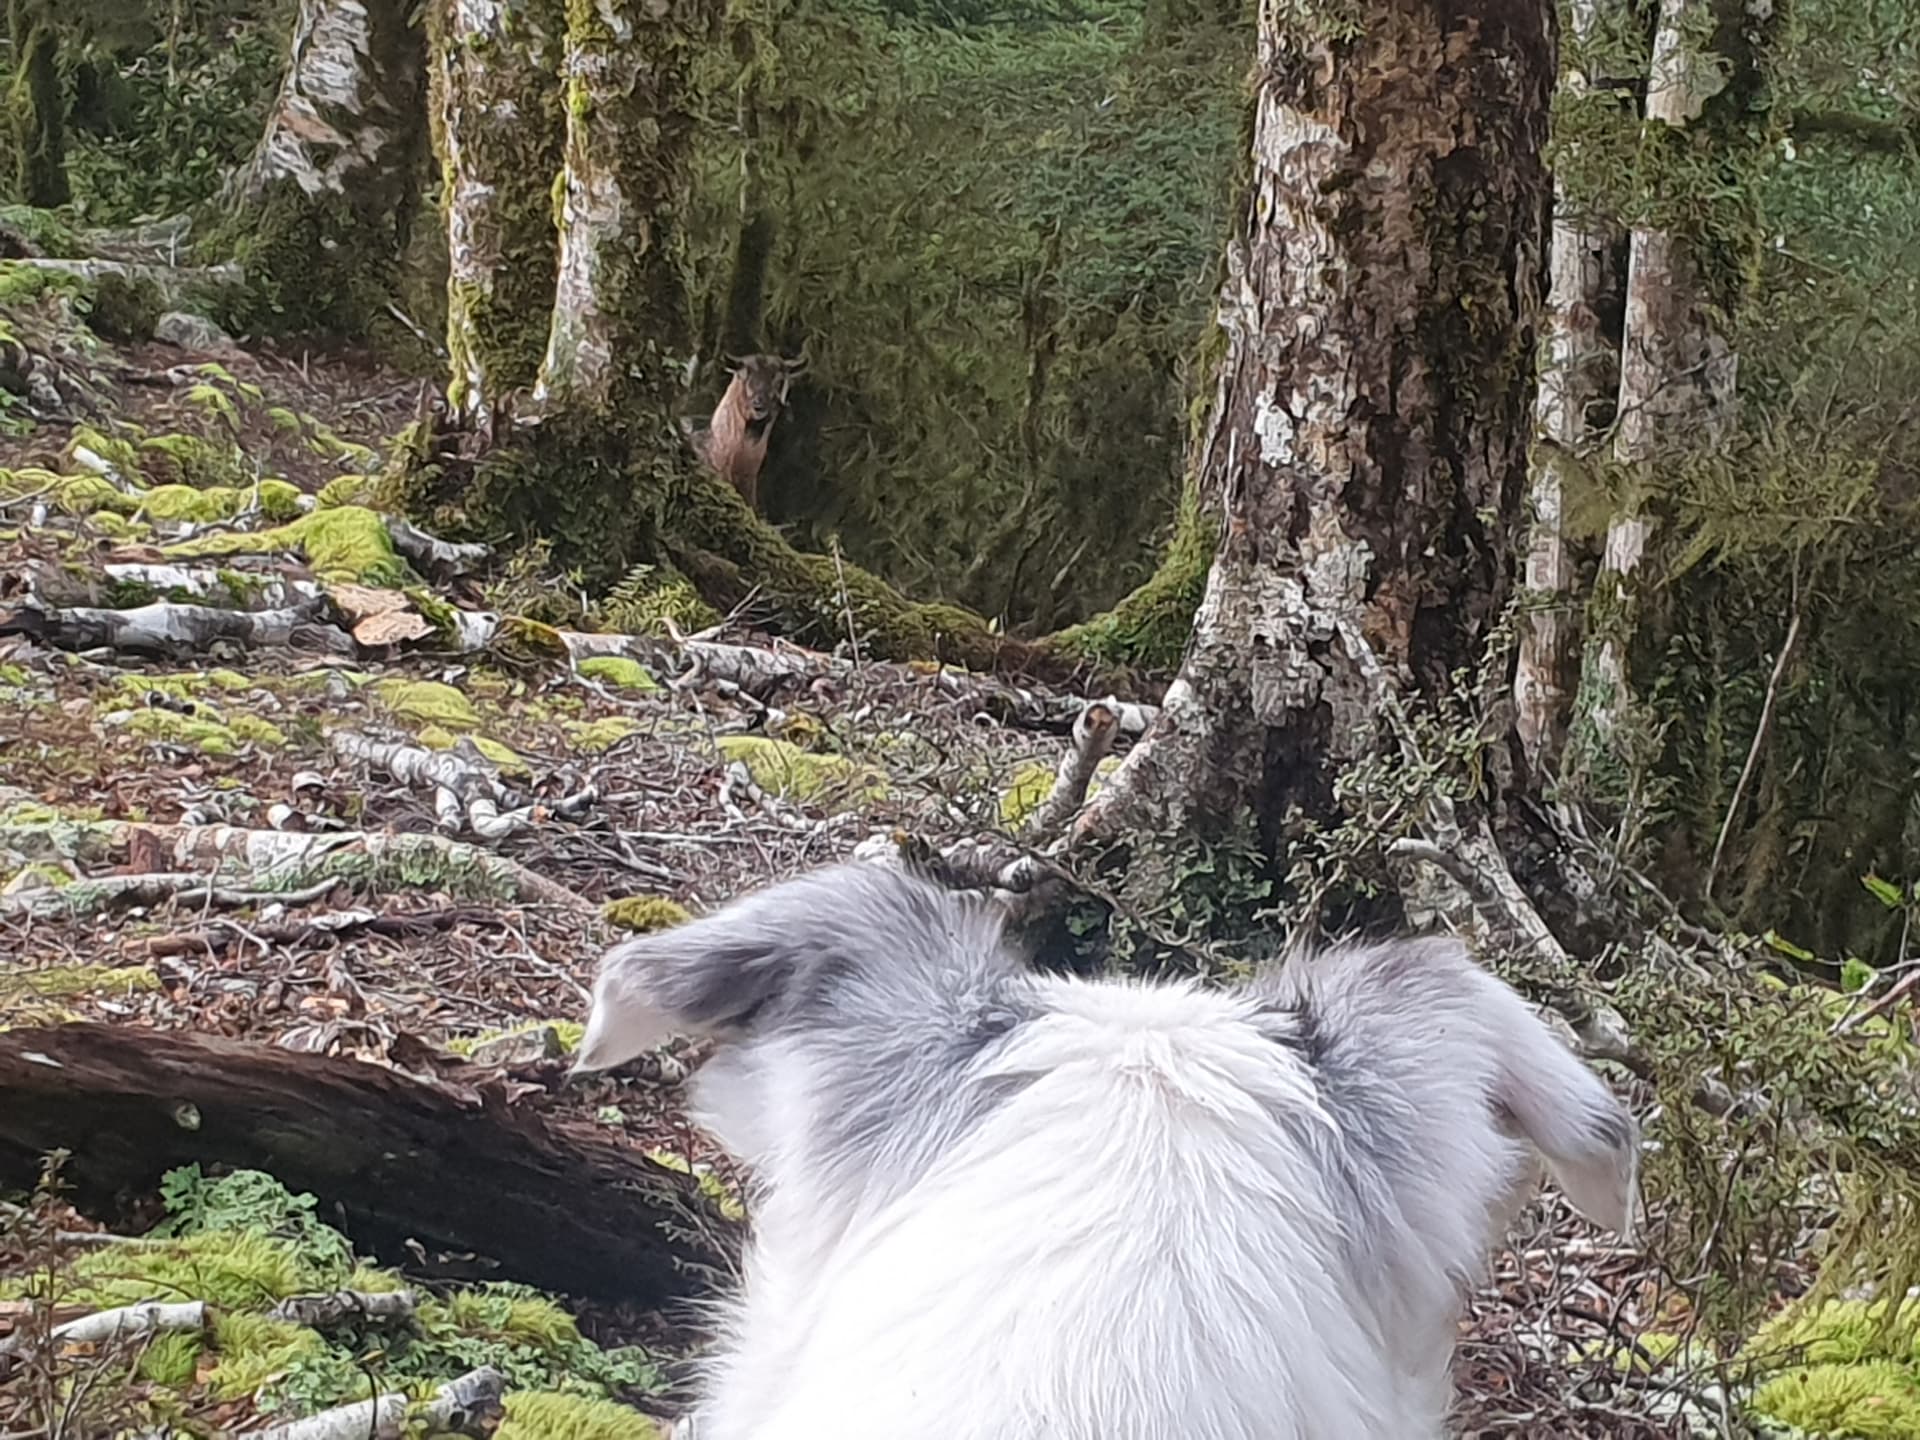
Reascending Mt Fishtail in the dull, ice-misted, morning light, we cross the its two western highpoints and scramble back down through the various layers of bluffs on the ice-rimed rock-scree ridgeline, the ice-axe doing good service. From Fishtail to Mt Fell the ridge is tight, convoluted and slow going. Climbing and descending between 1100m an 1350m over ZL3/HMB-118 and ZL3/MB-149 we’re above the forest and below the open tops, and thus spend most of the morning pushing through the scrub-layer of intertwined 2-3m-high stunted beech. Only the lowest saddles provide some respite. Thankfully the ever-present goat-trails indicate viable routes, if only I were 2 foot tall!
I’ve been conscious over the last few weeks of borrowing guy-ropes from my SOTA kit for other purposes and failing to return them - with the result that only one remains - tied to the far end of the EFHW. As a result of which the scrub is at least welcome as the only means to support the mast during activations - unless I remove my bootlaces!
It is gone 1pm by the time we finally break out of the scrub and ascend the scree face to Mt Fell and the luxury of the marked route that makes the Fell-Richmond traverse. The mist has still to clear and the breeze is bitter, and so I make for the simplest possible activation, stringing the antenna horizontally across a small gully between two track markers. There are complains of deep QSB, but it works - with 20 in the log in just over 10 minutes.
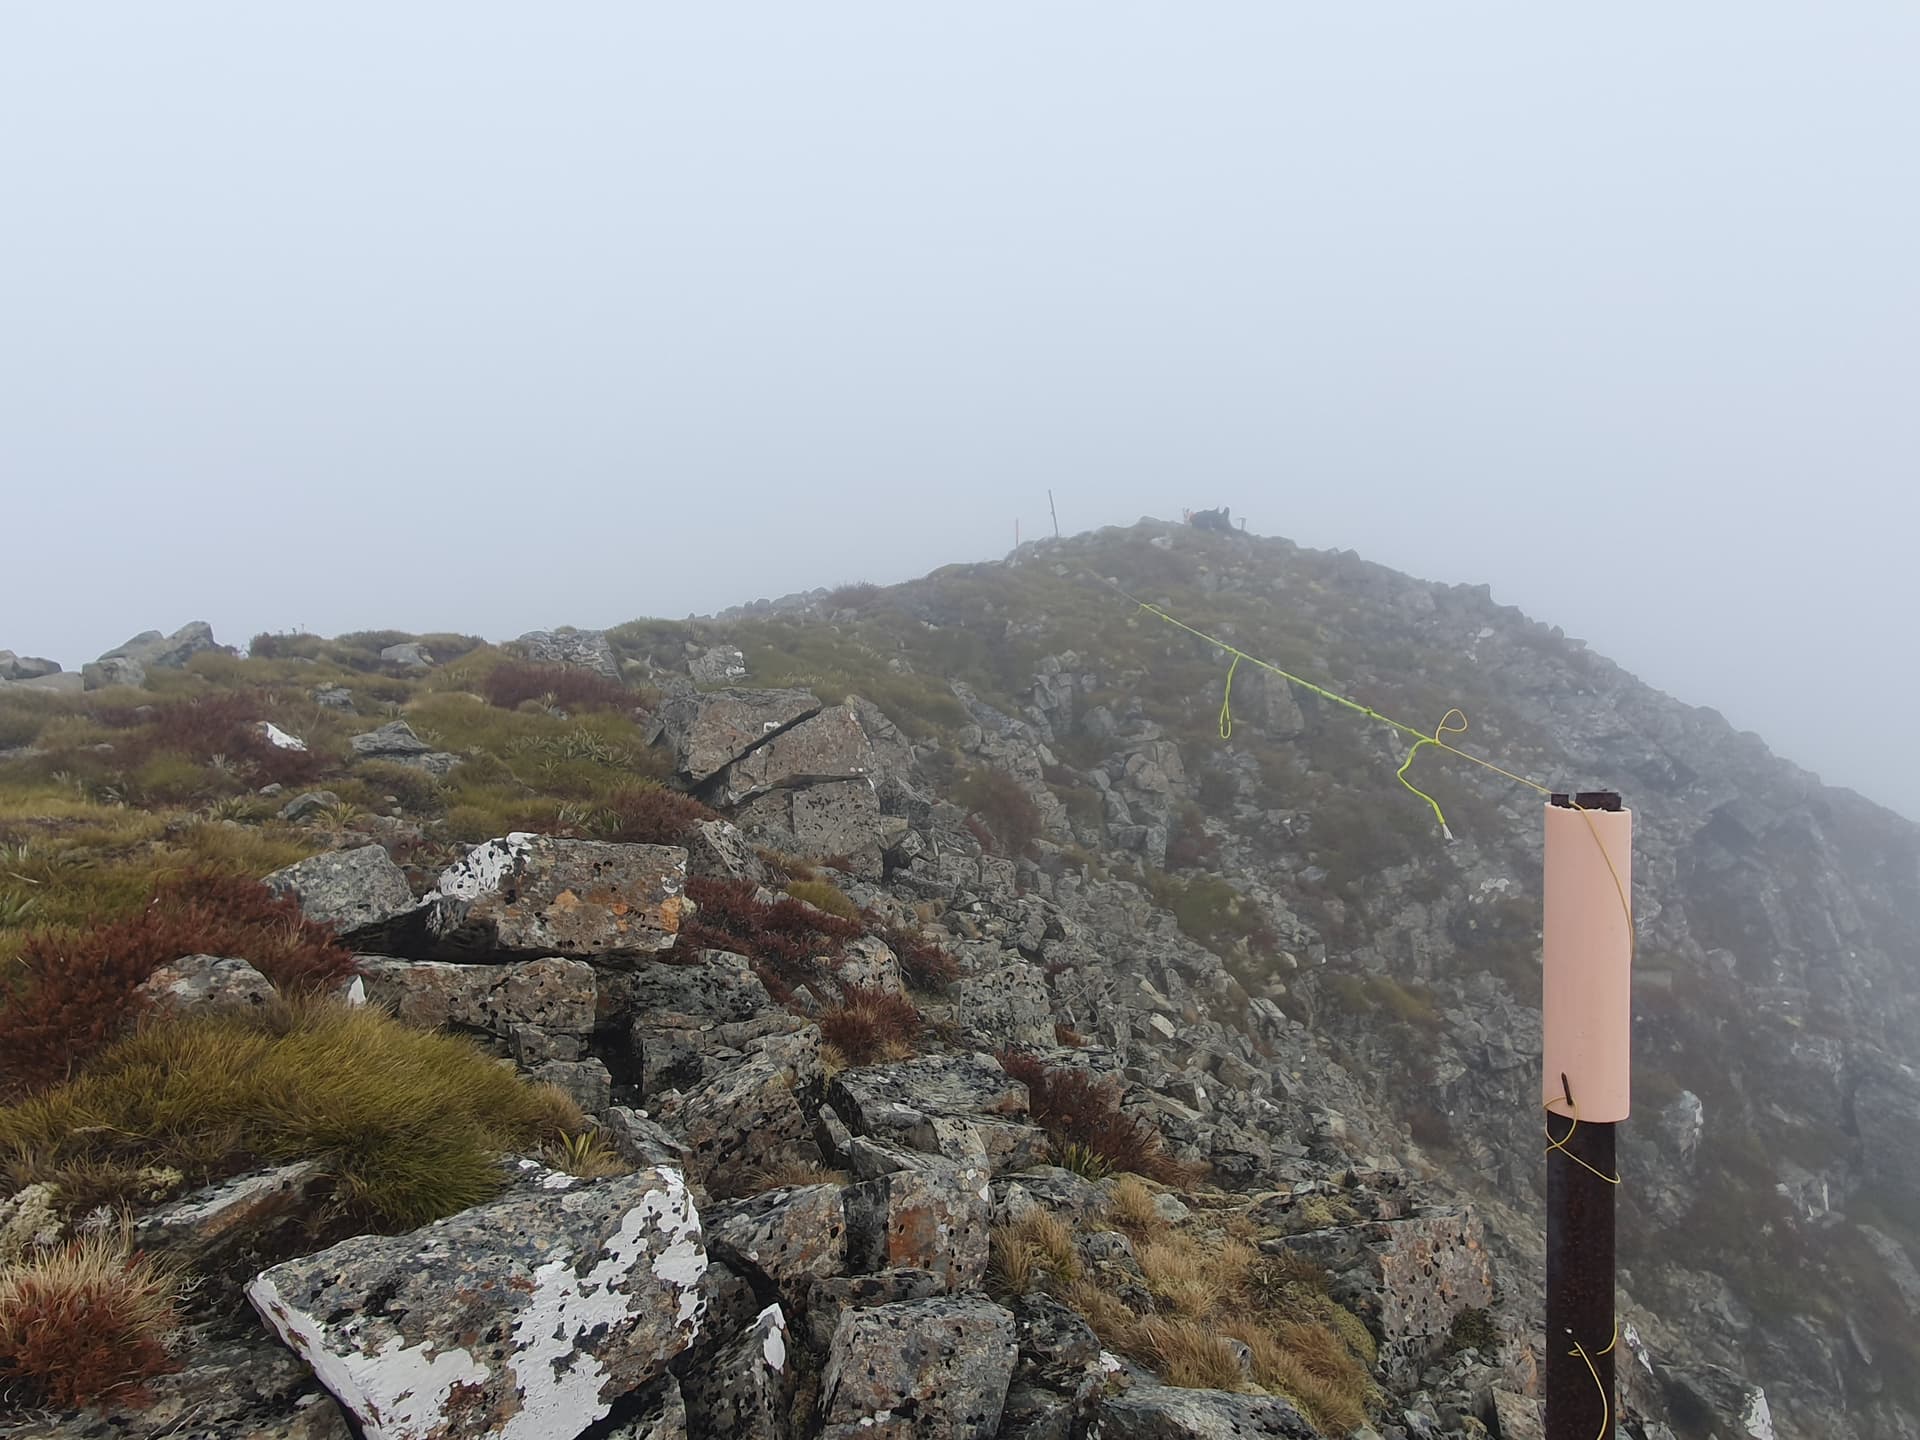
Activating Mt Fell - ZL3/MB-104
The poled route crossing rock and tussock tops to Mt Richmond is well used and easy following. The HEMA summit Johnston Peak [ZL3/HMB-060] lies just 500m off the track, tempting me to divert to bag ‘just one more’ easy one. But the bluffed-out ridgeline and the poor visibility mean it takes over an hour to make the return trip. It will be another long late day!
Activating Mt Richmond
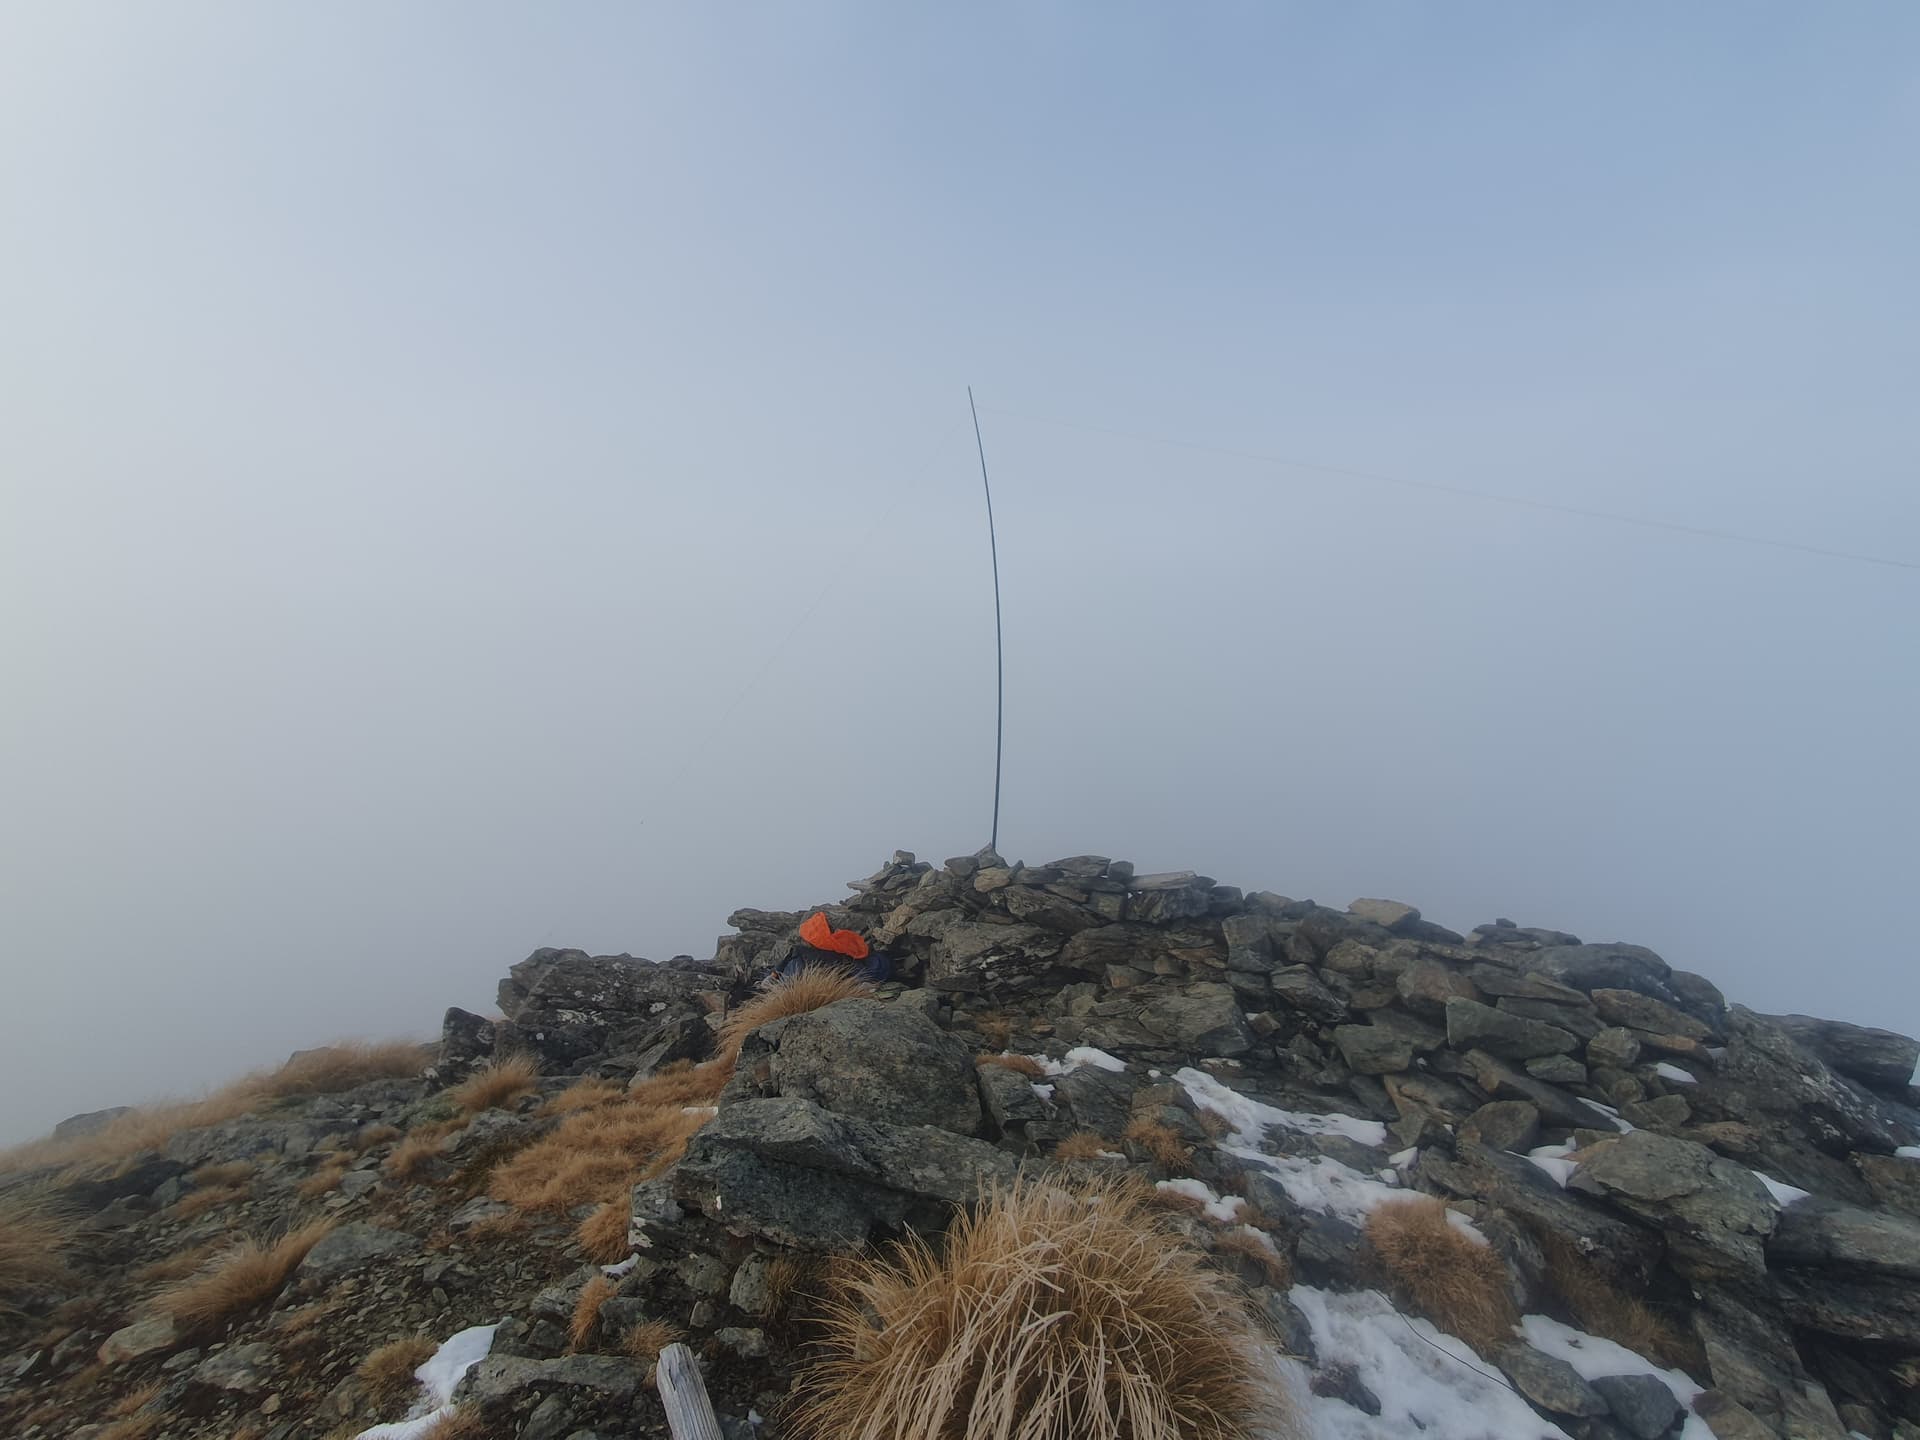
We manage the final 300m scree scramble to Mt Richmond in one go - a great improvement over the previous day’s exhaustion. The drifting ice / mist has accumulated on the 1760m summit - and the bitter southerly still blows. But this is the only peak I have met in ZL with a hollow-ring summit-shelter of piled rocks.
Activating Mt Richmond
We crouch in the lee of the shelter (the opening is puzzlingly on the wind-prone SW side) and make the final activation of the day, before scampering down the long scree face to the bush-clad shelter of Richmond Saddle and it’s eponymous hut.
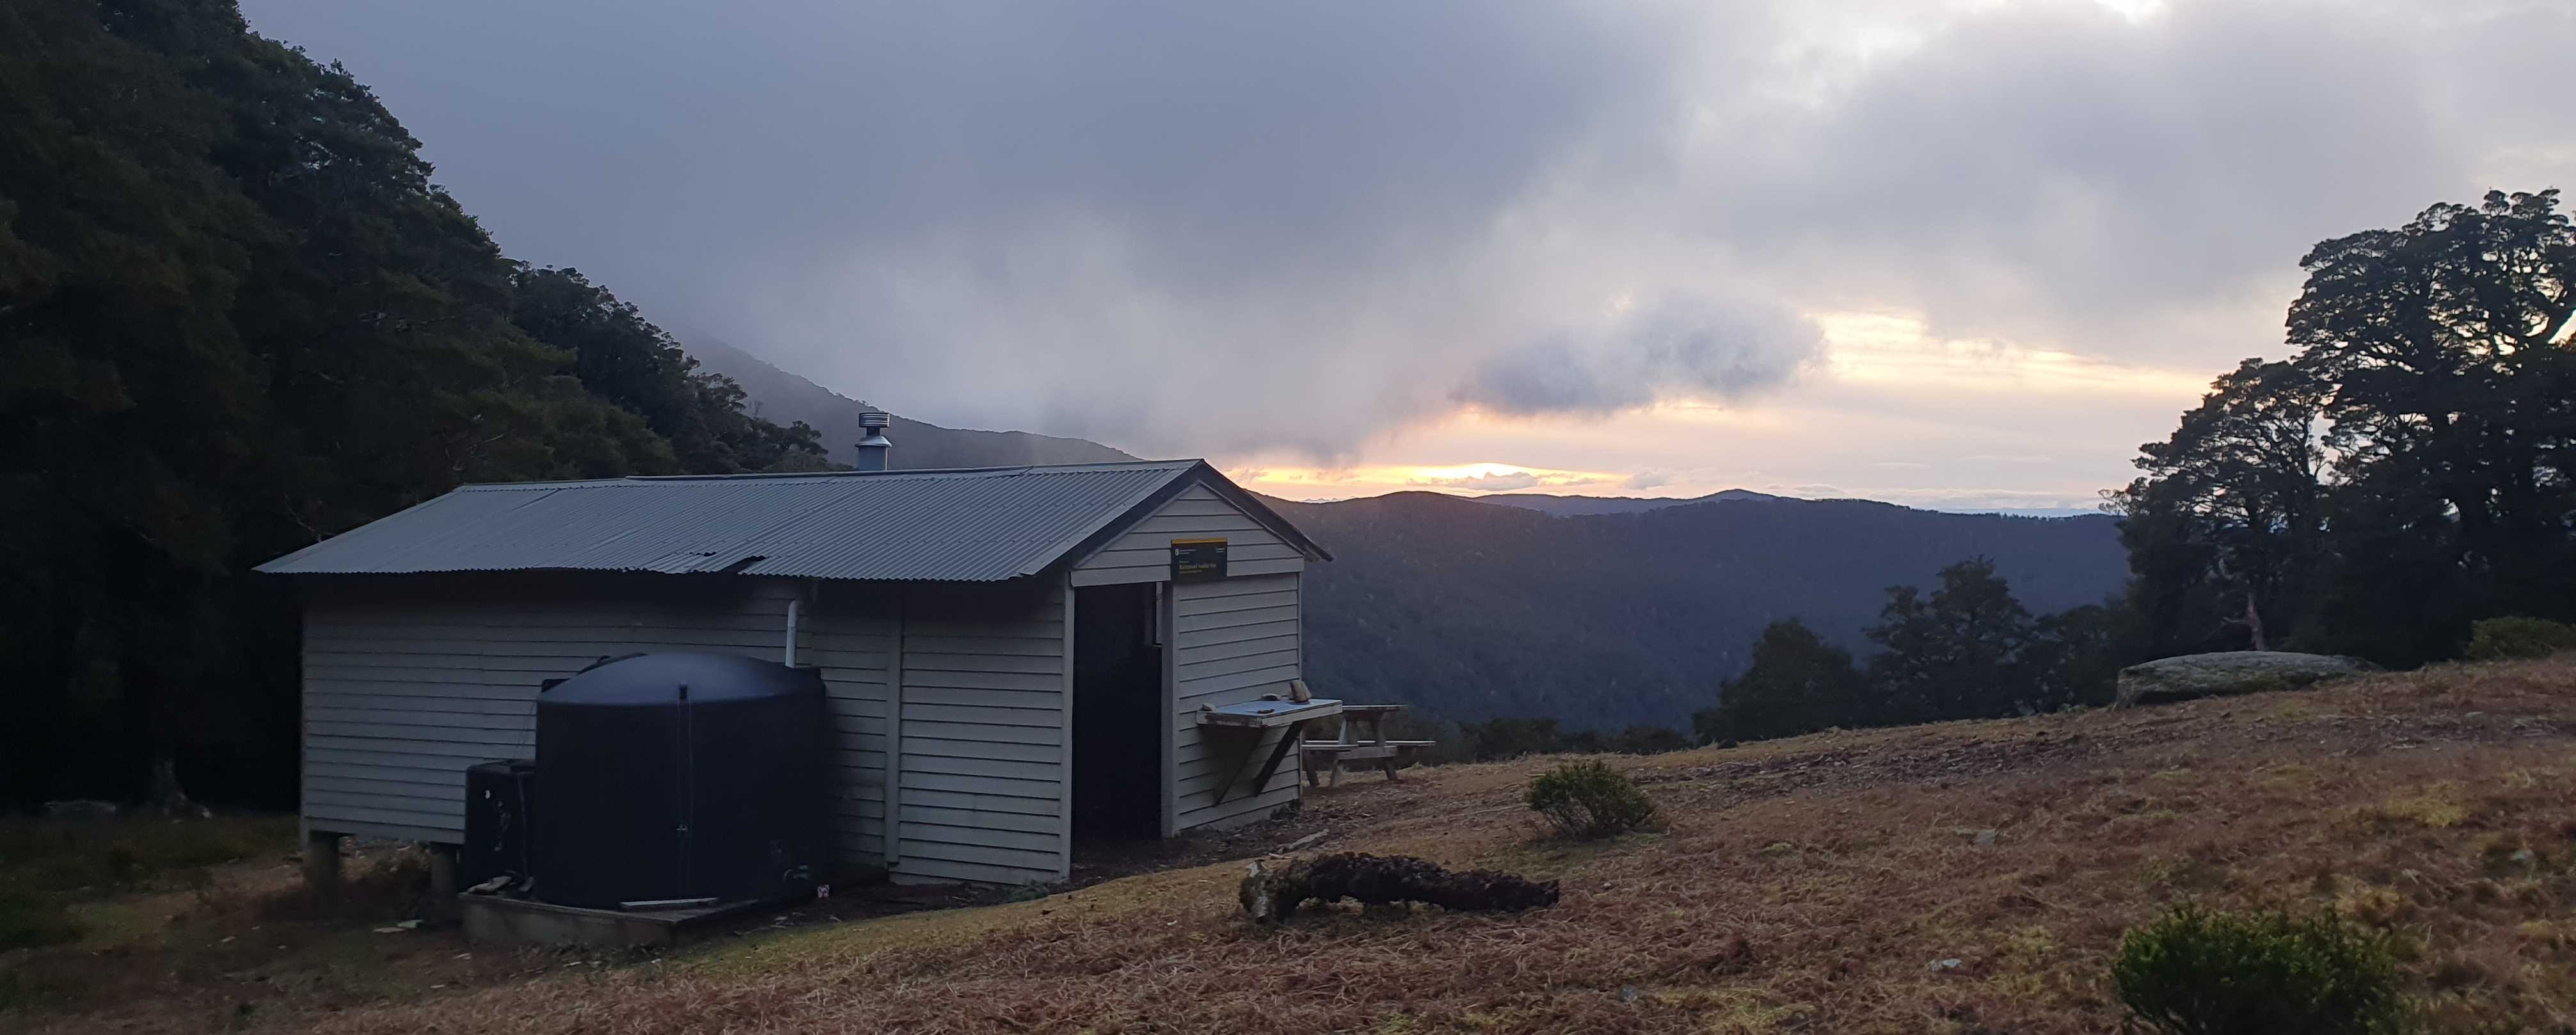
Richmond Saddle Hut - ZLH/MB-041
Distance: 17km
Elevation gain: 1500m
HEMA: 2 summits, 19 QSOs
SOTA: 3 summits, 49 QSOs.
ZLOTA: Richmond Saddle Hut, 10 QSOs
DX: VK3PF, VK3ACZ
Timings: 7:30am - 5:30pm
Day 4
I walked the section of ridgeline from Richmond Saddle to Ada Flat 20 years ago, and remember only that it was narrow, bluffed, slow, scrubby, unpleasant and scary. I naively hope that it has improved in the interim.
Things start well with an easy 200m ascent to the northern peak of ZL3/HMB-089 through good open bush. Maybe this will be better than I remember. Sadly the AZ for ZL3/HMB-089 is on the southernmost peak a kilometer away, and with a long, challenging day ahead I don’t have time to make the detour to bag it.
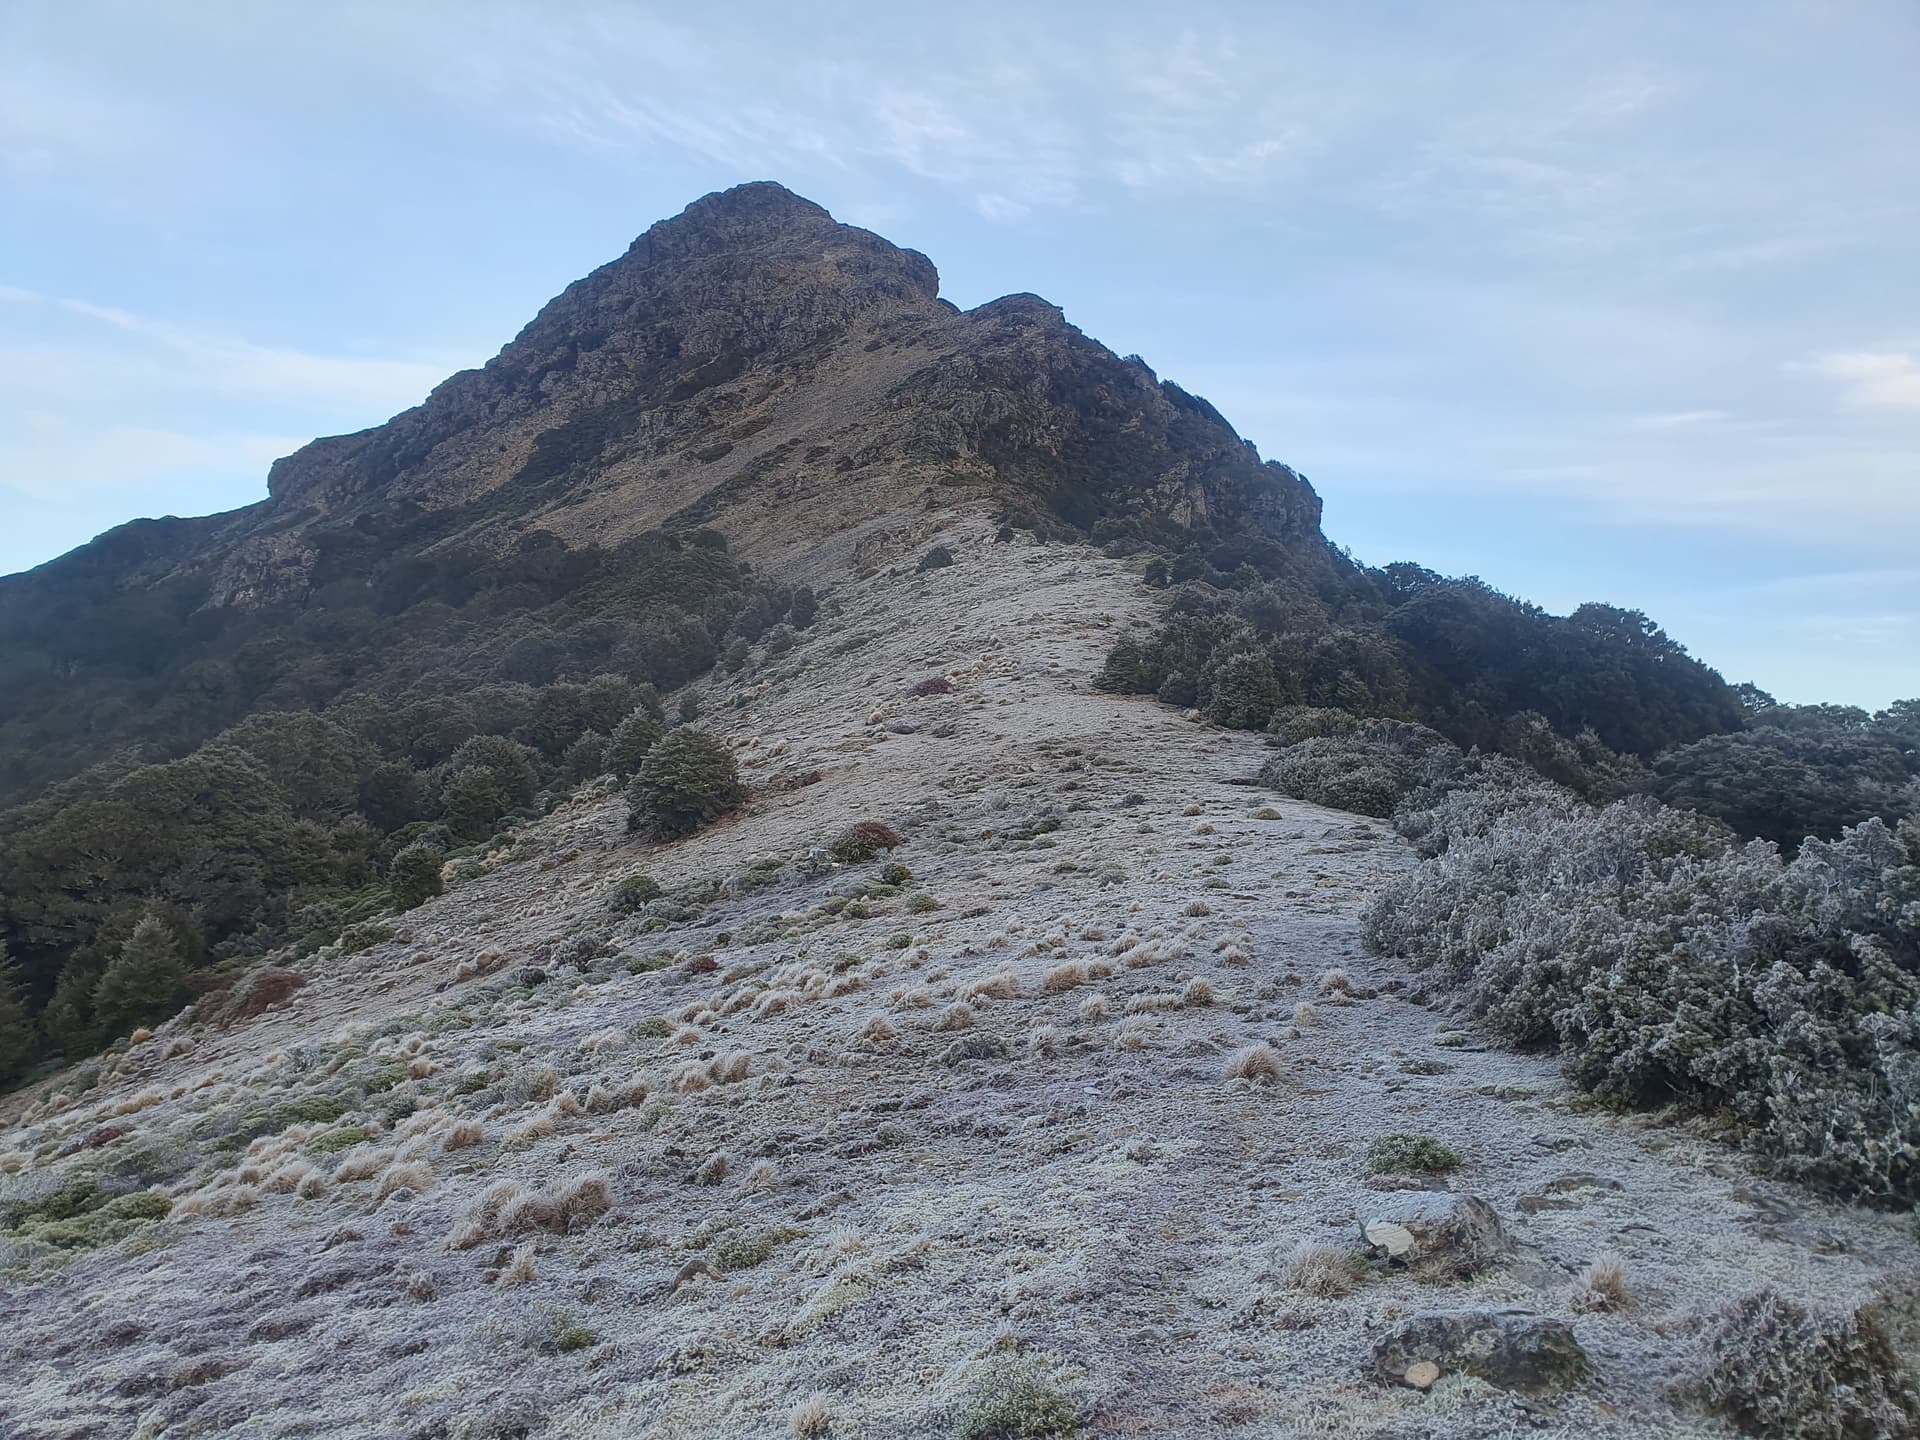
Ascent to Grass Knob
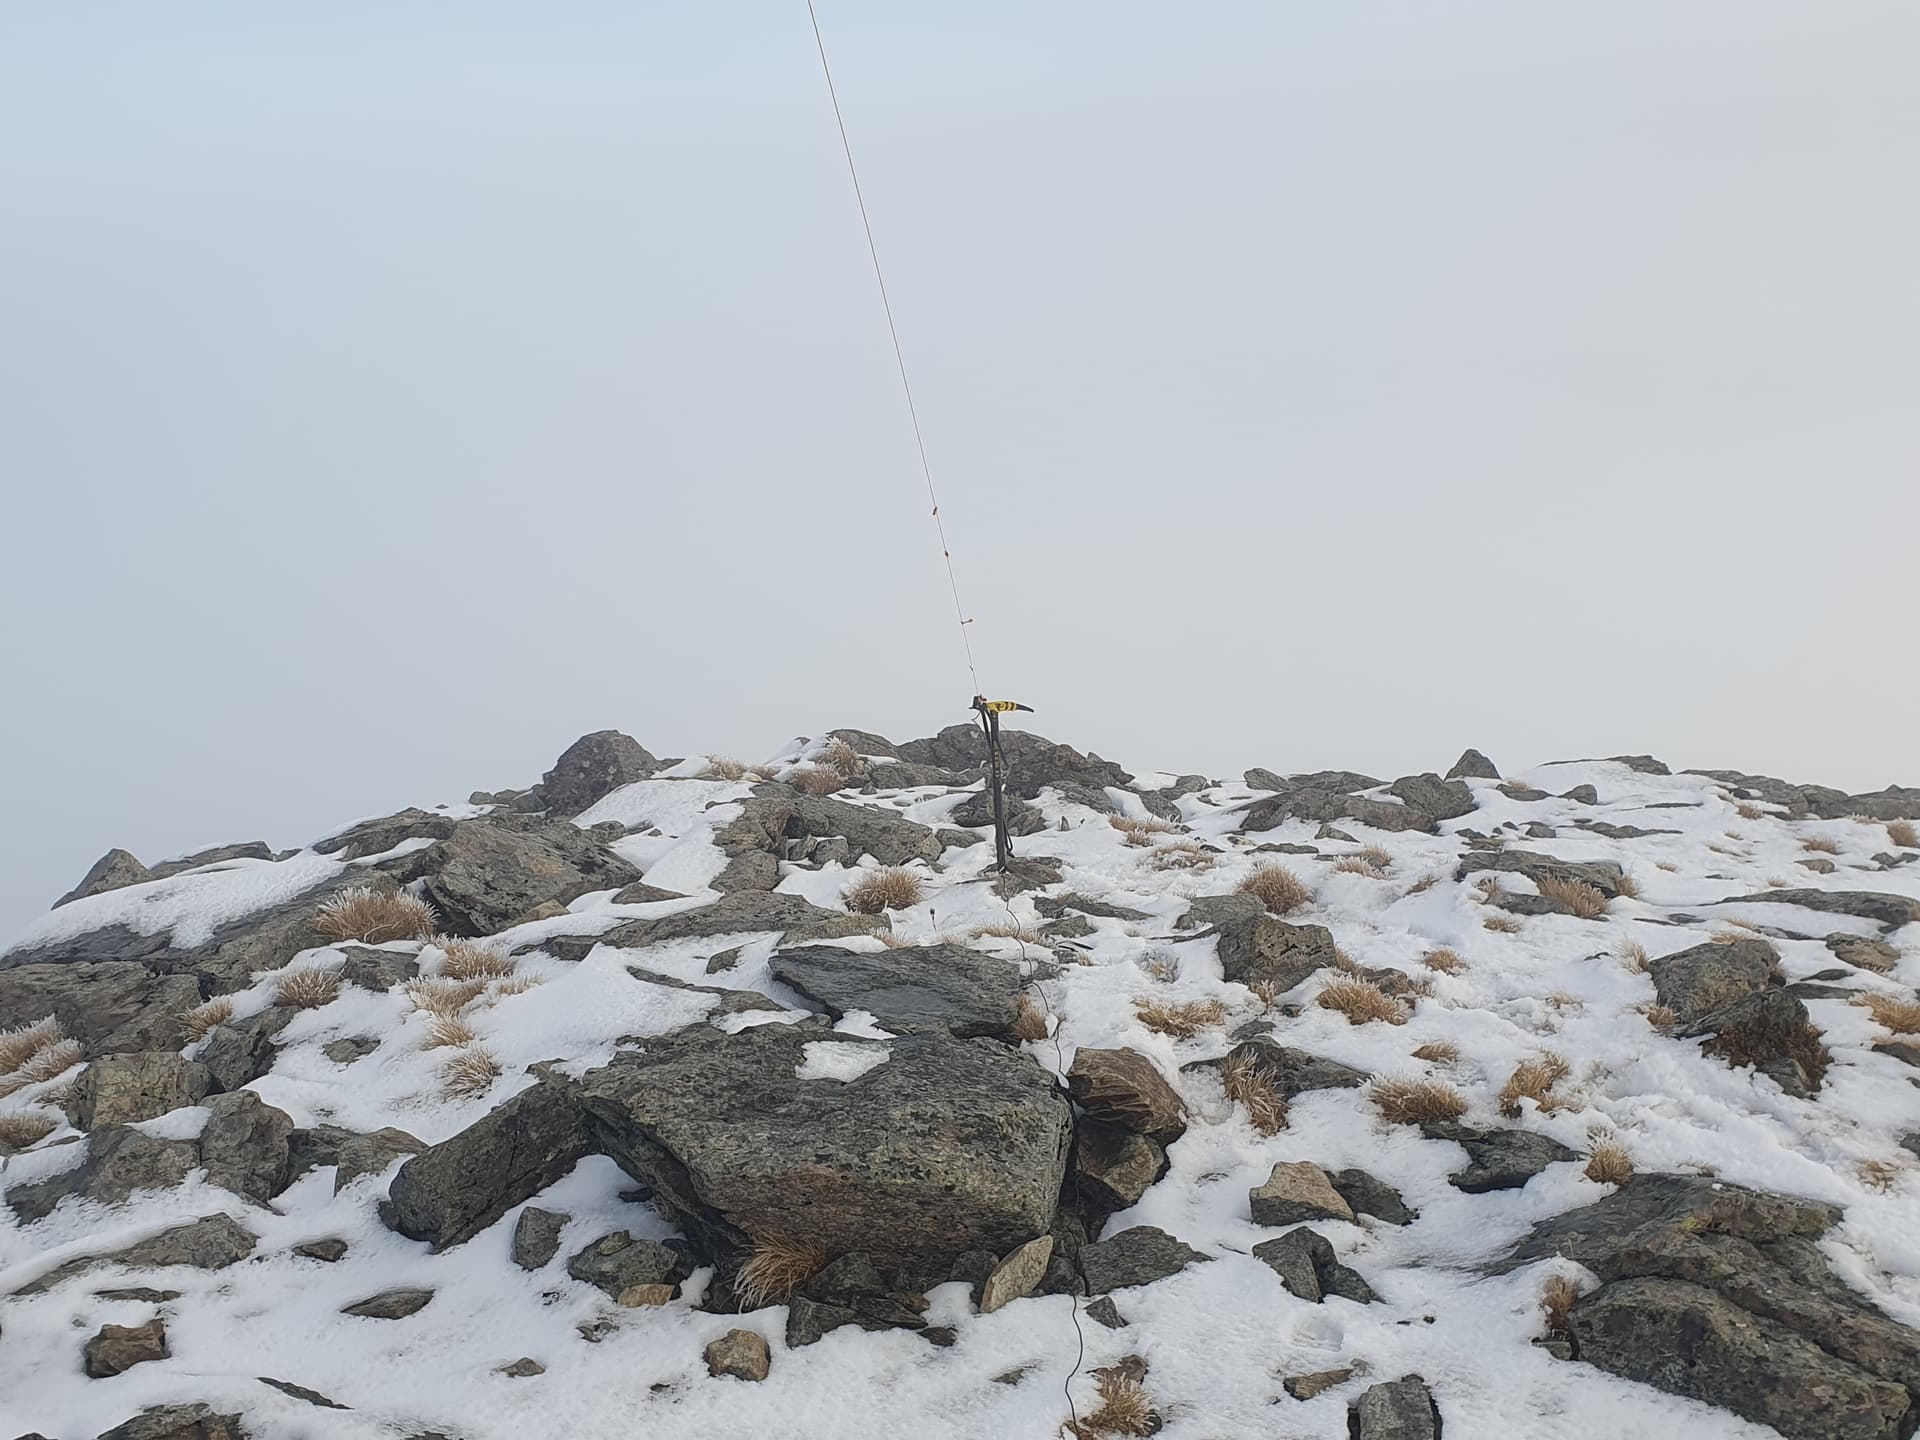
An easy descent to the broad saddle with the puzzlingly-named rock outcrop of Grass Knob [ZL3/MB-126] continues well. Then the fun starts - ice-frosted bluffs making the ascent to the first SOTA peak of the day more fun than strictly necessary. Still conditions and morning sunshine on the top make for a great morning activation and good moods, however, prevail.

Activating Grass Knob - ZL3/MB-126
The ridgeline beyond Grass Knob is narrow and bluffed. At 1200m-1400m we’re smack in the middle of the thickest of the scrub-layer, with wind-toughened stunted beech doing its best to impeded progress along the narrow exposed ridge. Even the goat trails seem to have mostly vanished.

ZL3/HMB-083
We hit the ‘scary bit’ I remembered, descending off the 1st HEMA summit - ZL3/HMB-083. A deep bite follows the sharp summit, invisible from the approach and not indicated by map contours. The only solution is to descend 100m off the steep eastern face of the peak following faint goat trails down through scree-chutes above high bluffs to reach narrow, sloping terraces leading to the next saddle. I recall this being absolutely at the limit of my comfort zone on the last visit - but it feels fairly routine today. A bit like the evolving roadside fire-risk warning signs, the time spent in Fiordland in the interim has caused some serious recalibration of the ‘scary’ scale; with ‘Extreme’ and ‘Catastrophic’ being added beyond the original Low, Medium, and High.
ZL3/MB-136 (right) from ZL3/HMB-095
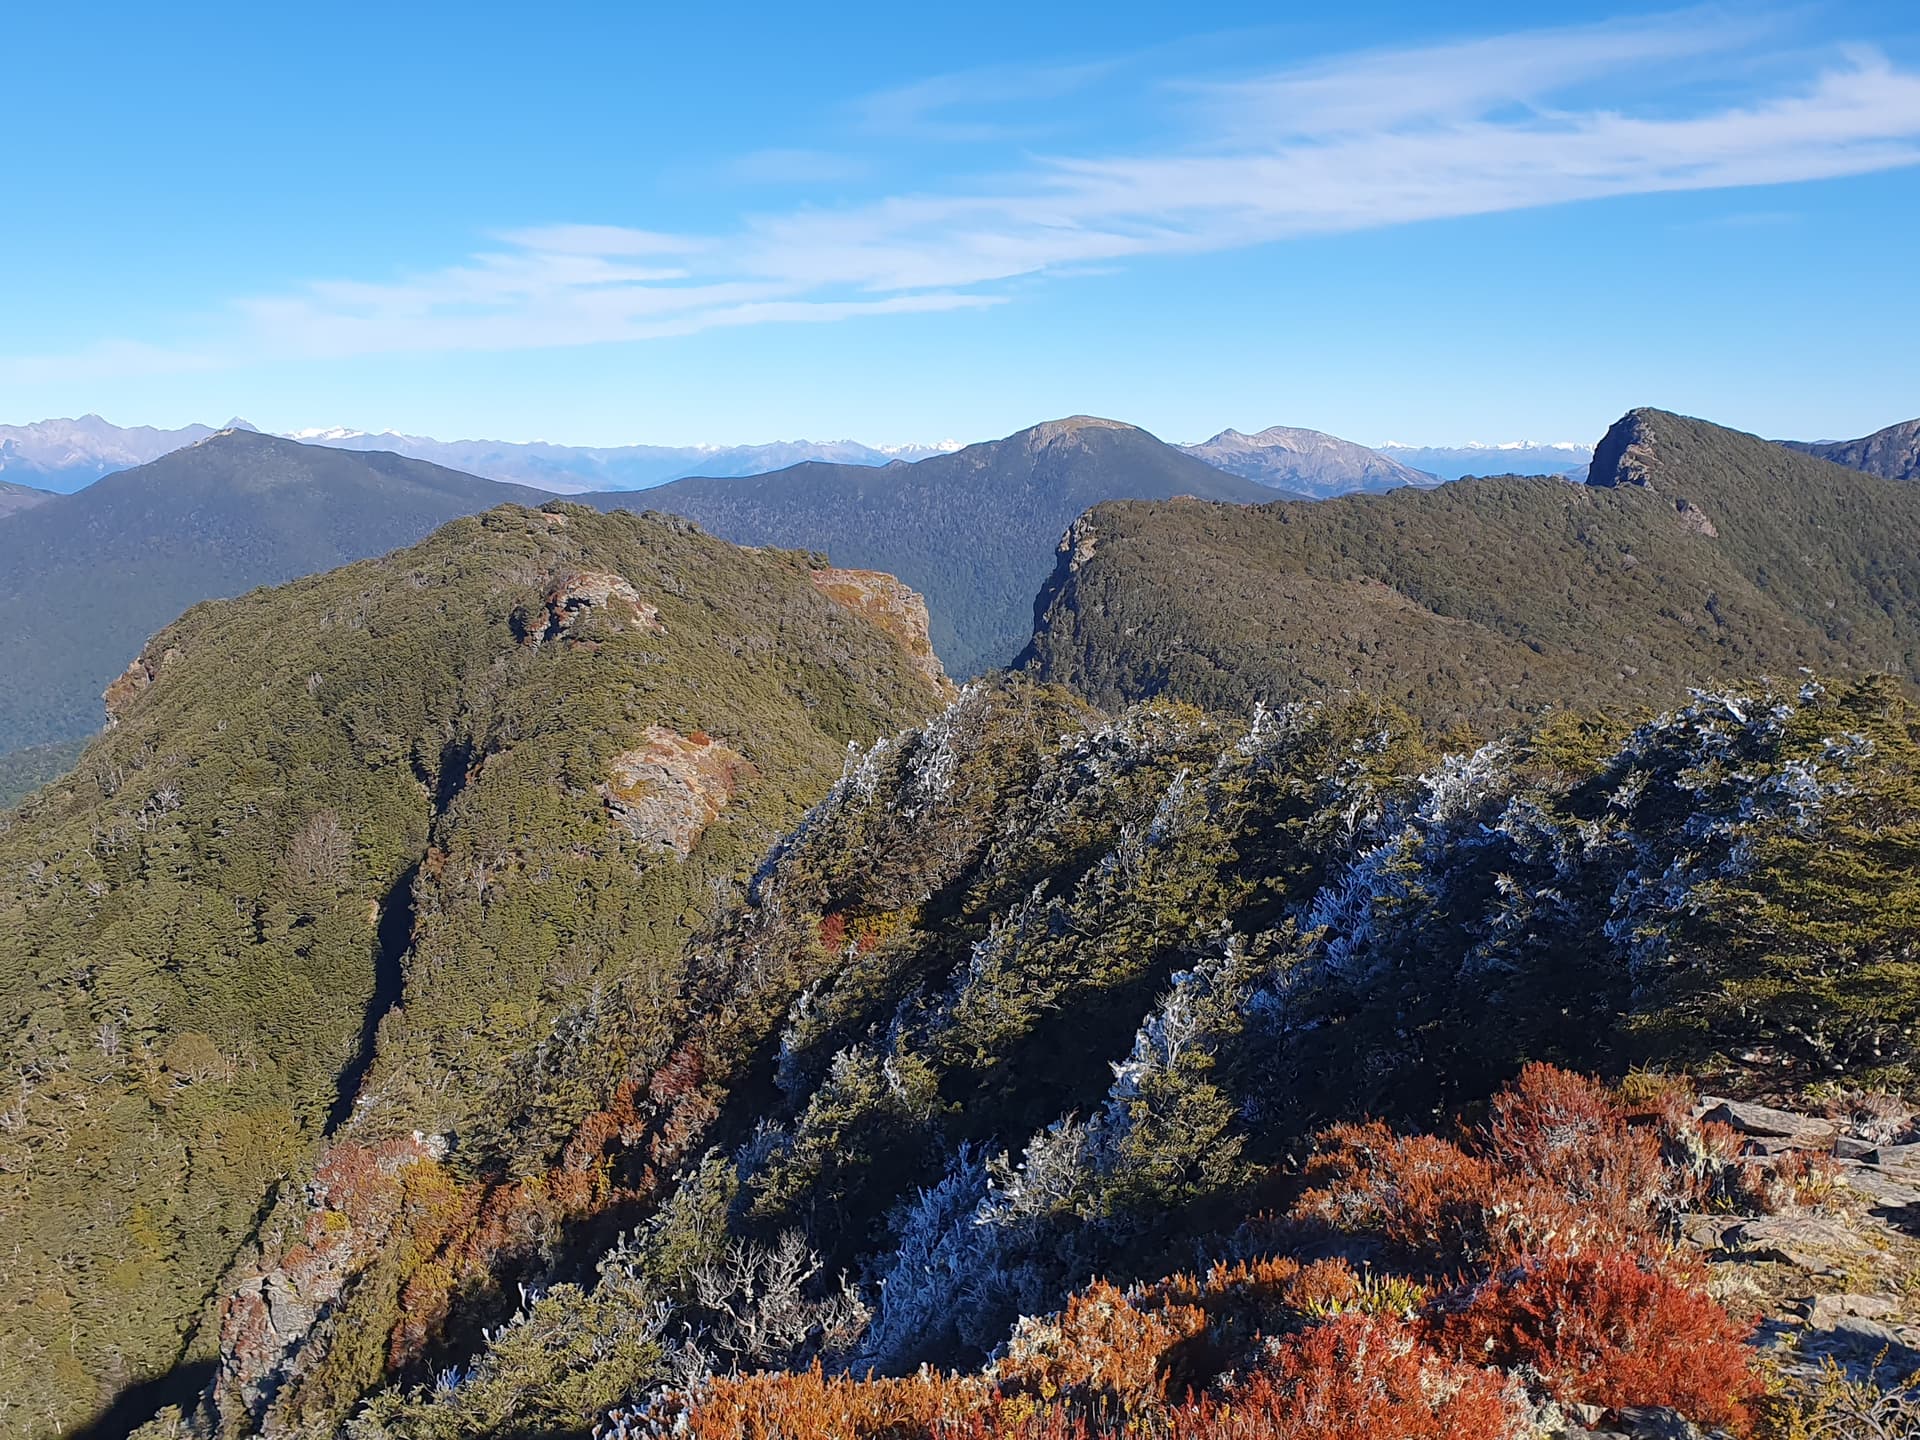
Two further ‘bites’ beyond the 2nd HEMA peak - ZL3/HMB-095 - are more easily bypassed to the north, before the final SOTA summit [ZL3/MB-136] on the untracked section of the range is ascended by bypassing it in good open beech forest to the north, and cutting back to the rock/scrub peak from the west.
Ada Flat, Old Man and Mt Rintoul from ZL3/MB-136
Beyond ZL3/MB-136 the ridgeline broadens, the beech forest becomes more established and good game trails provide easy travel to the open tops at Ada Flat, which we reach in under an hour. A final 5km walk along the Alpine Route leads us past Slaty Peak [ZL3/TM-073] (already activated) to the comforts of Slaty Hut tucked at 1400m on the bushedge.
Distance: 15km
Elevation gain: 1500m
HEMA: 2 summits, 28 QSOs
SOTA: 2 summits, 24 QSOs.
ZLOTA: Slaty Hut, 8 QSOs
DX: VK2HRX, F5PYI
Timings: 7:30am - 5:00pm
Day 5
At Slaty, we’ve reached the apogee of our orbit of the Pelorus Tavern. We left the narrow, dry, crumbling exposure of the main Richmond Range backbone at Ada Flat, and now start the loop back along the northern side of the catchment, descending onto the broad tops and ore-stunted vegetation of the Nelson mineral belt. We also leave behind the commitment of that main range - with its steep, dry, exposed ridgelines, deep, flanked by tight valleys offering little hope of escape. The ever-present need to reach the water-tank of the next hut before dusk.
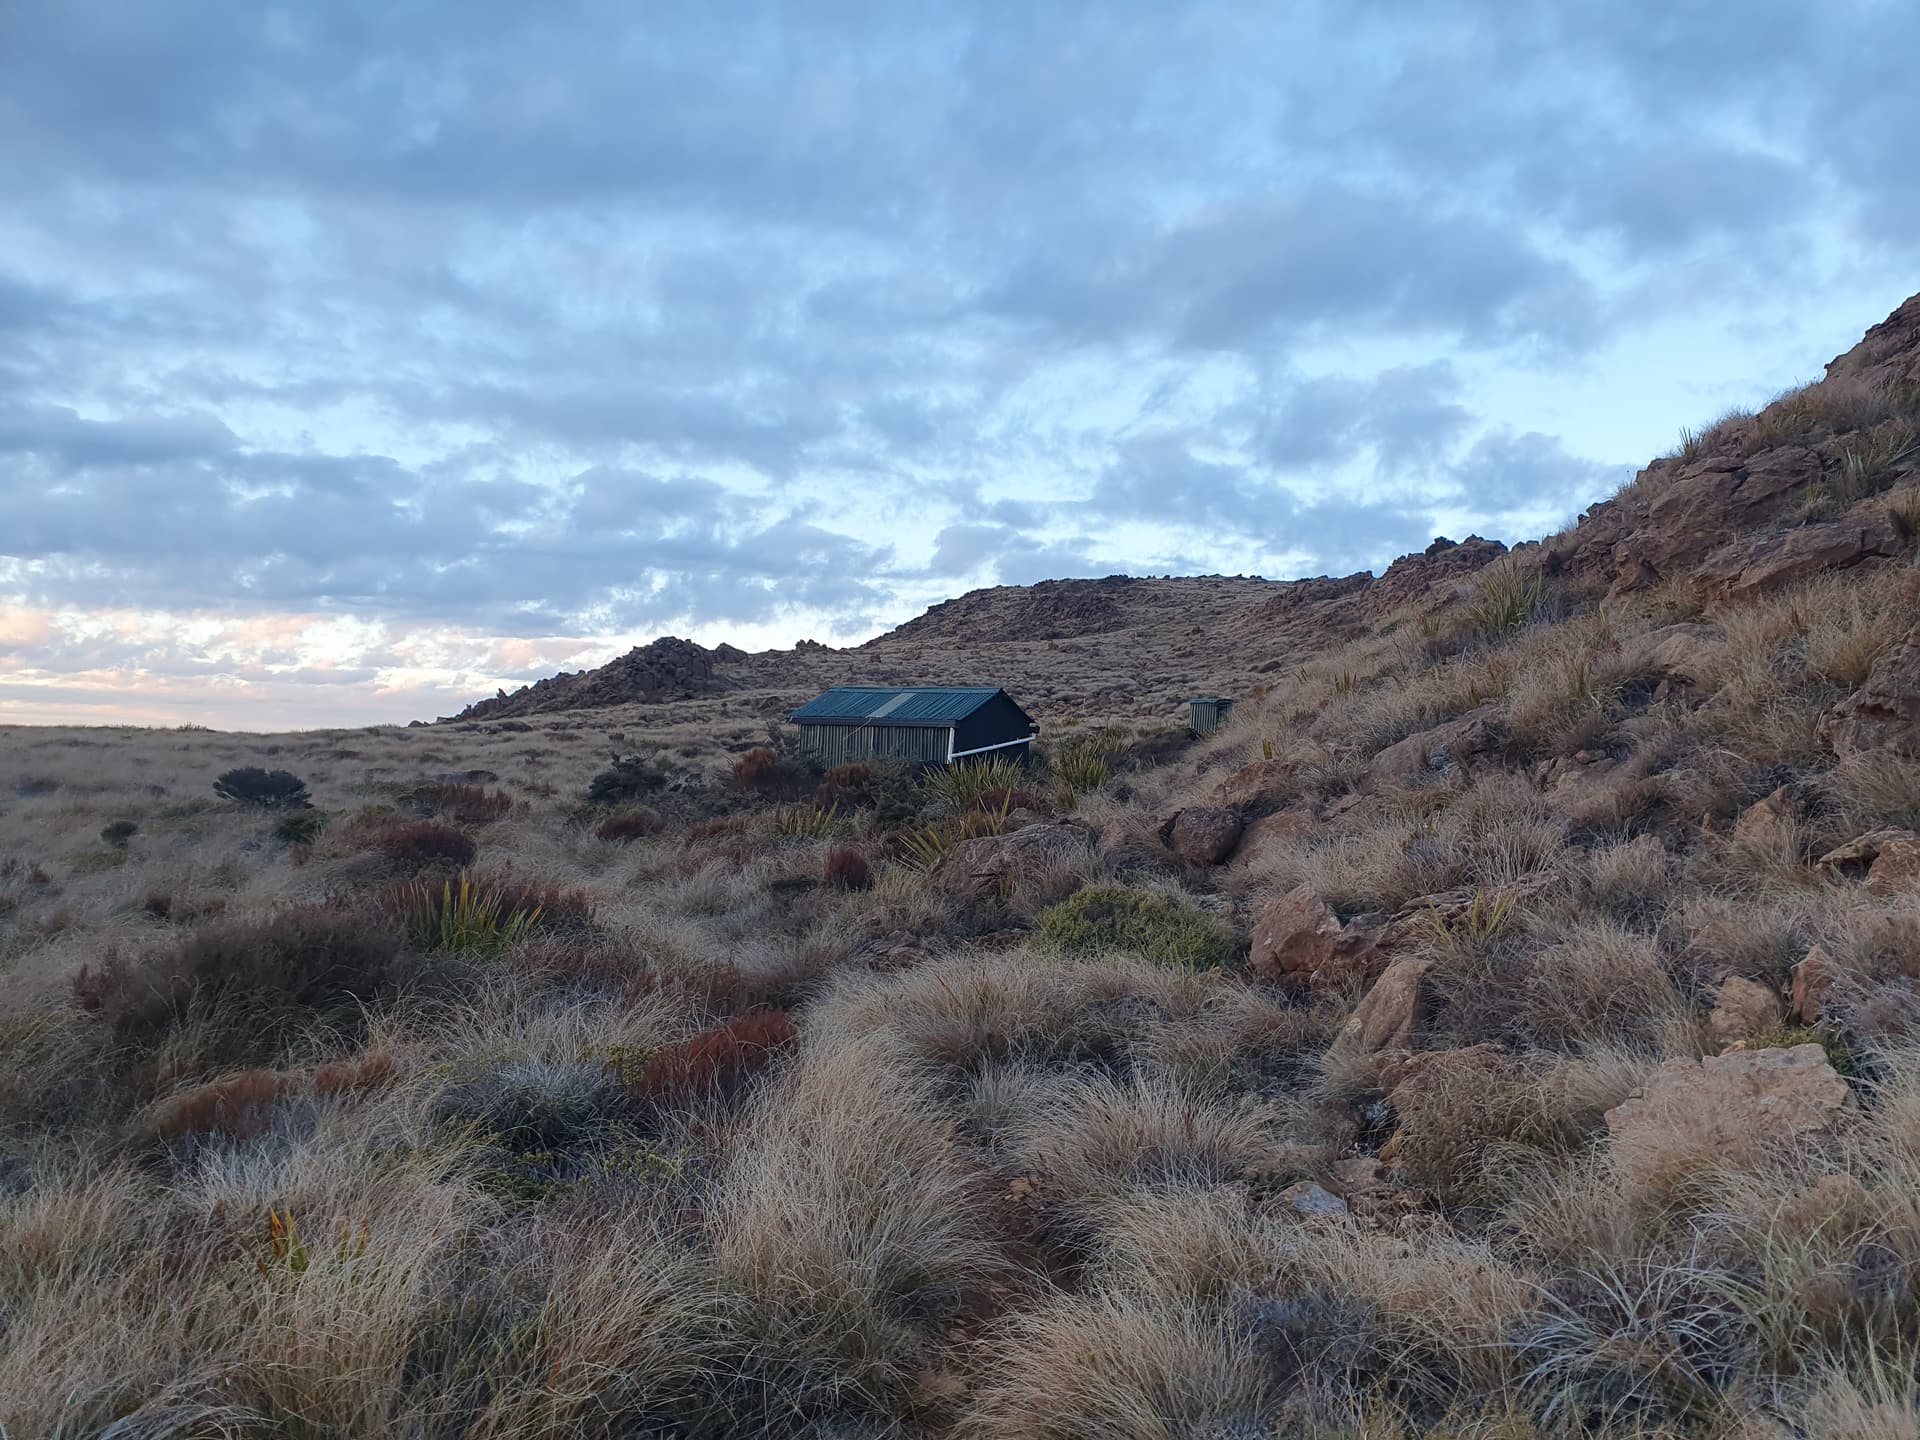
Leaving Slaty Hut, early morning - ZLH/MB-049
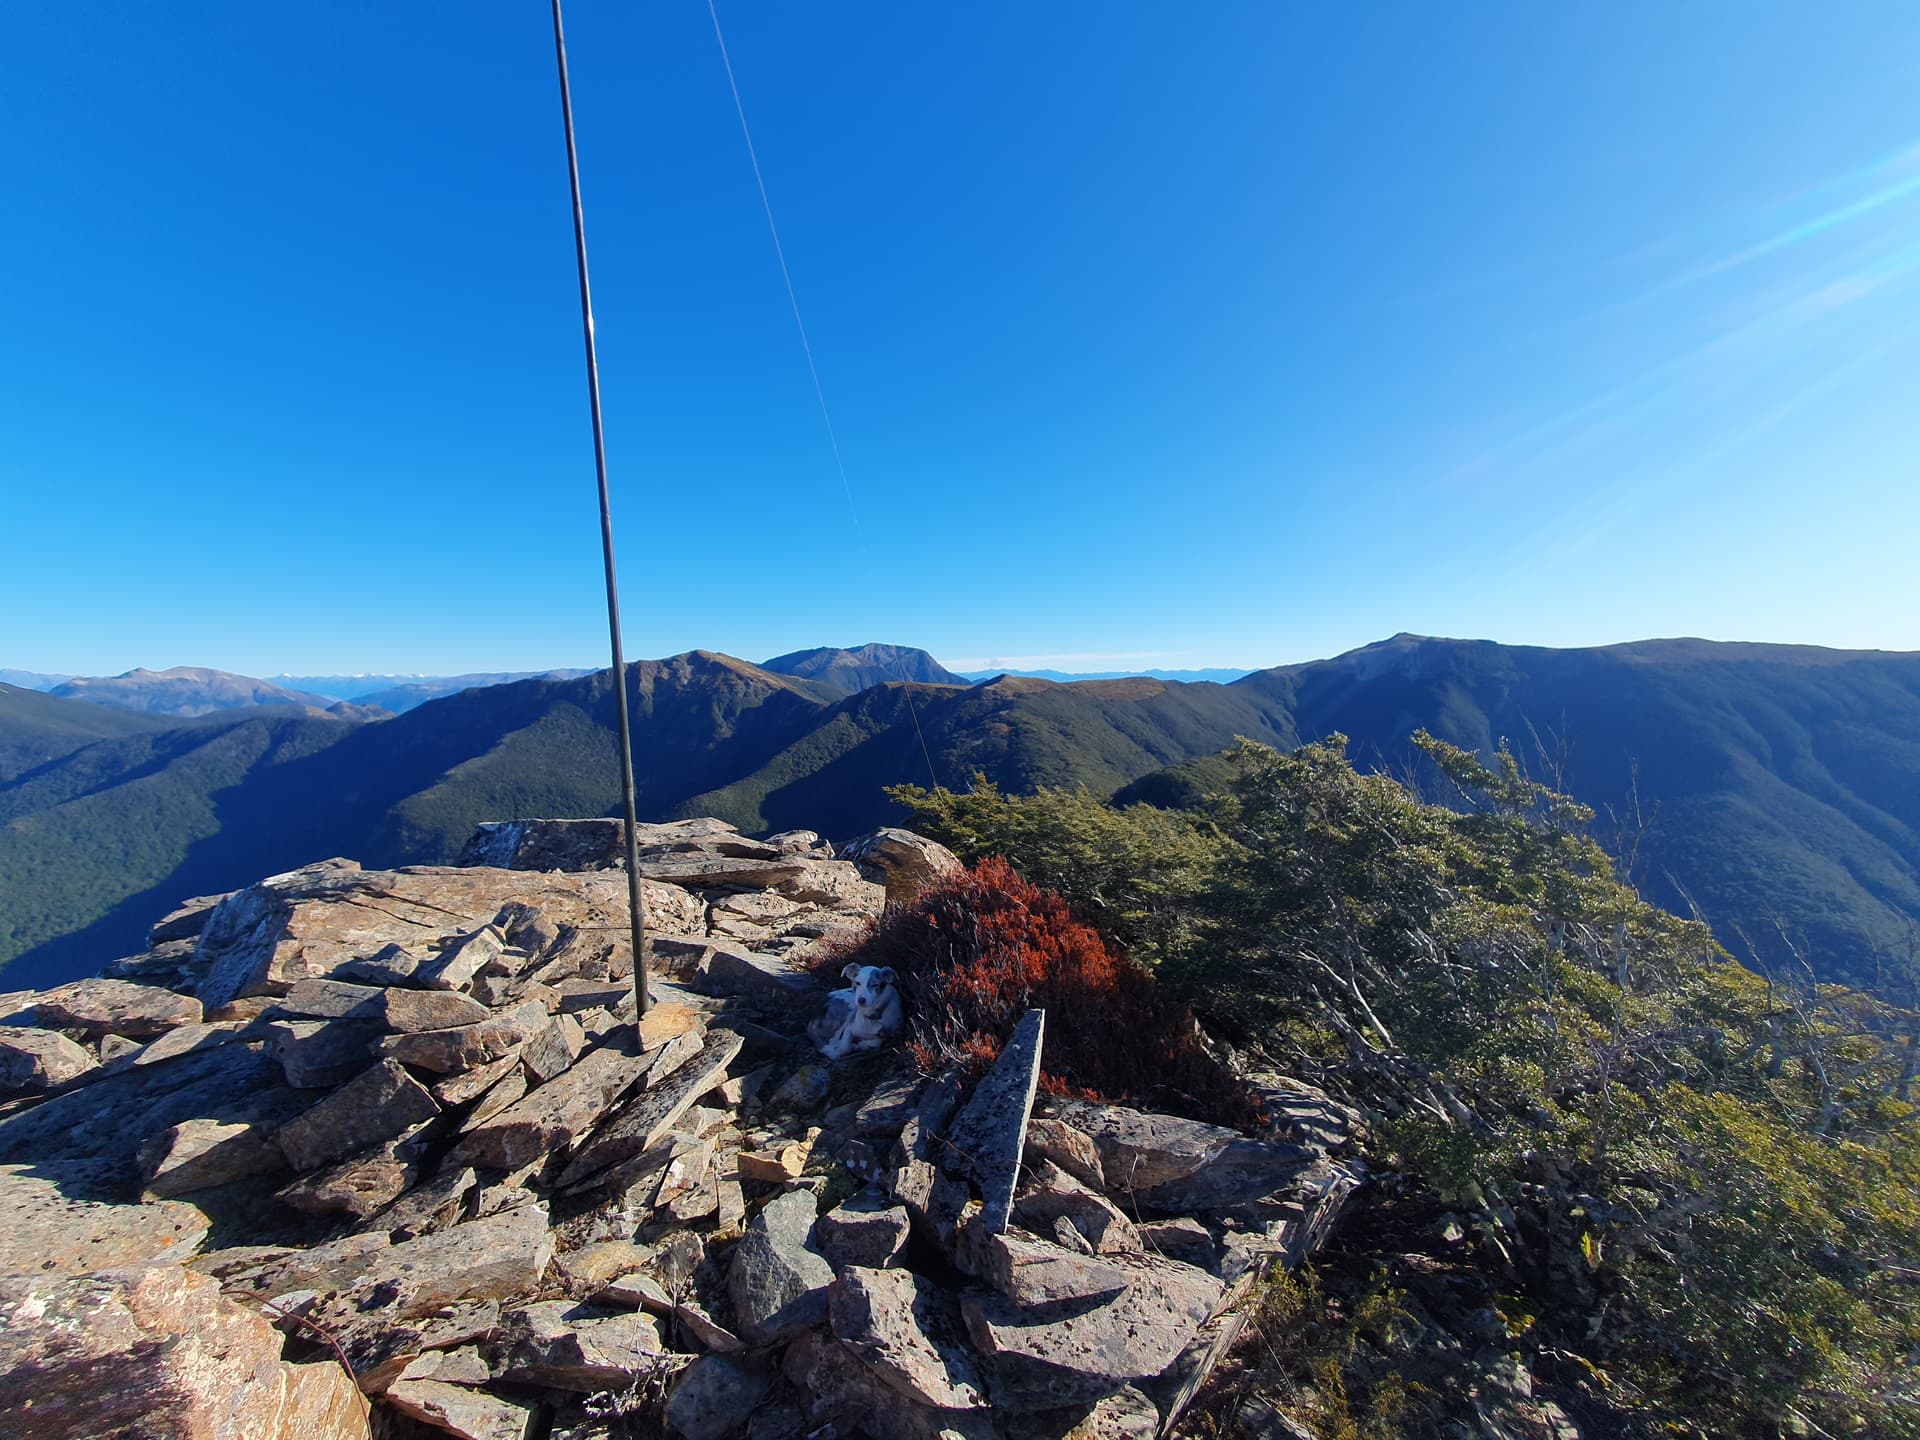
A final ascent along the Alpine Route to Mt Starveall (also bypassed, previously activated) and we swing NE along the Bryant Range. A good, informal, taped route leads through the last scrubby saddle to Hacket Peaks ZL3/TM-099 for the first SOTA activation of the day.
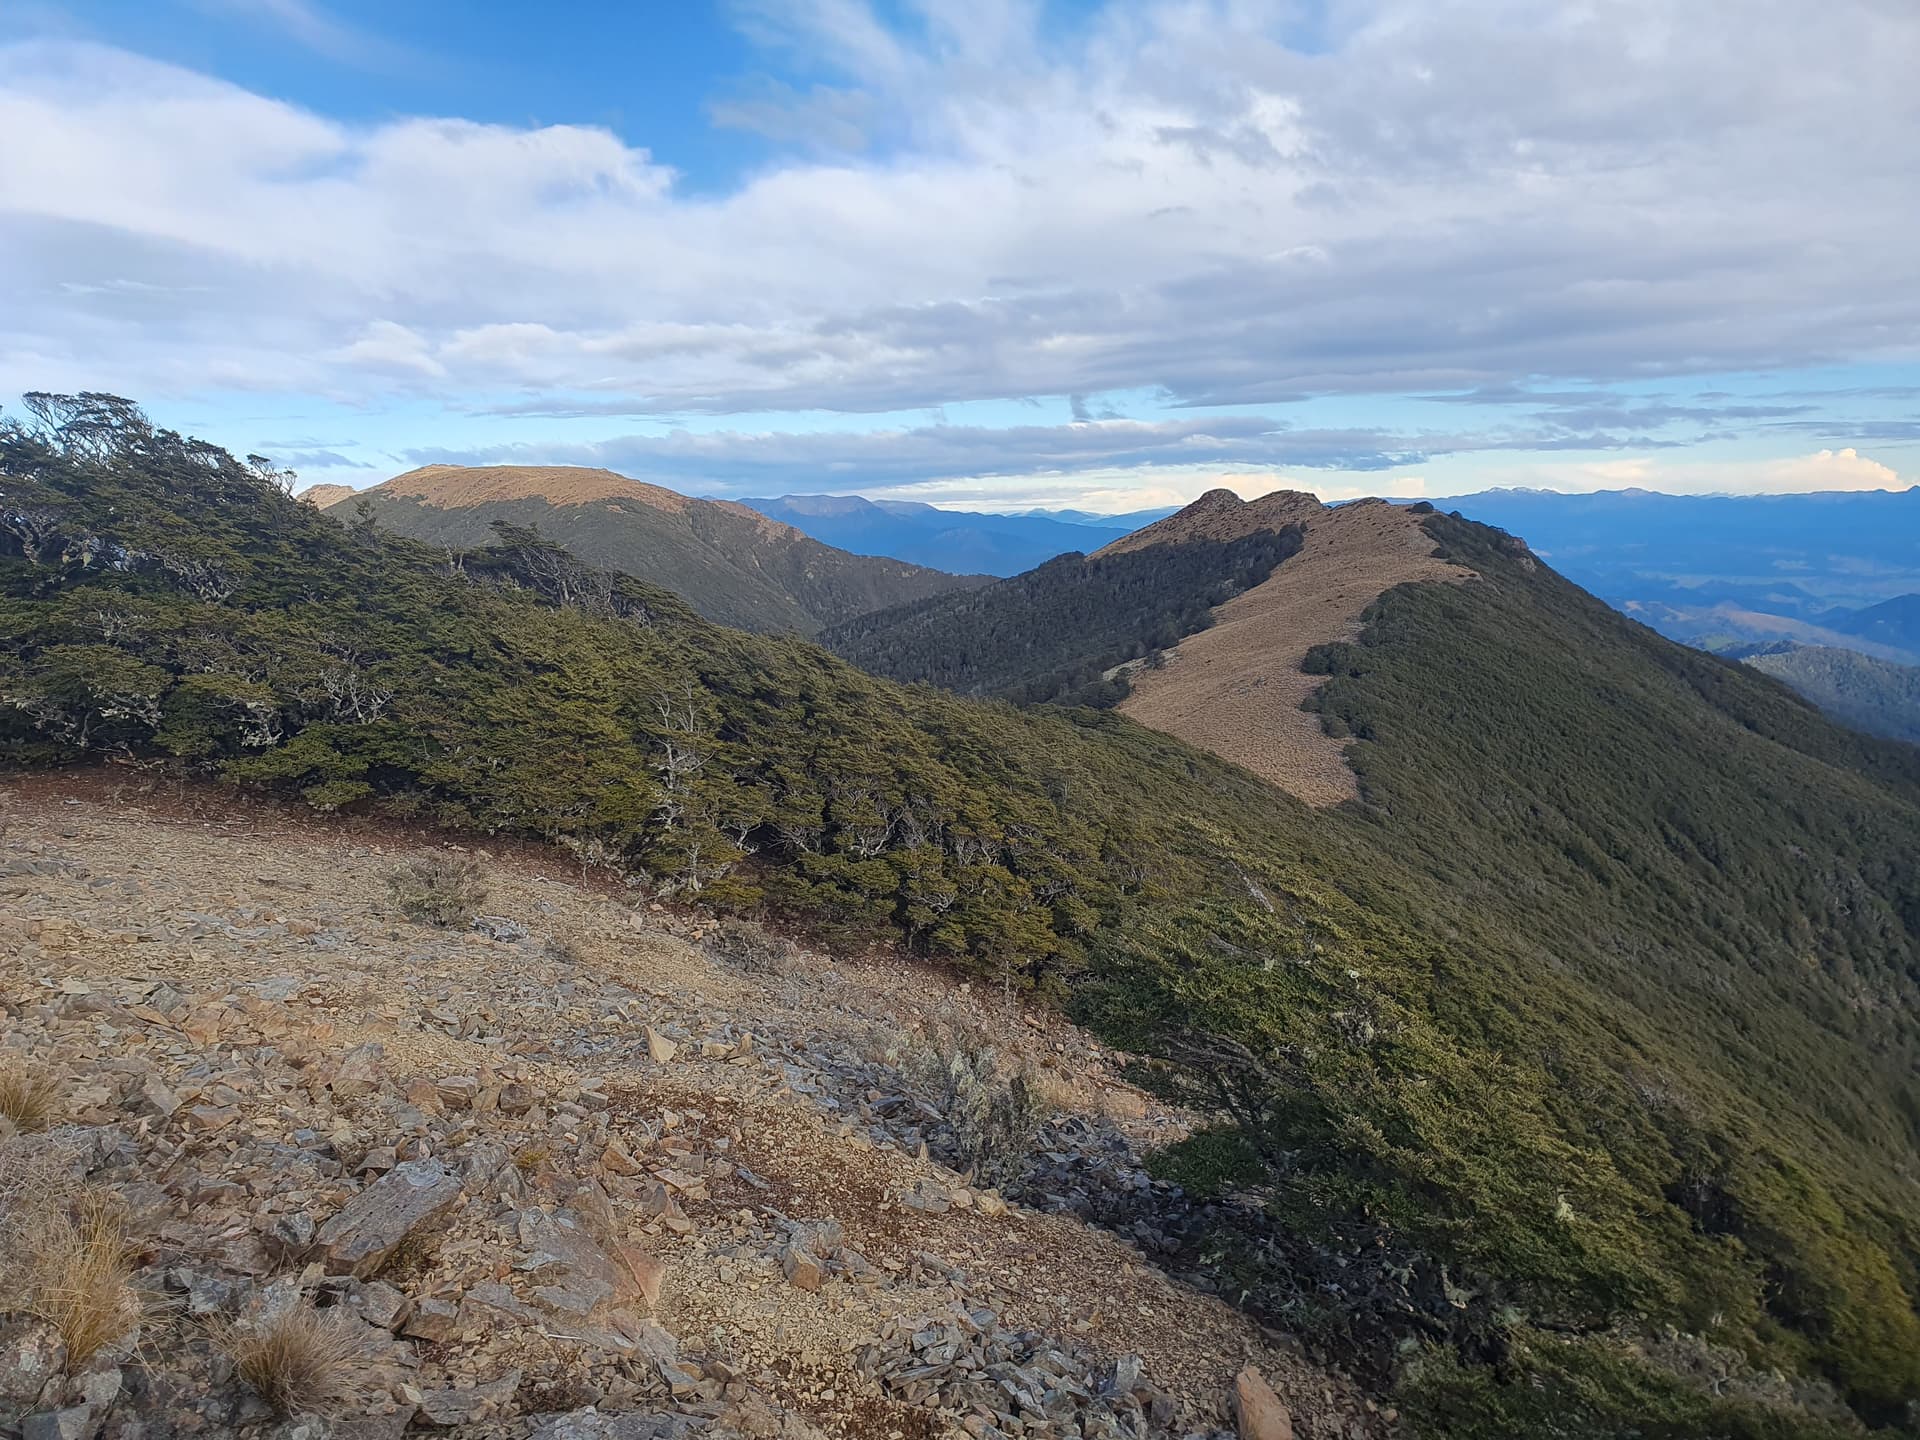
Looking back at Hacket Peaks ZL3/TM-099 (right) with Mt Starveall beyond
The final 3 days of the trip stretch out before us, fading into the haze.
Bryant Range, from NE summit of Hacket Peaks
Beyond Hacket Peaks we drop off the high tops onto meandering bush ridgelines. Going is depressingly easy - goats have chewed out any semblance of an under-story and no recruitment of new-growth seems to be occurring.
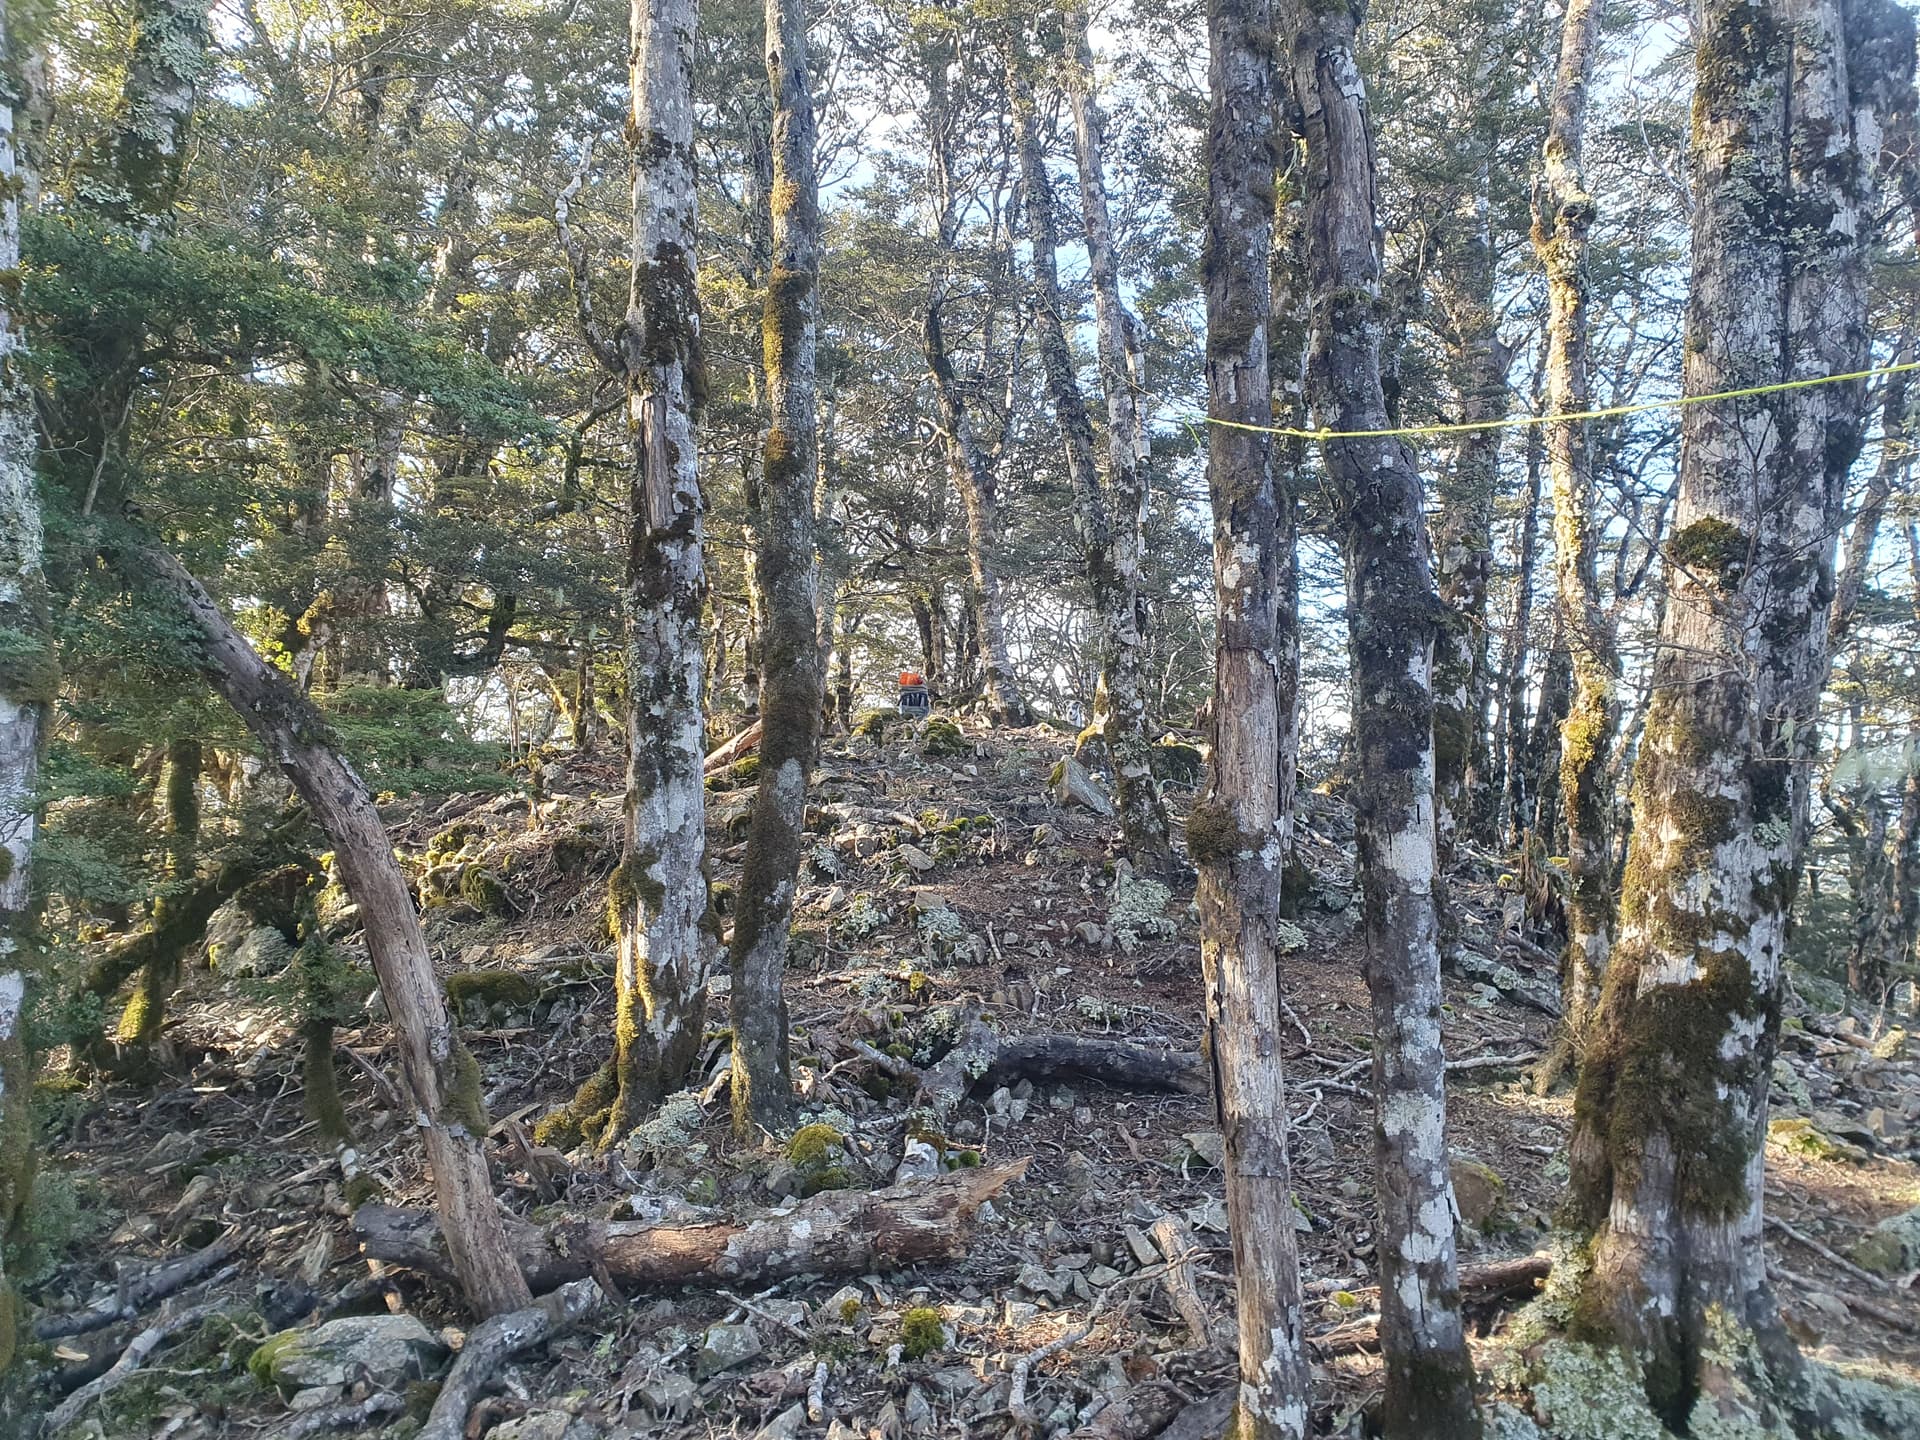
Chewed-out bush on Mt Stewart - ZL3/HMB-117
A steep descent off Mt Stewart leads to Totora Saddle and the start of the tracked section of the Bryant Range. The grey fractured rocks of Slaty and Starveall are replace by the crumbling colours of the mineral belt. For long sections the mineral concentrations become so strong that woody vegetation is restricted to turpentine and stunted manuka. Where trees do exist they are sparse, shallow-rooted and windfall prone.
Approaching ZL3/TM-187
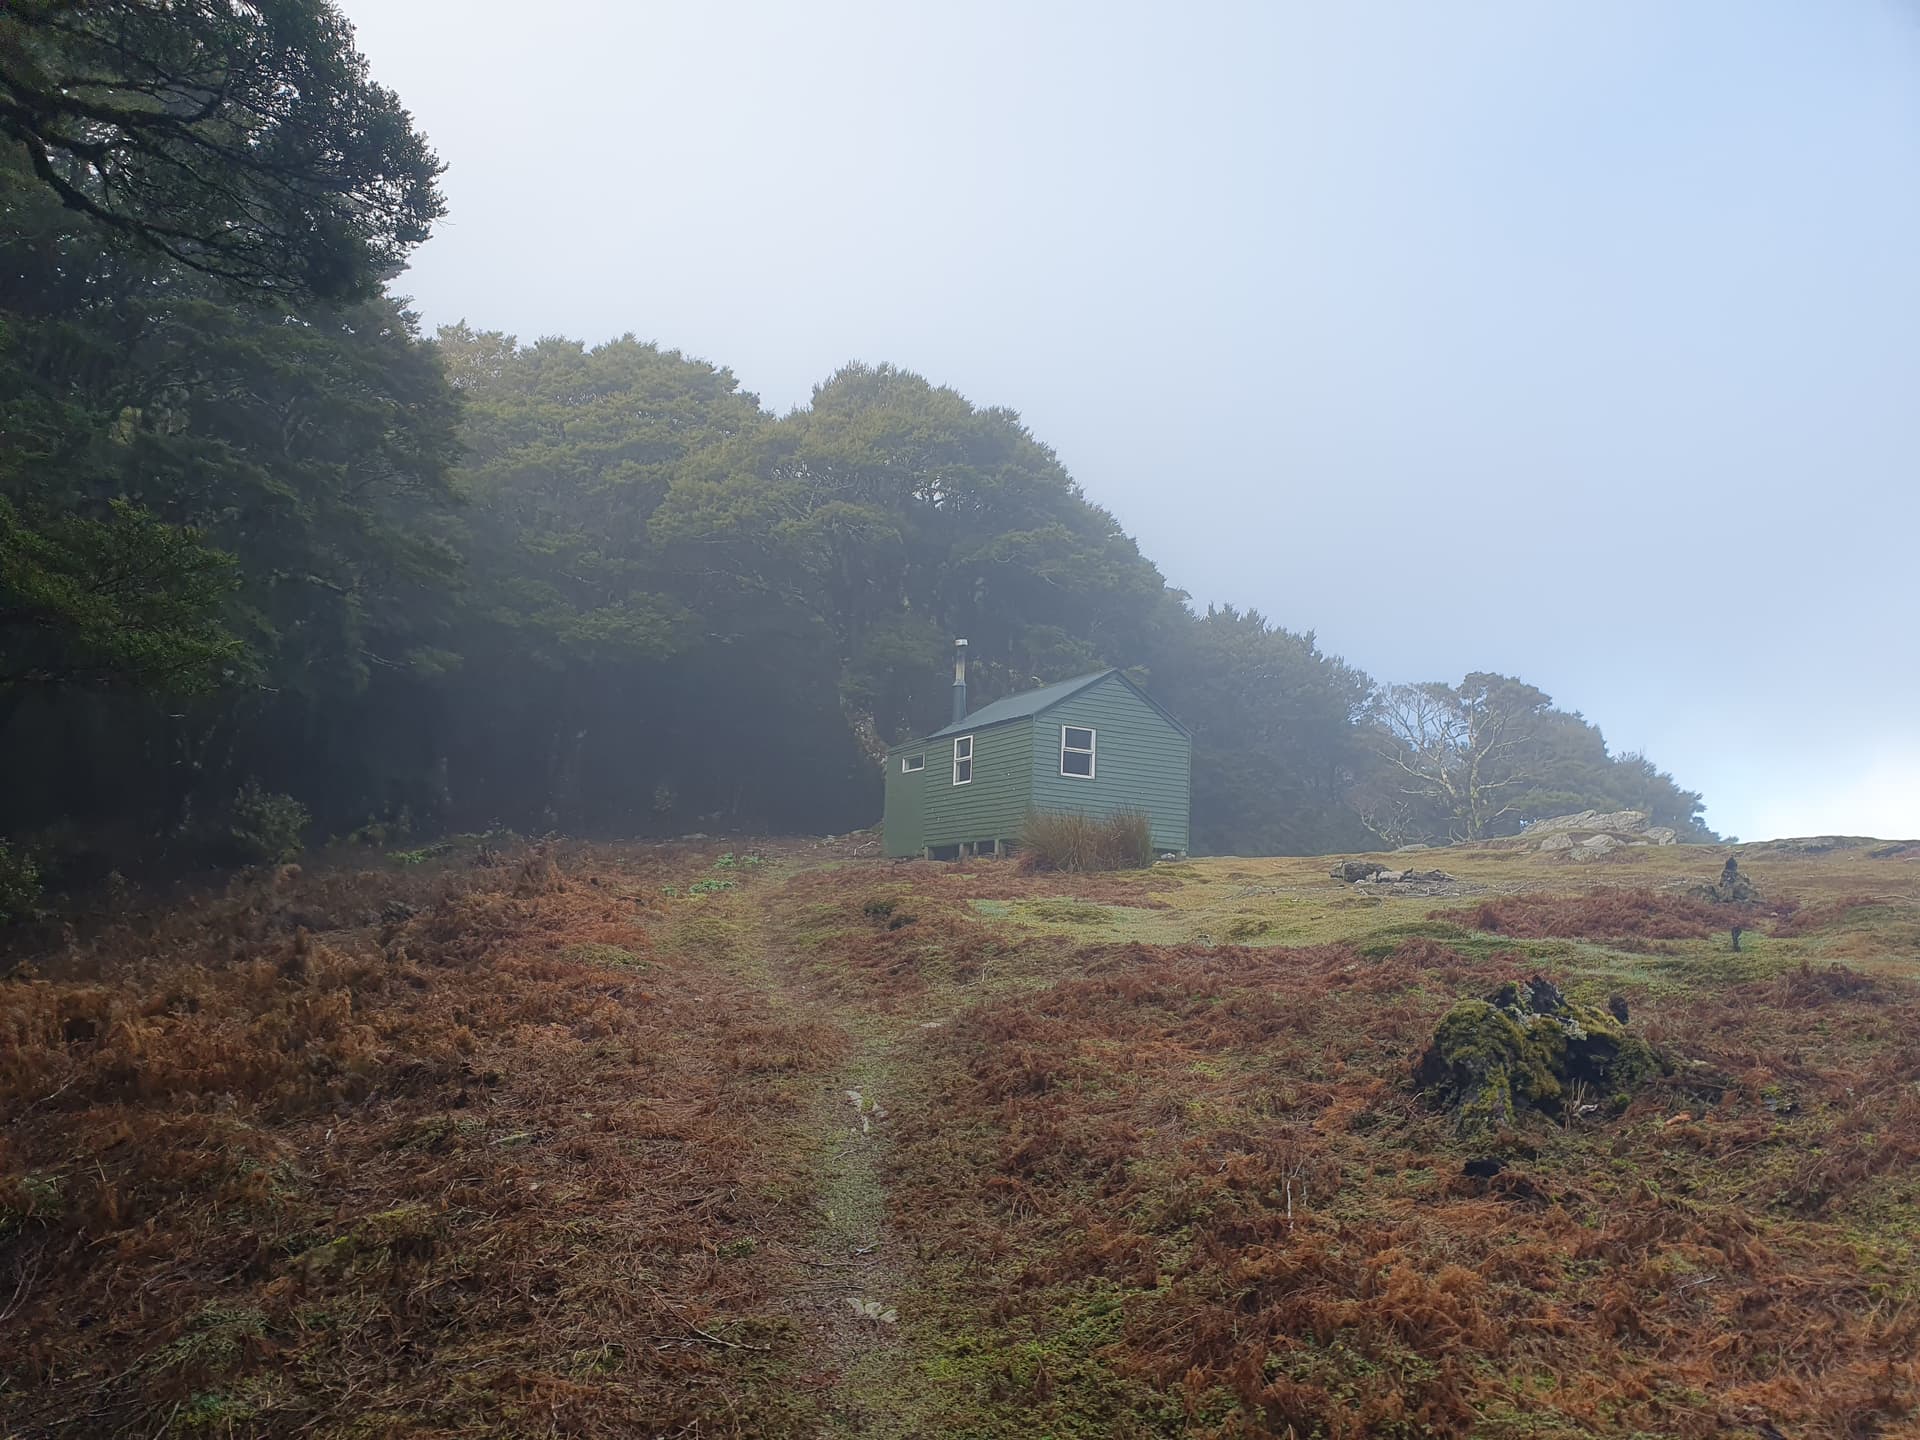
Rocks Hut tempts me as we approach it with 45 mins till dark, but smoke billows from the chimney and I press on up the final ascent of the red boulder-face to Dun Mountain Shelter rather than face a night in a shared hut. Again, the shelter is 100m from the limit of the summit’s activation zone - unfair!
Dun Mountain Shelter - Dun Mountain beyond
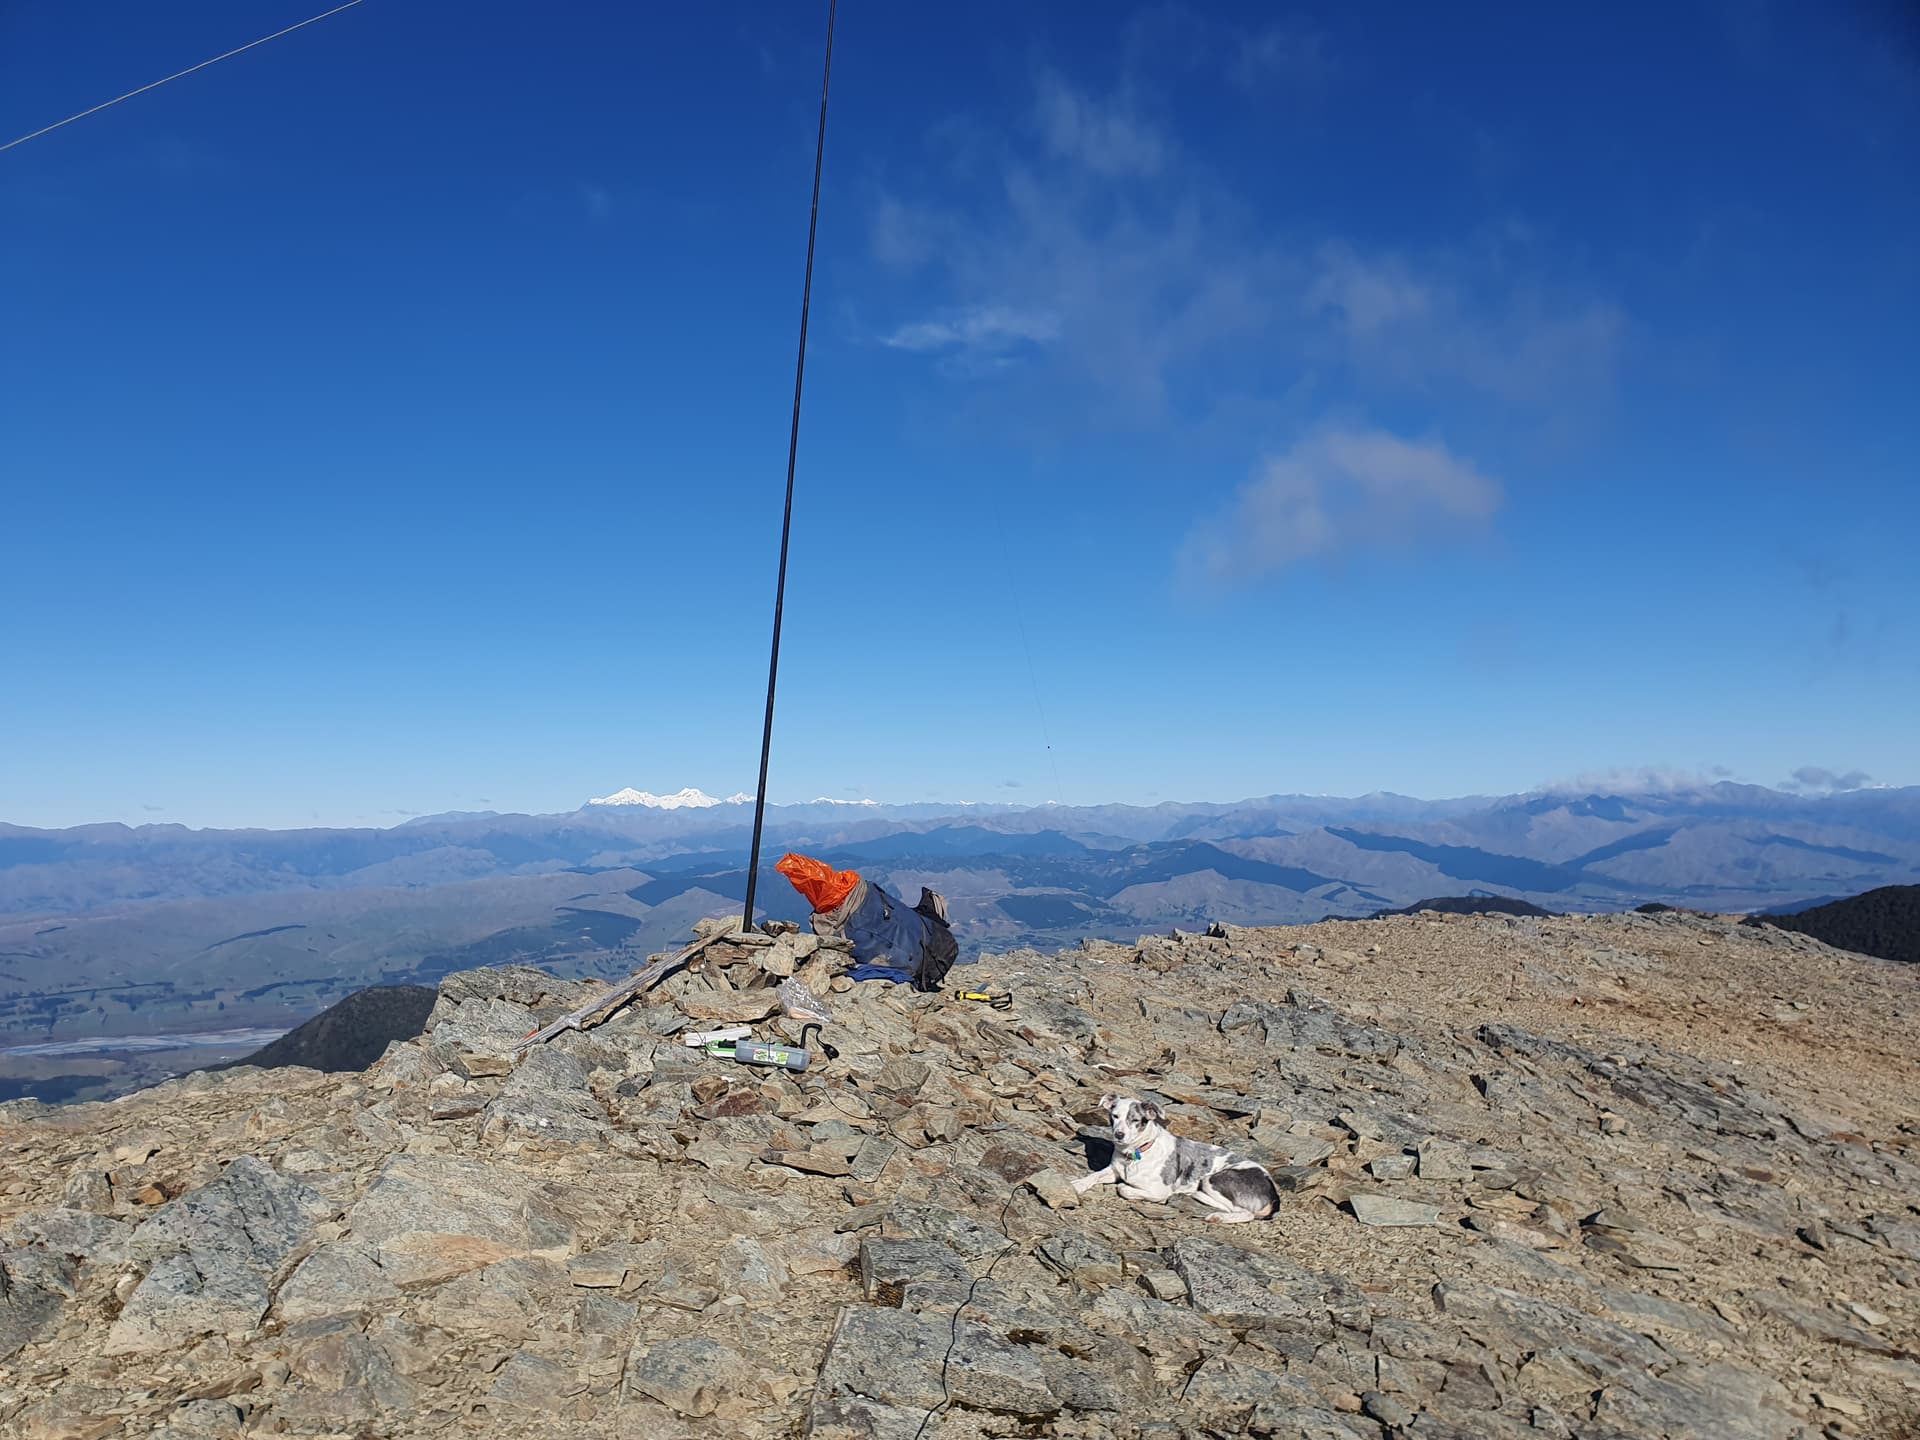
As it’s name befits, Dun Mountain Shelter is basic and sleeping is on a sleeping mat on the floor. Sadly, my thermarest develops a leak and the appropriate patch kit is mysteriously missing from my survival kit. I patch it instead with a tent repair patch, but it is not fully airtight and goes flat every two hours - not something I can sleep through on the sub-zero shelter floor. The views over Nelson are, it must be said, wonderful. But I’d have preferred a good night’s sleep!
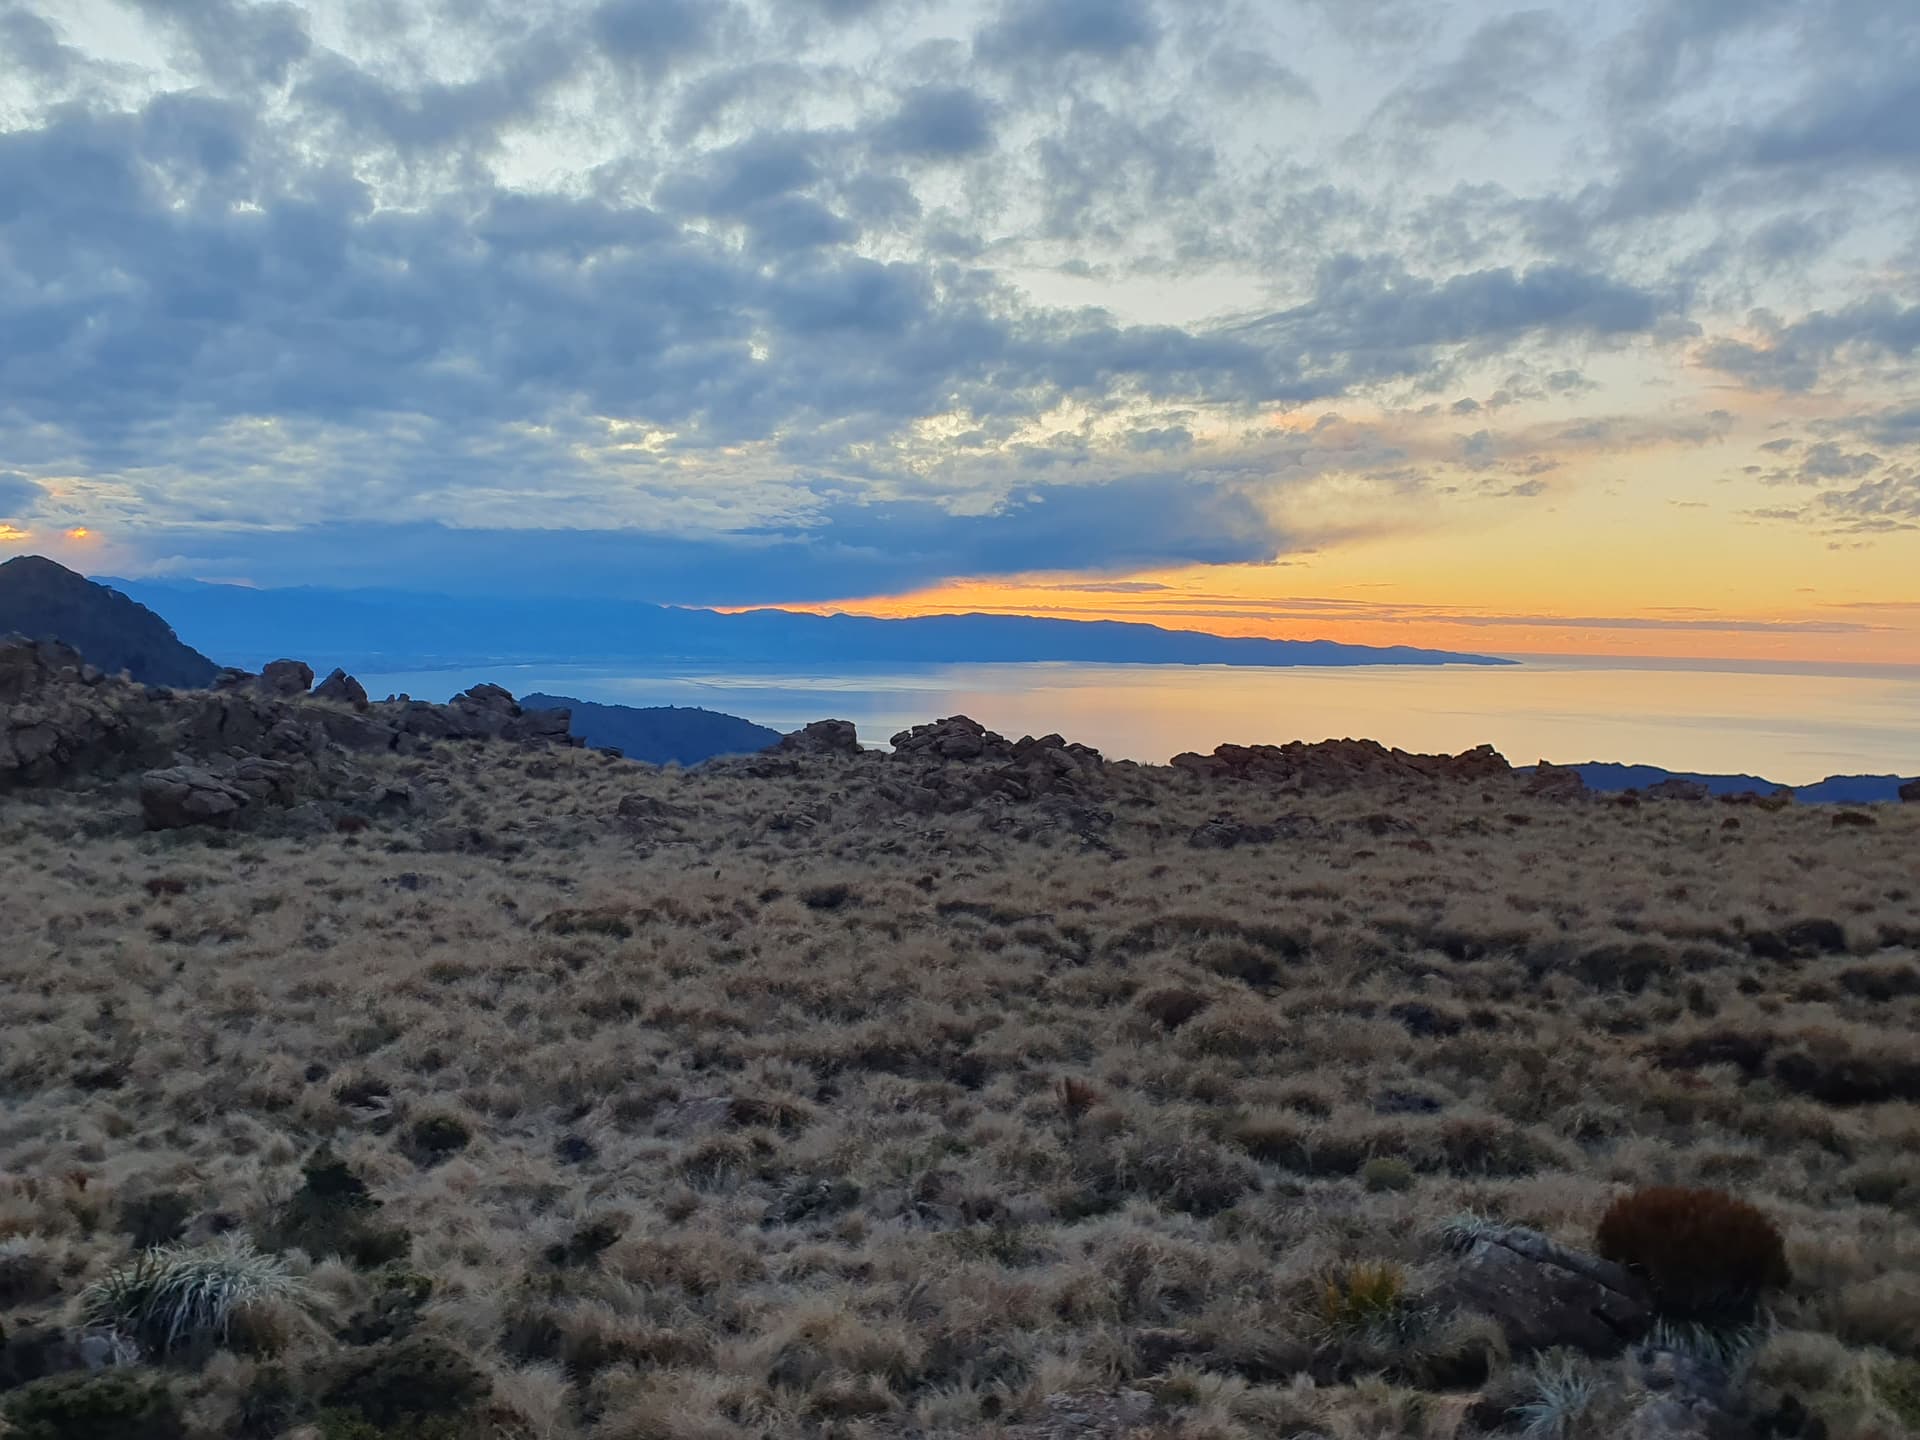
Nelson Bay from Dun Mountain
Distance: 24km
Elevation gain: 1450m
HEMA: 2 summits, 26 QSOs
SOTA: 2 summits, 39 QSOs.
ZLOTA: Dun Shelter, 1 QSO
DX: VK1AO, VK4ANS, VK2IO
Timings: 7:30am - 5:45pm
Day 6
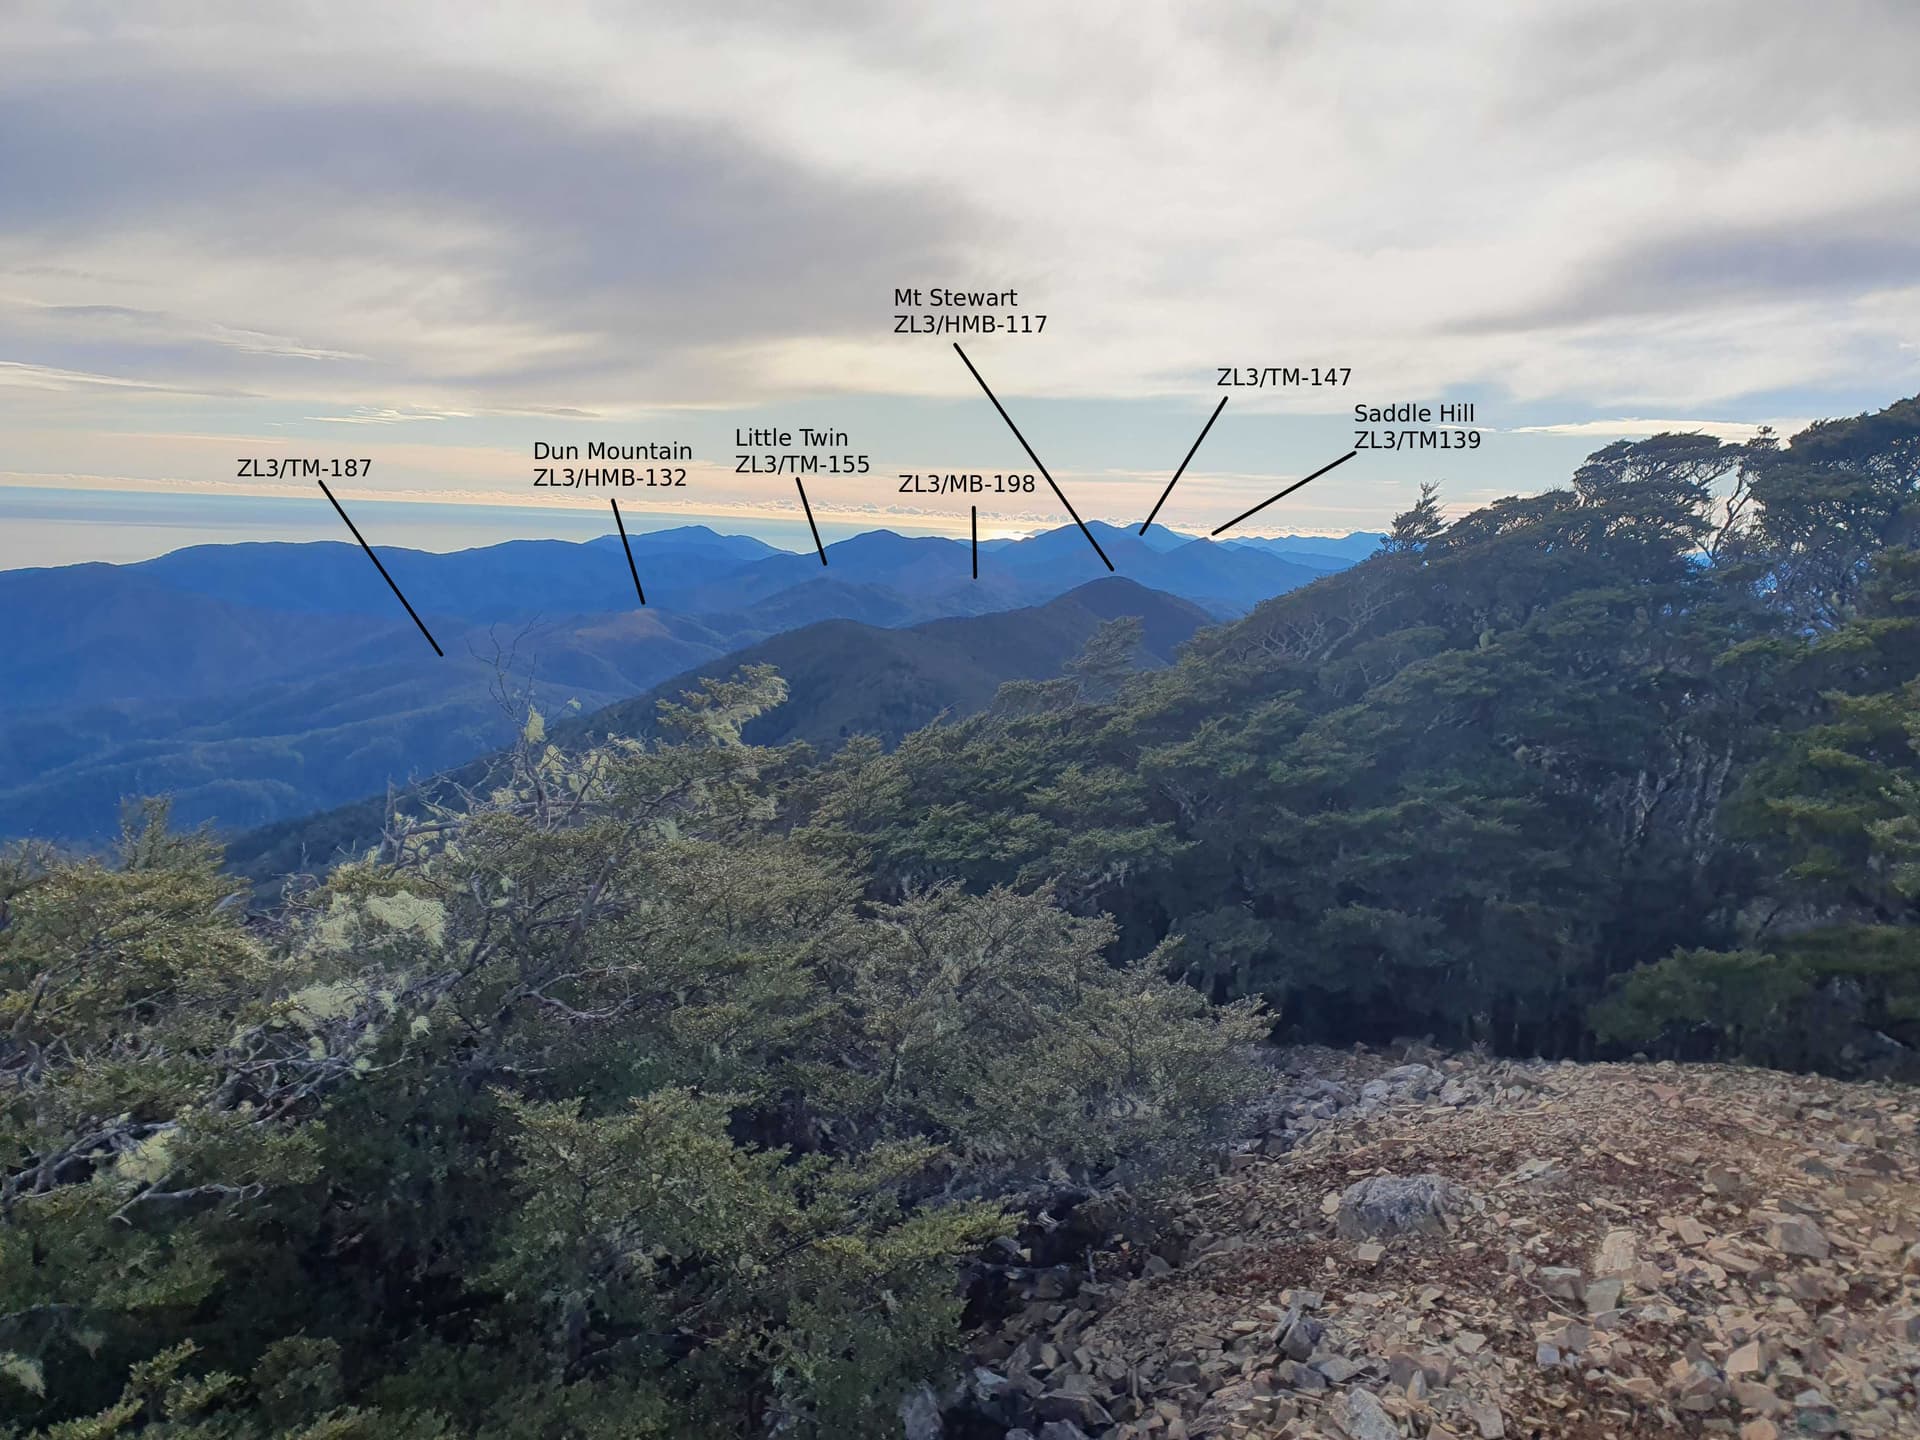
Having activated Dun Mountain the night before, we pass quickly over the summit and continue to descend NE along the Bryant Range. The bush-clad Little Twin is the first summit of the day.
Little Twin - ZL3/TM-155, ZL3/MB-198 beyond, below to right
Progress is good, and I arrive at Dew Lakes with time to make the planned side-trip to the unnamed ZL3/MB-198. A tapped, cut route through marshy scrub to the saddle is a pleasant surprise and we are left only to find our own way up the ferny forested face to the outlying summit.
Activating ZL3/MB-198
Stopping for lunch, and to activate Dew Lakes, ZLL/0087 we reach the low Maungatapu Saddle nearly an hour late at 12:45. I drop all but radio and survival gear at the saddle and make the unwelcome 500m climb back to tops with lightened load. I’d been hoping for a quick return trip to Saddle Hill, but a worryingly old signpost at the saddle states ‘Track Permanently Closed, No Longer Maintained’. Uh-oh.
ZL3/TM-147 (left), and Saddle Hill [ZL3/TM-139] (right) from Maungatapu
Thankfully the signpost may well have been recycled from elsewhere, as the track proves to be in good condition with just two major windfalls to negotiate. I steam past ZL3/TM-147, knowing that if I stop now I’ll not have the energy to continue to Saddle Hill. We arrive at Saddle Hill at 2:15pm, 15 minutes after my absolute cutoff to leave it! A rapid, brusque activation ensues before returning to activate ZL3/TM-147 on or way back to the Maungatpu Saddle.
Repacking all the tramping gear into the pack at the saddle is cruel, the body now accustomed to the lighter pack. But with the last light of day colouring the sky we head down the 4WD Maungatapu Track to where the truck awaits 7km away on the valley floor: present, tyres and windows intact, battery charged and ready to drive us back to the Pelorus Tavern.
Distance: 24km
Elevation gain: 1450m
HEMA: nil
SOTA: 4 summits, 51 QSOs.
ZLOTA: Dew Lake, 12 QSOs
DX: VK2IO
Timings: 7:30am - 5:45pm
Day 7
The late arrival and subsequent closer deployment of the truck meant that the final days tramping along the ridgeline from Saddle Hill over Mt Duppa and down to SH6 was not an option. But is seemed a shame to leave the last two SOTA summit unactivated.
So the next morning we’re up before dawn an the usual 630am alarm, and head off in the truck along State Highway 6 to the Mt Duppa access track. An easement along forestry roads leads to the park boundary at 500m, leaving just a 650m climb to the Mt Duppa [ZL3/TM-156] summit - the first summit of the trip to have previous activations logged against it!
A clear frost morning give crystal views from the summit, and the short 2-summit day gives time for an enjoyable, relaxed, leisurely multi-band activation.
Pelorus Valley from Mt Duppa - ZL3/TM-156
The track ends at the summit, and we’re back to bushbashing as we drop north to the final peak of the range. Things start well, but descending to the saddle we soon enter tortuous scrub. Stumbling on an old hut-site, I guess the area was logged and farmed in the past.
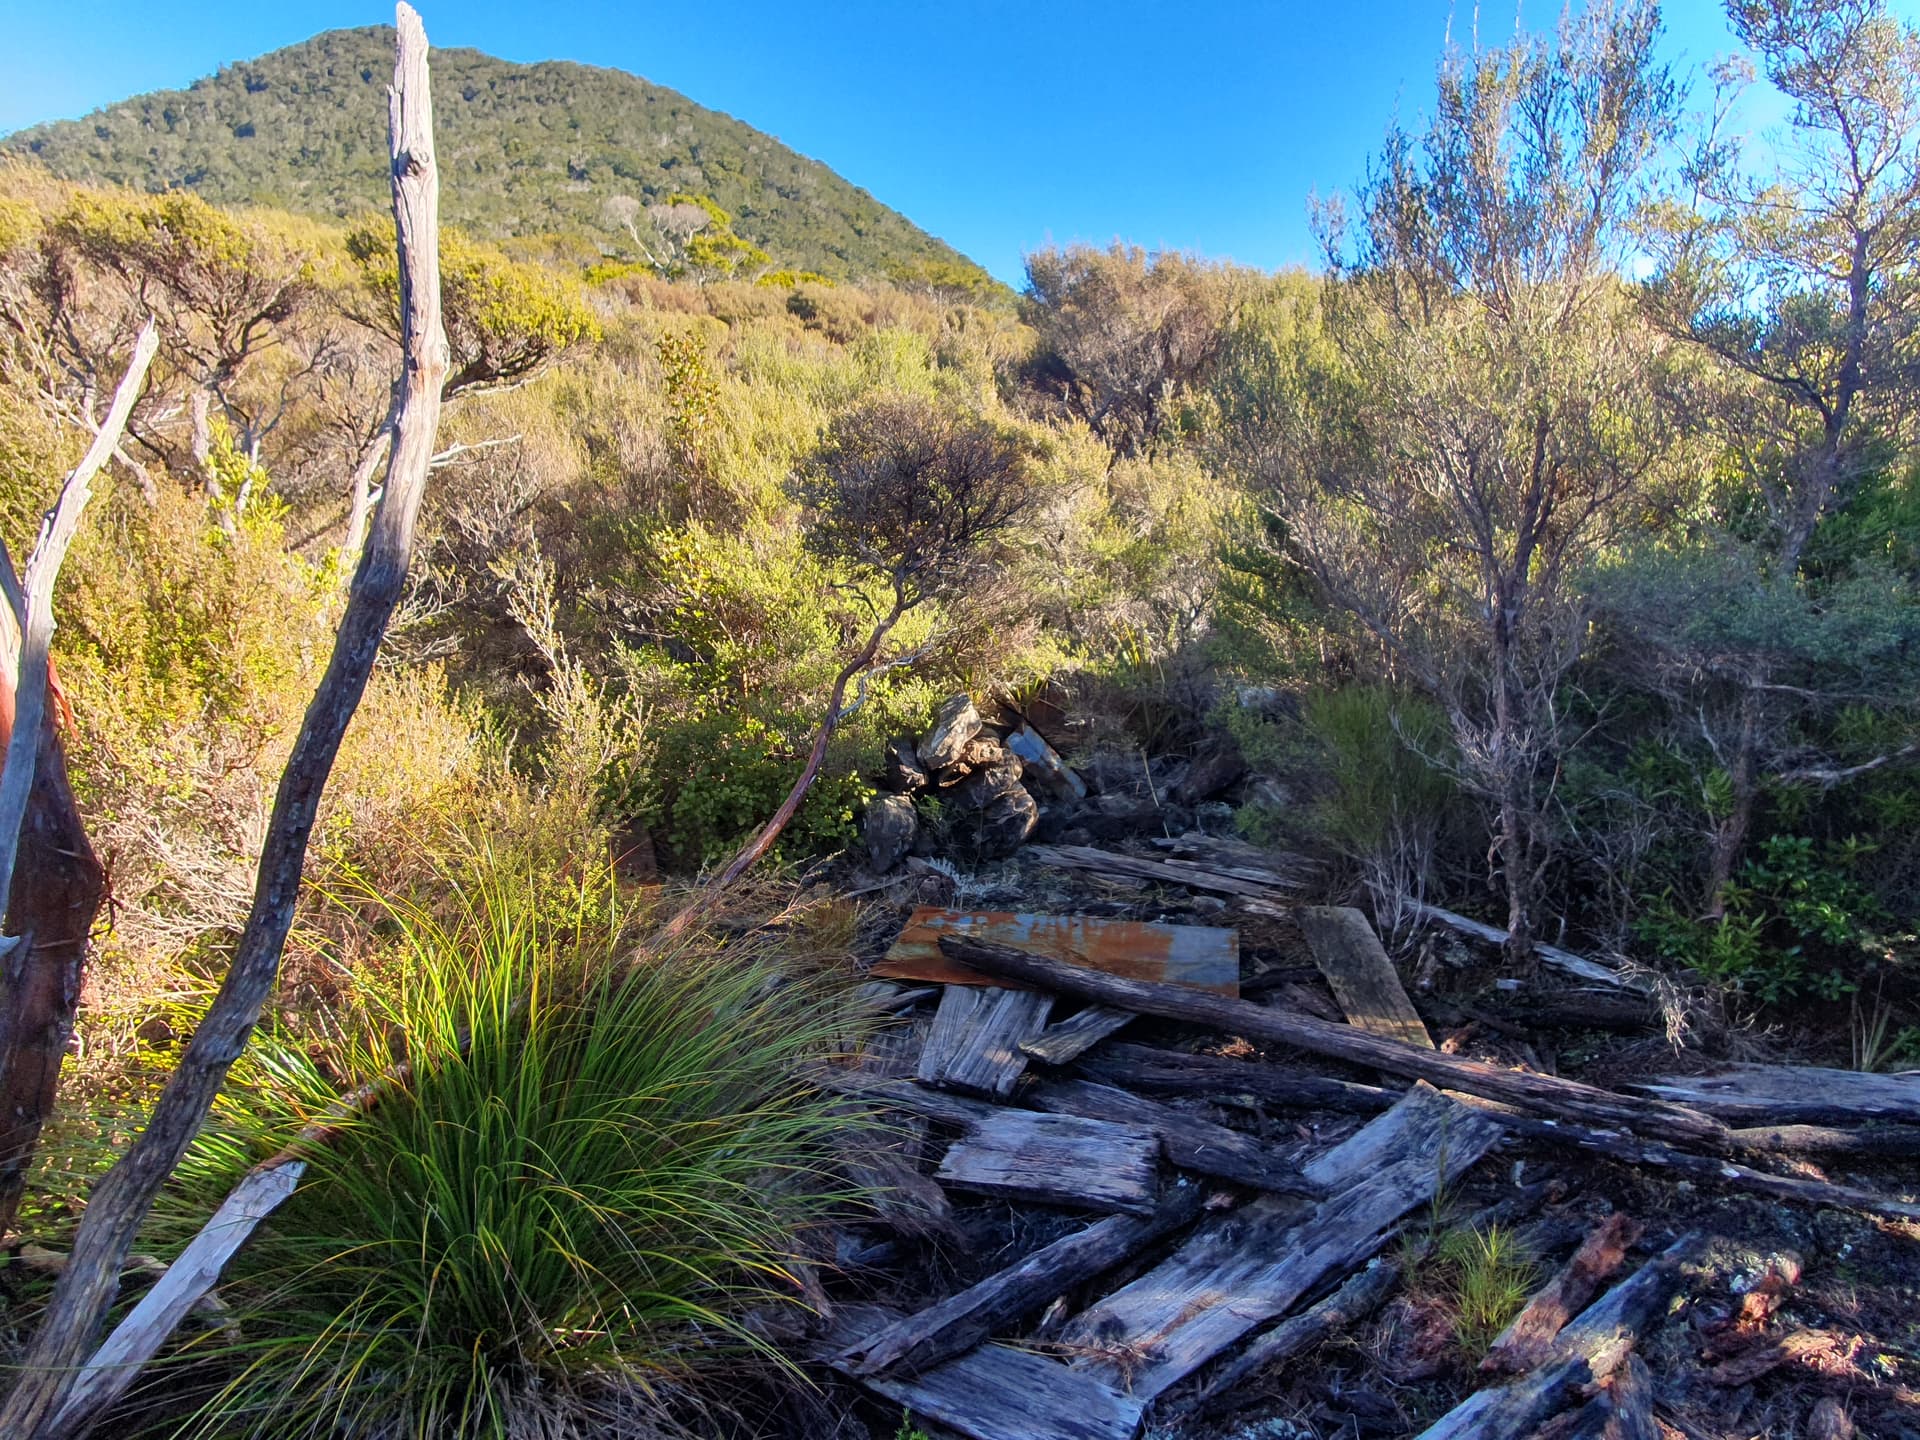
Hut site amidst tortuous scrub between Mt Duppa and ZL3/TM-206
We pick up a decent game trail at the hut, and whilst it does not provide great going, it does at least indicate where to go! It takes 3 hours to travel the 4km to the final summit on ZL3/TM-206, where thankfully open bush provides space to string an antenna.
Thankfully improved vegetation of ZL3/TM-206
Well, there’s no way we’re gong back the way we came, so we take Plan B for an exit and drop to the boundary of commercial forestry and follow the boundary across a steep gully to where it touches the access road. The only good thing about this plan turns out to be that it is shorter - the vegetation has been logged in the past, and is even worse!
Distance: 11km
Elevation gain: 950m
HEMA: nil
SOTA: 2 summits, 34 QSOs.
ZLOTA: nil
DX: VK4NH, VK1AO, VK3SQ, VK2IO, VK3GJG, VK3TDK
Timings: 8:30am - 4:00pm
====
Back at the Pelorus Tavern for a rest and a feed. What can I say about the trip?
Mostly - that what it needed was at least 2 hours more daylight in each day. That would have made the radio relaxed and enjoyable rather than rushed and pressured. But longer days would have meant hotter days, and so water would have been a real issue on the dry tops. And travelling, as it did, for two days along the route of the internationally popular Te Araroa long distance hiking trail, huts would have been chocka. So the winter activation was a compromise, but one probably worth taking.
There was a real feeling about midday on day 2 that I’d bitten off far more than I could chew. We completed the trip, but expectations and behaviour had to change to achieve this. Radio etiquette became efficient and brusque - far more so that I’d have liked. I was forced to abandon our VK colleagues through dropping the higher bands - though thanks for those that did persist on 40m.
But thanks for those many chasers who did persist with me, and tolerate the rapid activation style. I hope that it was an interesting journey for us all.
So did I learn my lesson about biting off more than I can chew?
Well - I did resist the opportunity to try the Pelorus Tavern’s signature foot-tall burger challenge. So maybe.