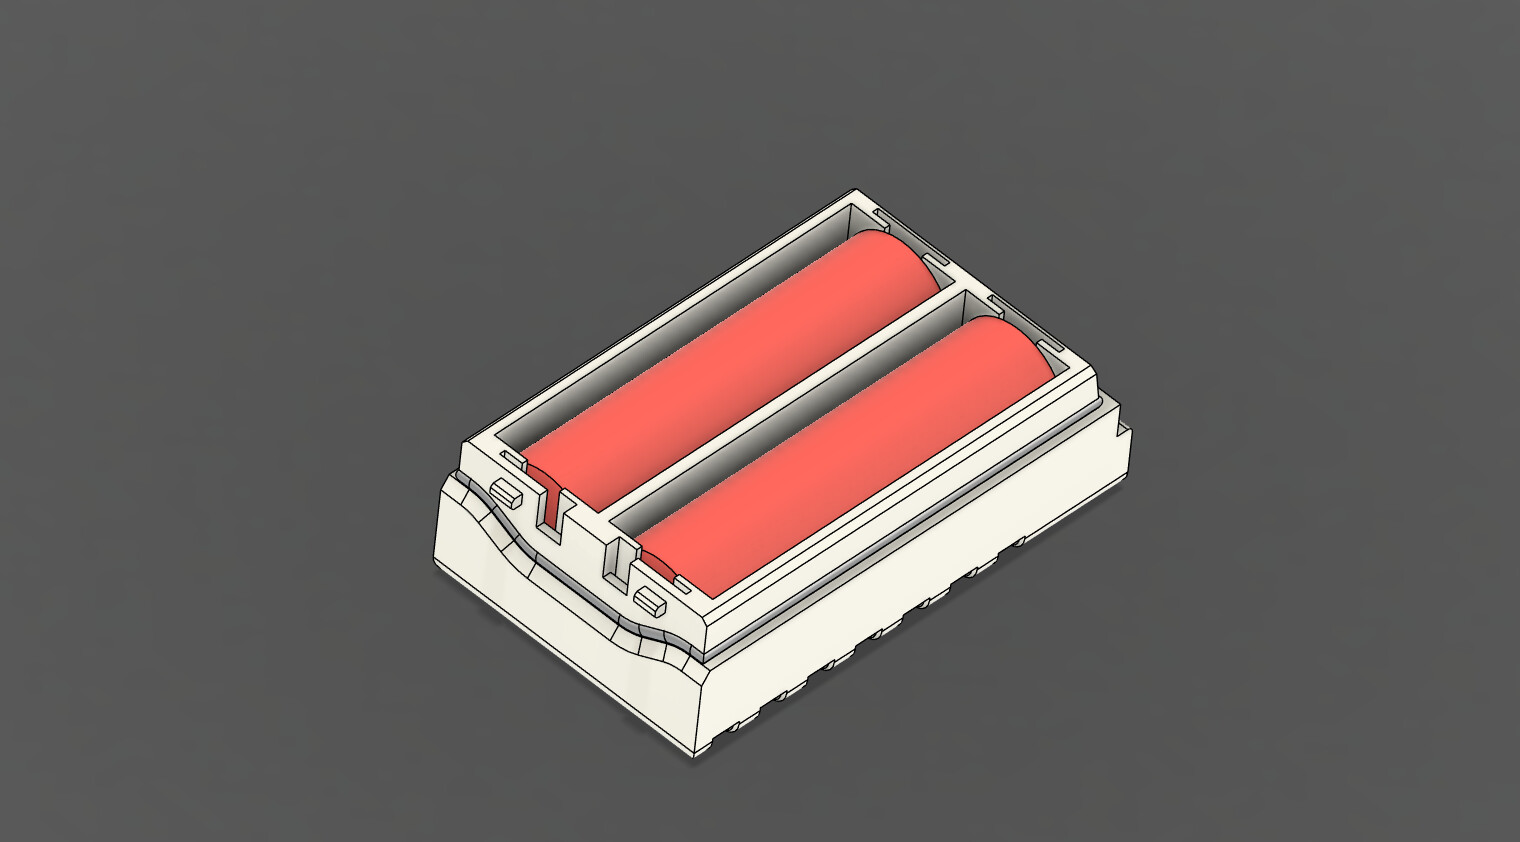
I have recently designed an 18650 battery holder for the Yaeasu FT70D. It works very well, currently at the stage of making a few tweaks to the design, including the addition of a gasket to keep the radio waterproof (the Yaesu original battery includes the same feature)
I’ve managed to arrange the battery contacts such that their rear faces form the connection to the pogo pins on the radio, so the only solderng involved is to link the +ve and -ve contacts with a 10mm long wire.
Unfortunately, there’s not quite enough space to use protected cells, but apart from that I’m quite pleased with it. Next project is to make one for the FT5D.
I use a similar arrangement with my FT818, where the internal has been replaced with a tray holding 18650s and a BMS.
It looks whopper. Really good job. I want to do the 18650 pack for my incoming FT60E. Doesn’t look as polished as this but still great someone was kind enough to share their design.
I was looking up a multi filament FIFA World Cup model to print out today with some gold PLA I am testing from Amazon Basics. Note: The 1kg spool doesn’t like the AMS so I need a steer on how to get it to work other than using the outer external spool.
Talking of which, someone mentioned something here a while back (I think, unless I imagined it) about TPU being a pain in the rear to work with.
Whoever said that is right. I printed a seal for a battery box today. Turned out great first time, but you have to set it up using the external spool holder as you can’t use regular TPU in an AMS (Bambu now make TPU for AMS specific filament now but I’ve not tried it).
It doesn’t half make a gloopy mess when extracting and bed levelling though!
Anyway, extremely long ramble over, when I found the World Cup model, this showed up. I thought some folks here might like to try it. Looks interesting!
Useful print here for a Slim Jim on a mast. I use the Spectrum Communications Slim G, with a small S Clip through one of the holes, you can attach the cord to the other end of the S Clip and hang it off there.
I didn’t print the bottom part as I use the clip someone else (callsign escapes me, sorry) made and posted here.
Doesn’t work great with a Lakeside pole from Decathlon as the pole is too flexible so it bends over too far. I used a Wimo standard 7m pole. I have the Wimo 10m ‘heavy duty’ pole too, haven’t tested but assume it would work the same.
Seen that… you need an Isle of Man attachment aka a third leg.
I’ve seen impressive bends when using those poles to support an inv-V dipole due the wind drag at the top. Sometimes you can use the inv-V legs to brace against the wind. Normally you can’t and I have a piece of 1.5mm Nylon thread about 8m long, for a 5m pole. It attaches to the top of the pole and you run it back into the wind to a tent peg. It works at the top but watching the pole buck and bend in strong winds it maybe would work better about 1m from the top.
Like this. Antenna is setup as inverted L (inverted 7) running from the top of the 5m pole to about 1m up, from the top it runs out to a 1m pole in the distance. Highlighted with dashed red line in the pic. The top support is highlighted in yellow. Cnoc-na-Maoile GM/NS-134 in 40mph winds.
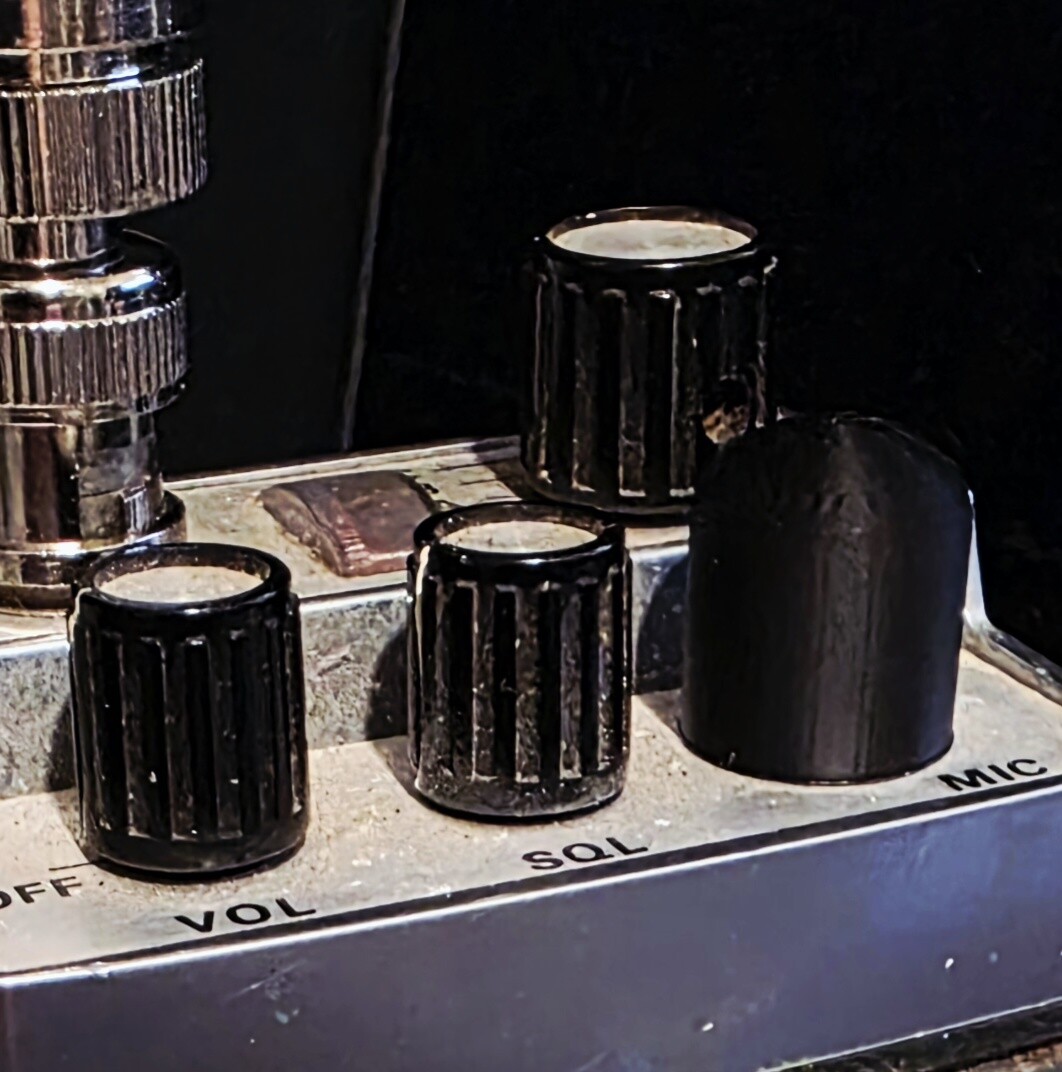
Presenting… The Yaesu FT-202R Dust-o-Tron 9000 Type R
A quick and dirty 3D print I made for the Yaesu FT-202R. It is a simple dust cap for the microphone port. I’m working on an improved version you could print in TPU and have it like a cap that dangles off like a key chain when in use and that you can replace when you are finished using the microphone port.
Simple enough and prints in PLA. Use your finest quality settings for best results. Please feel free to remix it, improve it etc if you want to. It’s not much I know, but I hope it helps someone out.
This is the dust cap printed and installed on my (rather dirty, I only got it in the post today so it needs a clean!) Yaesu FT-202R: