It’s been a while since I posted anything about this, and it seems that a couple of people were interested in this.
After a few problems and false starts, the system is now up & running.
Here is an update on the equipment side of things. There is a separate thread in which the antenna arrangements are discussed, so I will post updates to the antenna system there. This is specifically about the equipment side of things:-
Equipment:-
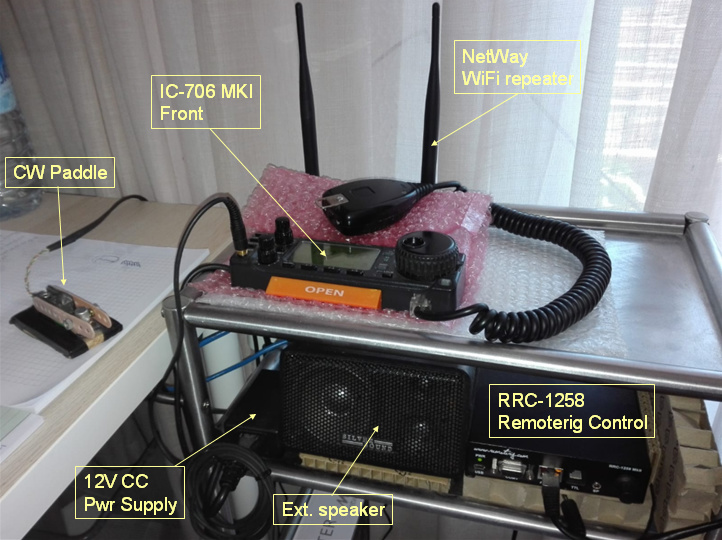
RemoteRig boxes
Yaesu FT-857
mAT-30 automatic antenna tuner

Solar panel, plastic salt bin housing the equipment and 4G antenna

Batteries and the two equipment boxes inside the plastic salt bin.
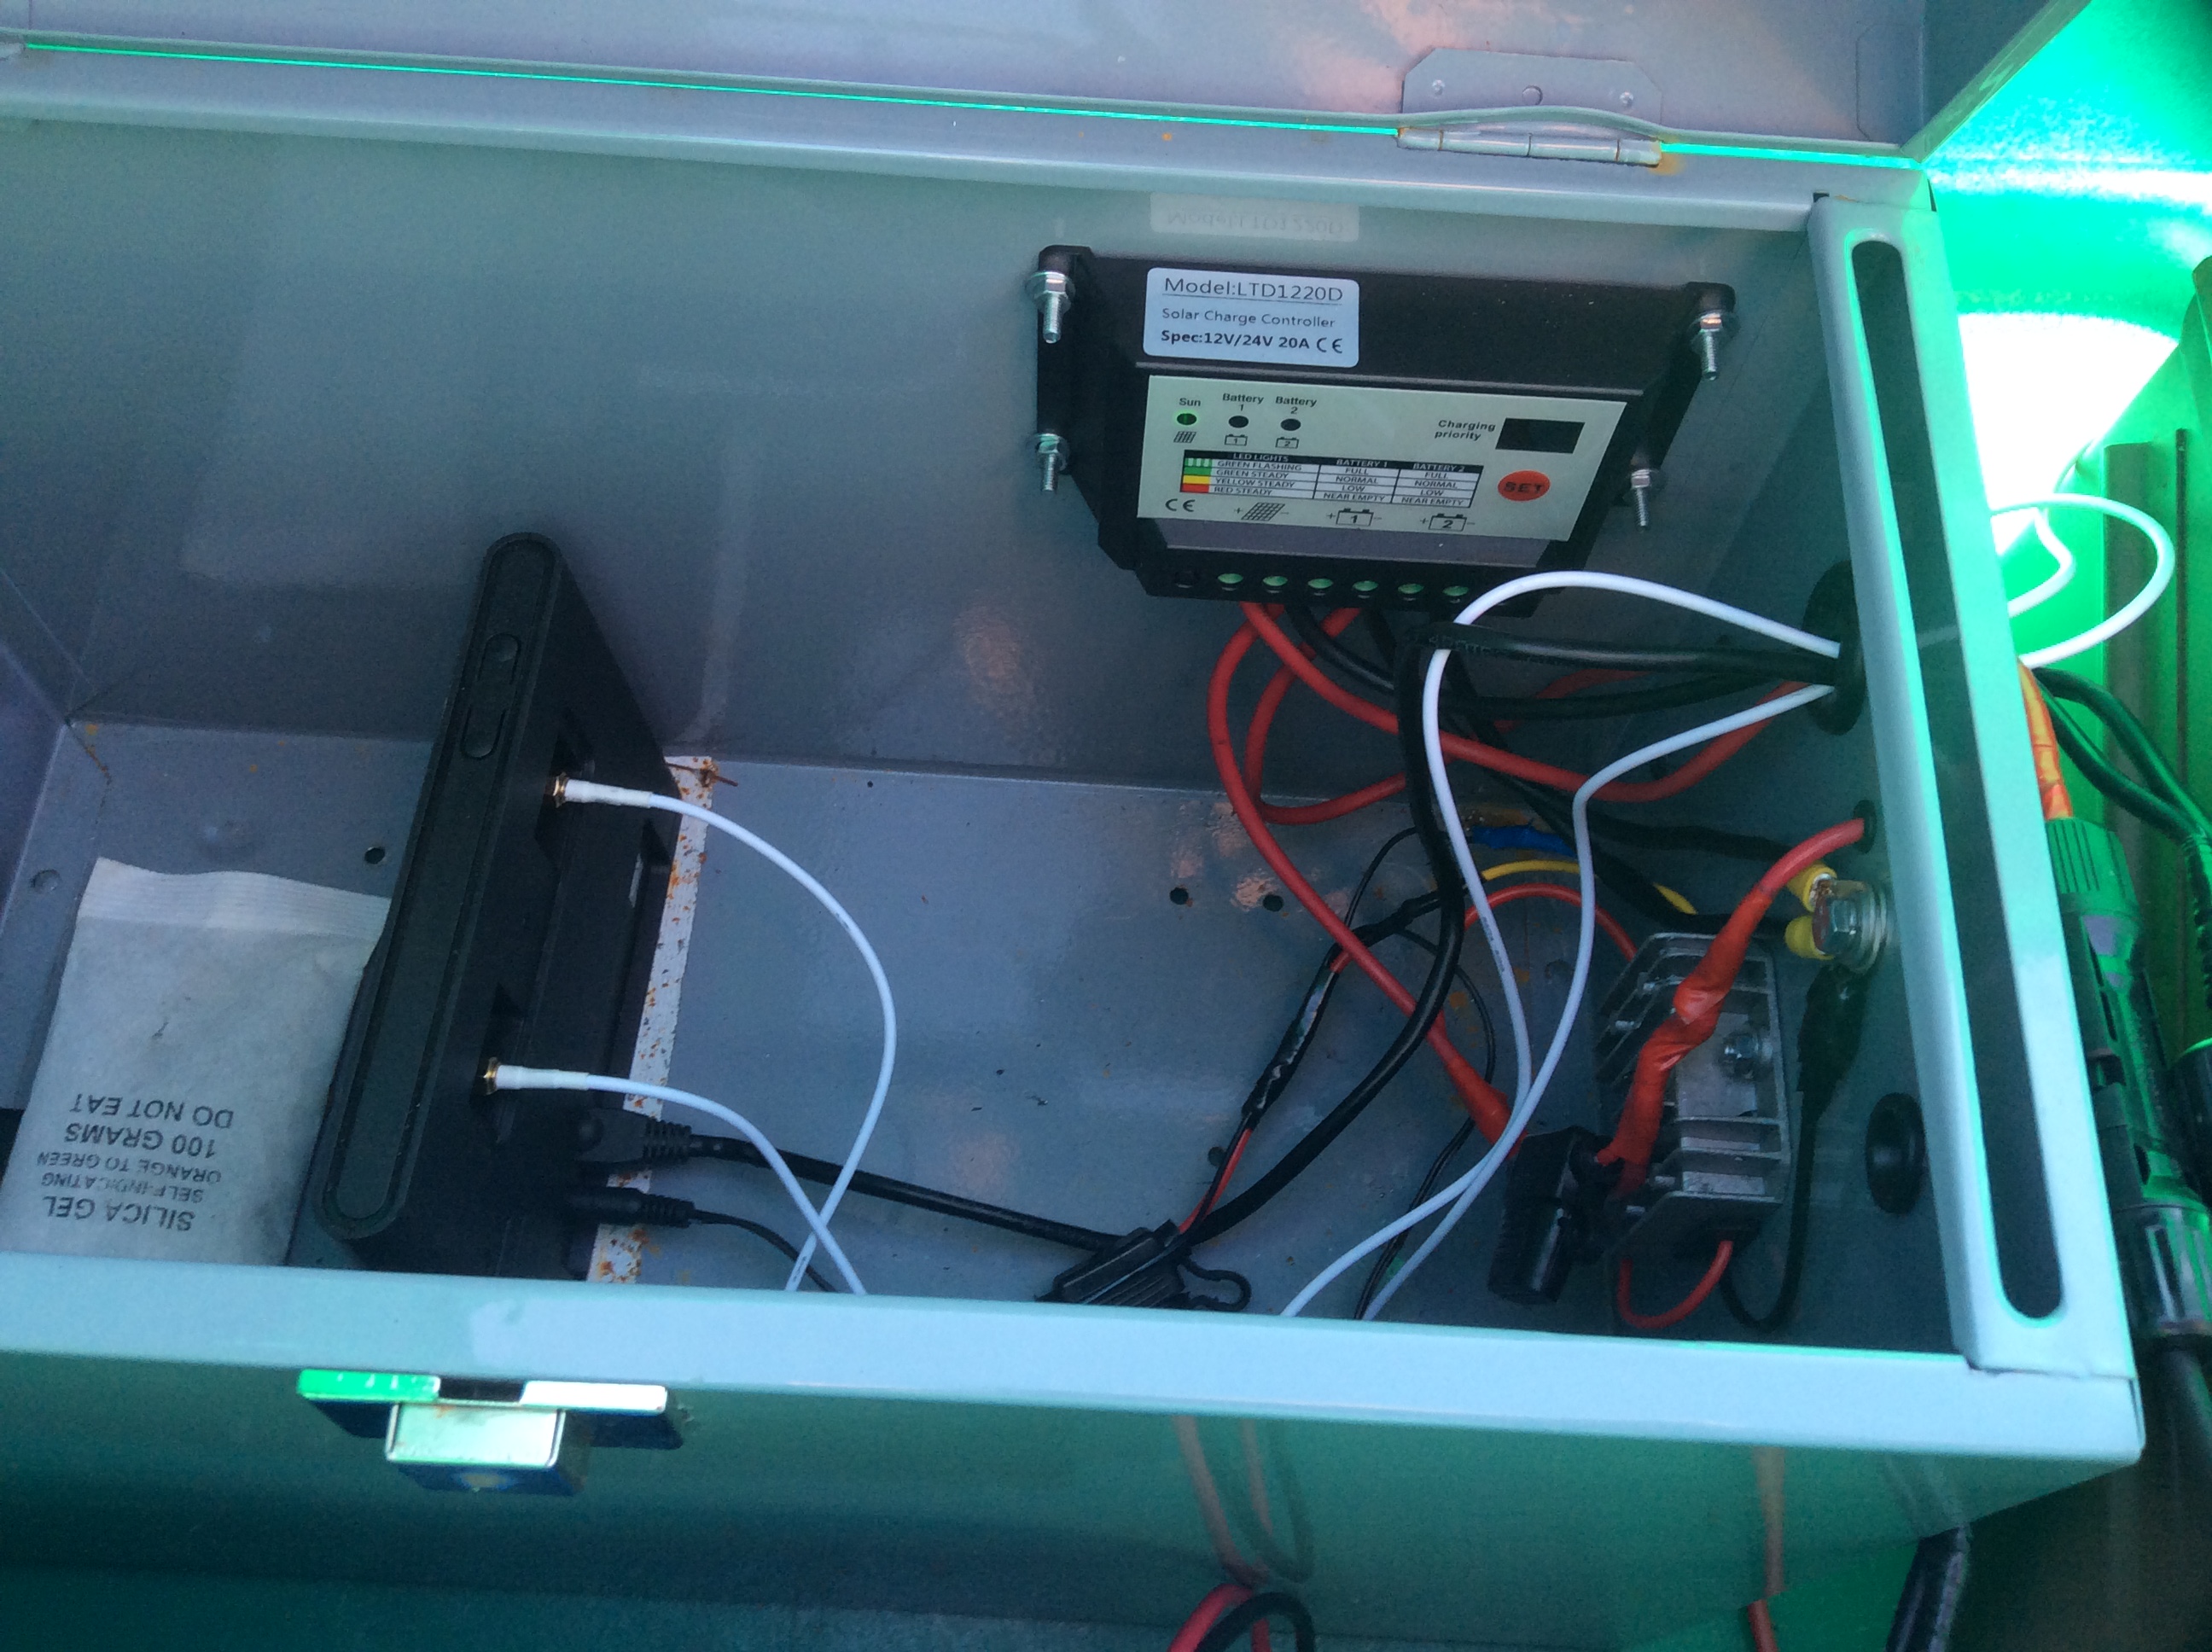
Inside the first equipment box:- router, solar controller & regulator.
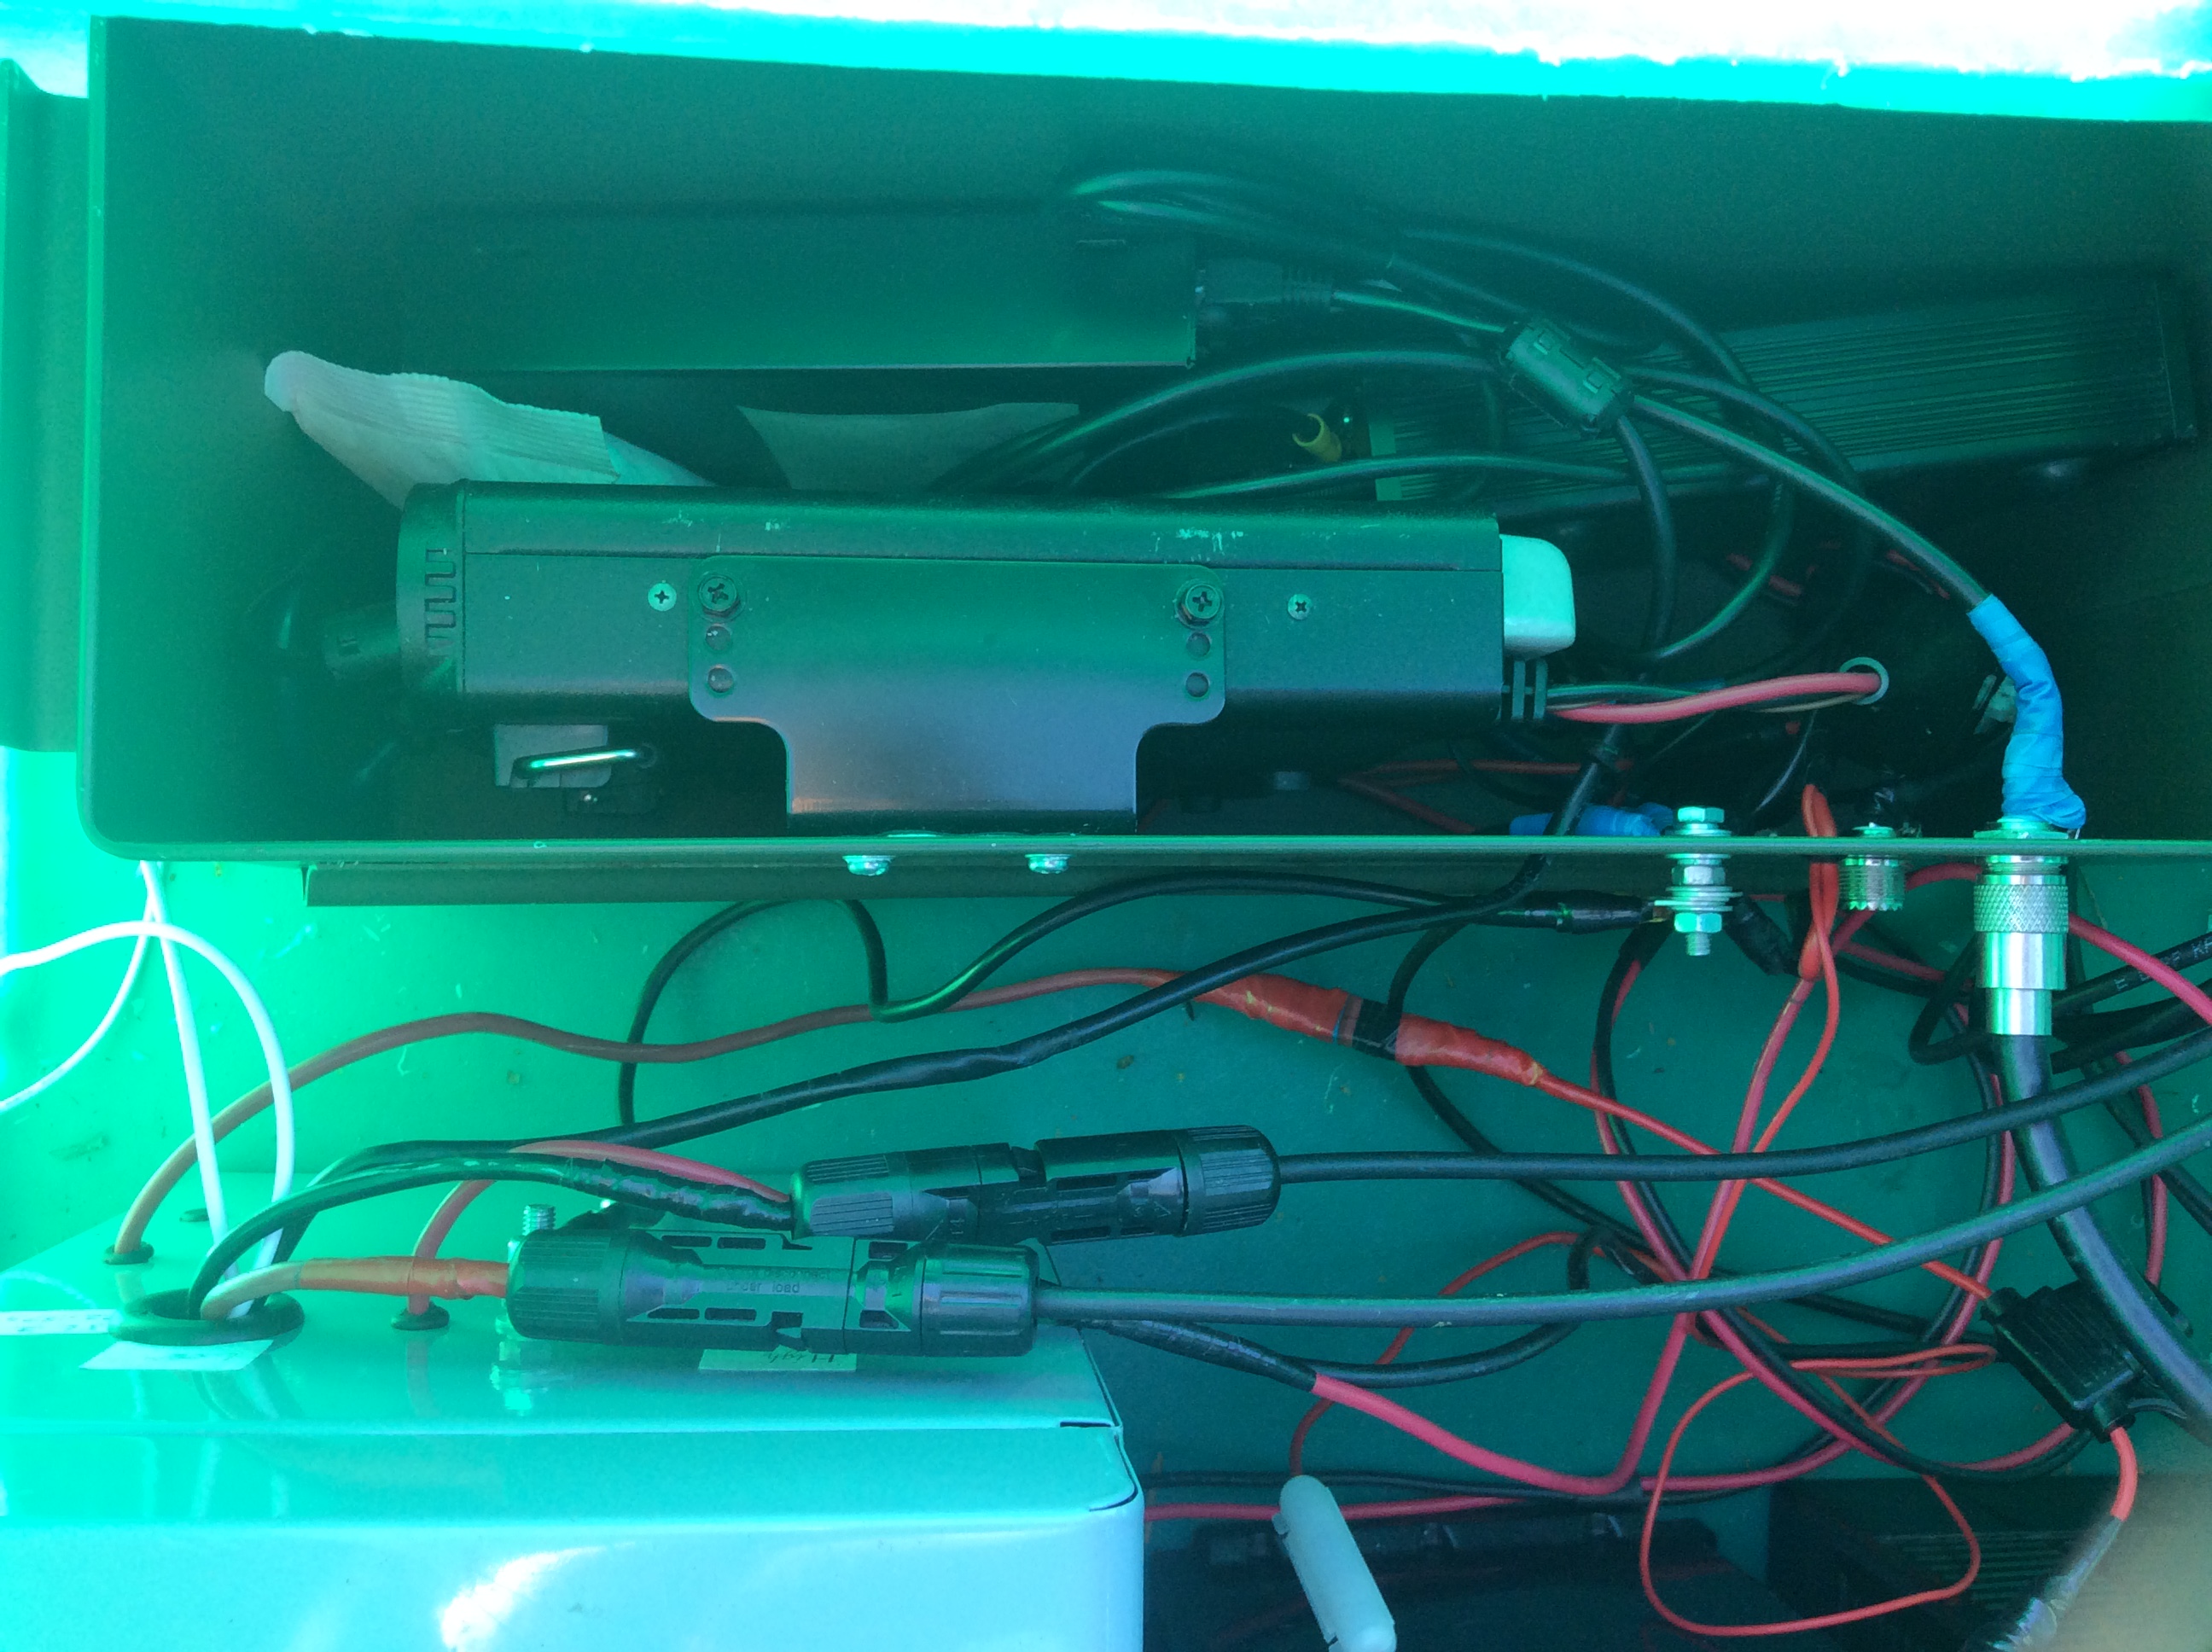
Second box contains:- the radio, one end of the RemoteRig, antenna tuner & a remotely controlled reset switch.
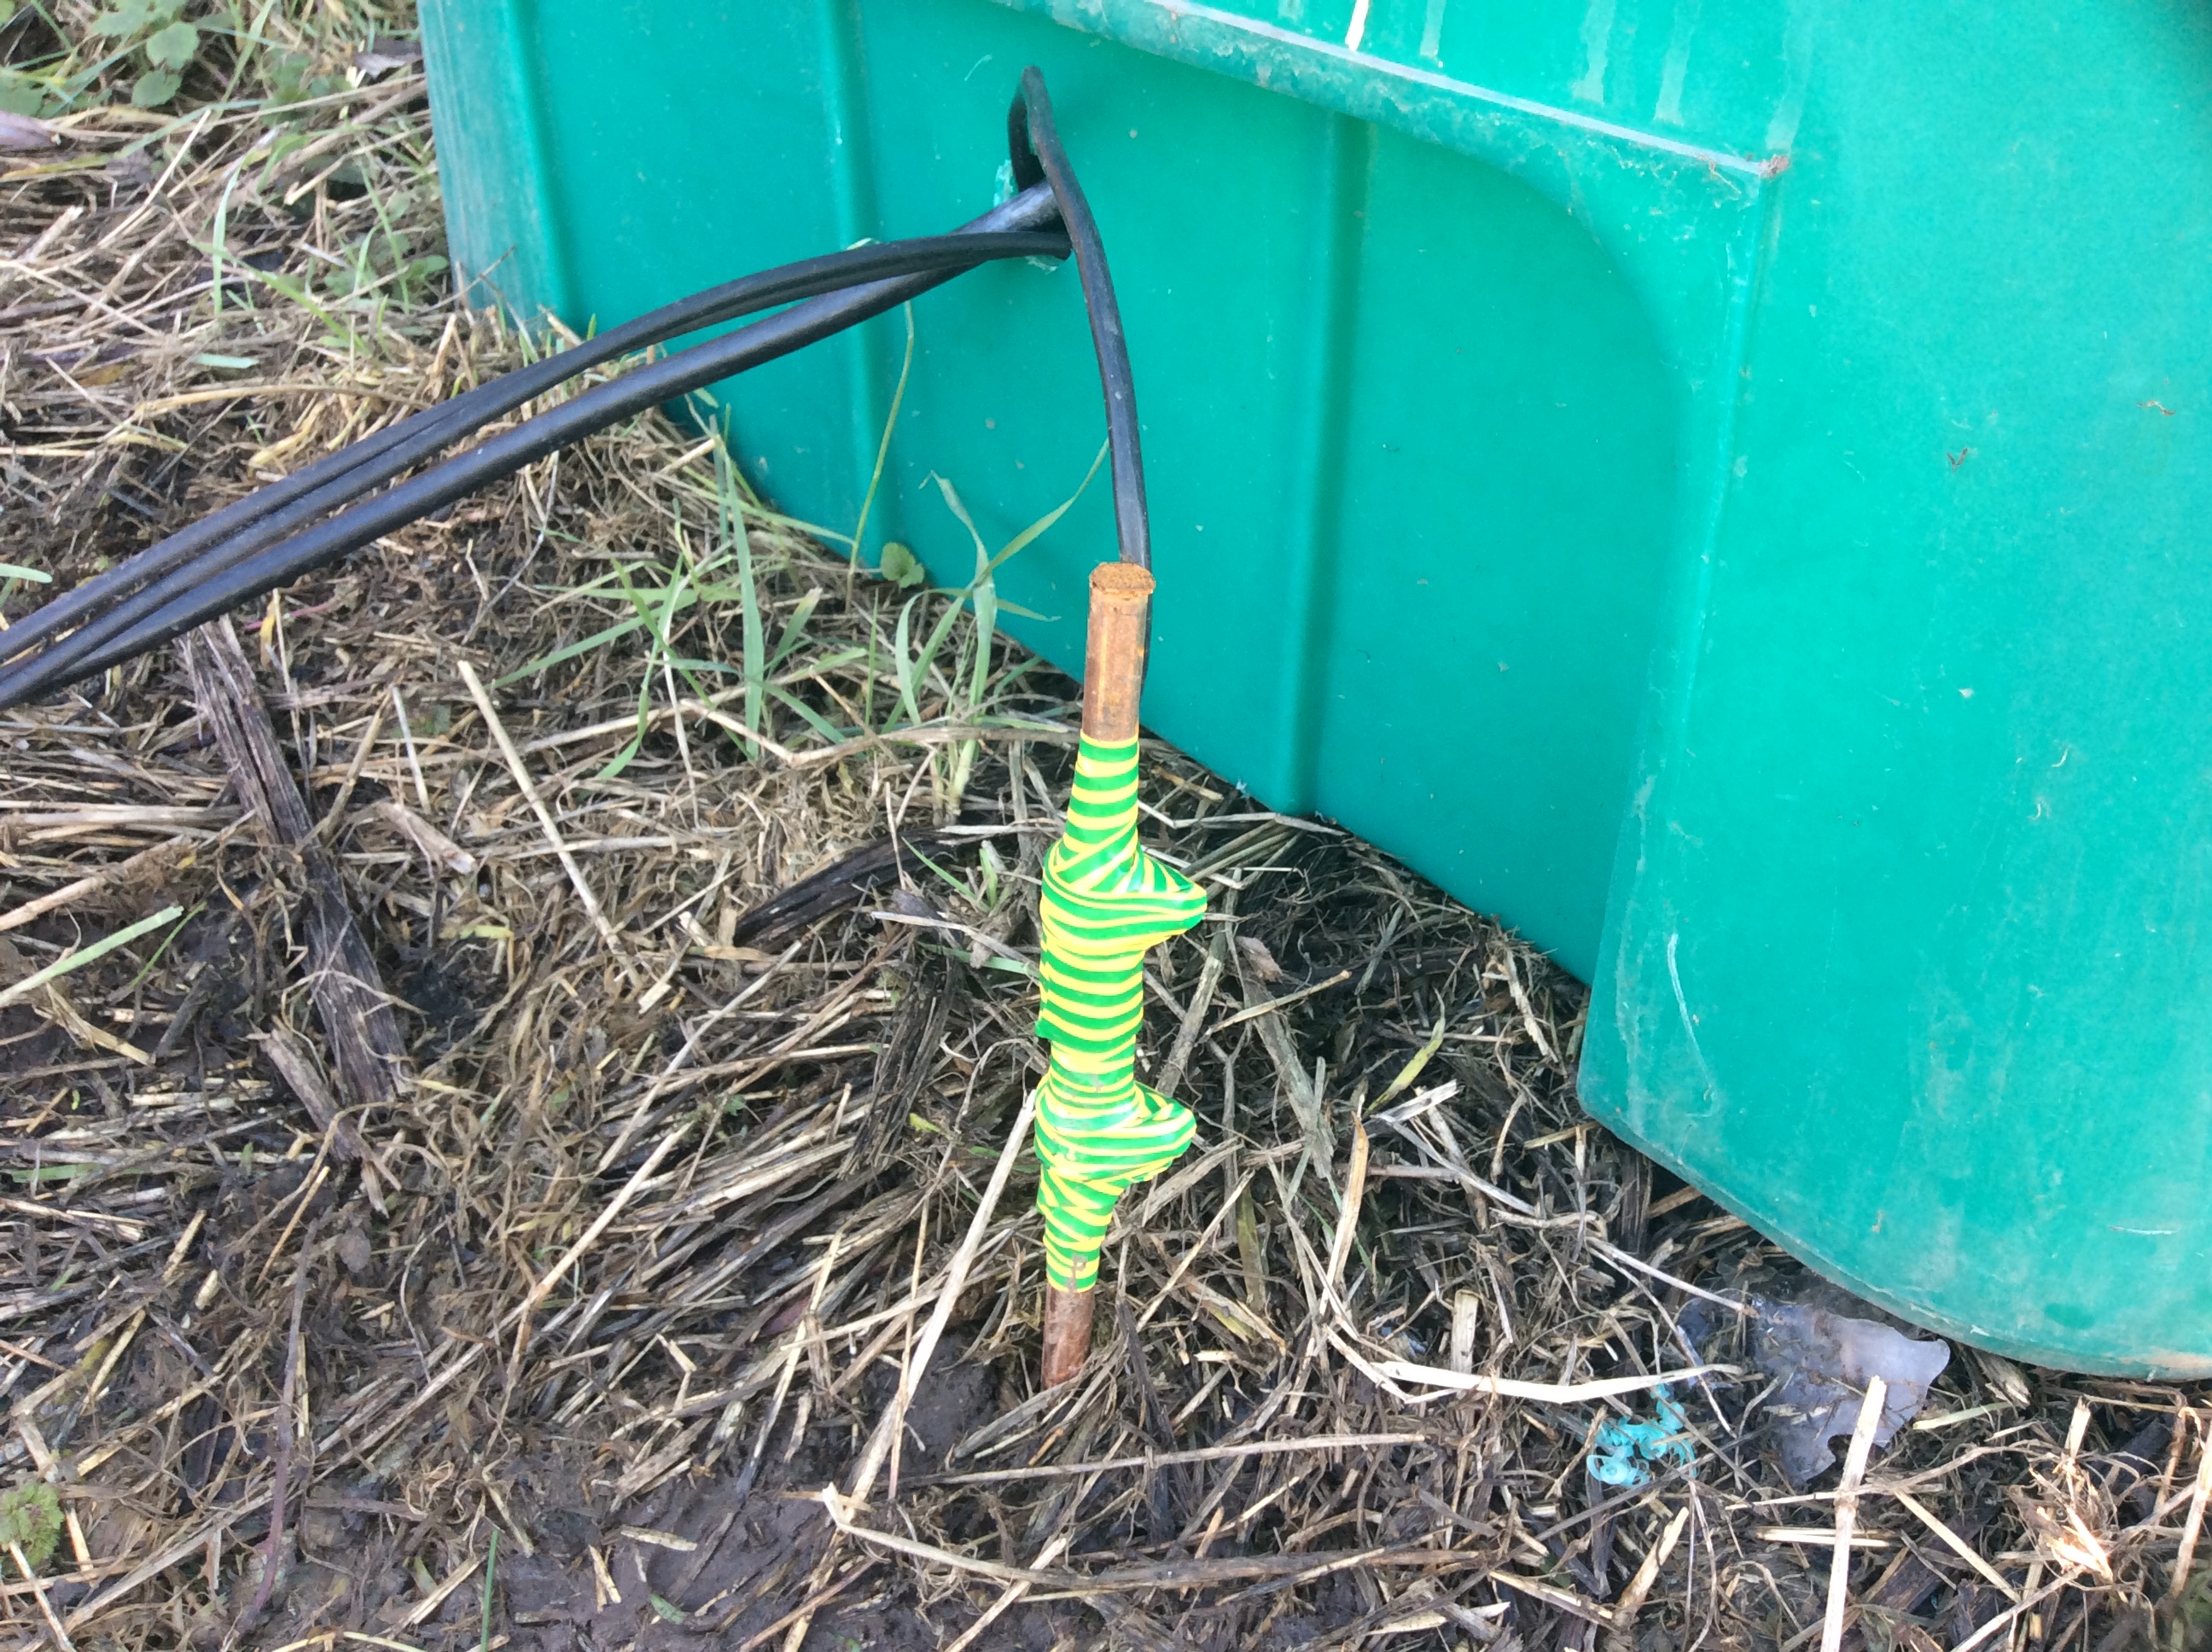
Earthed at the box.
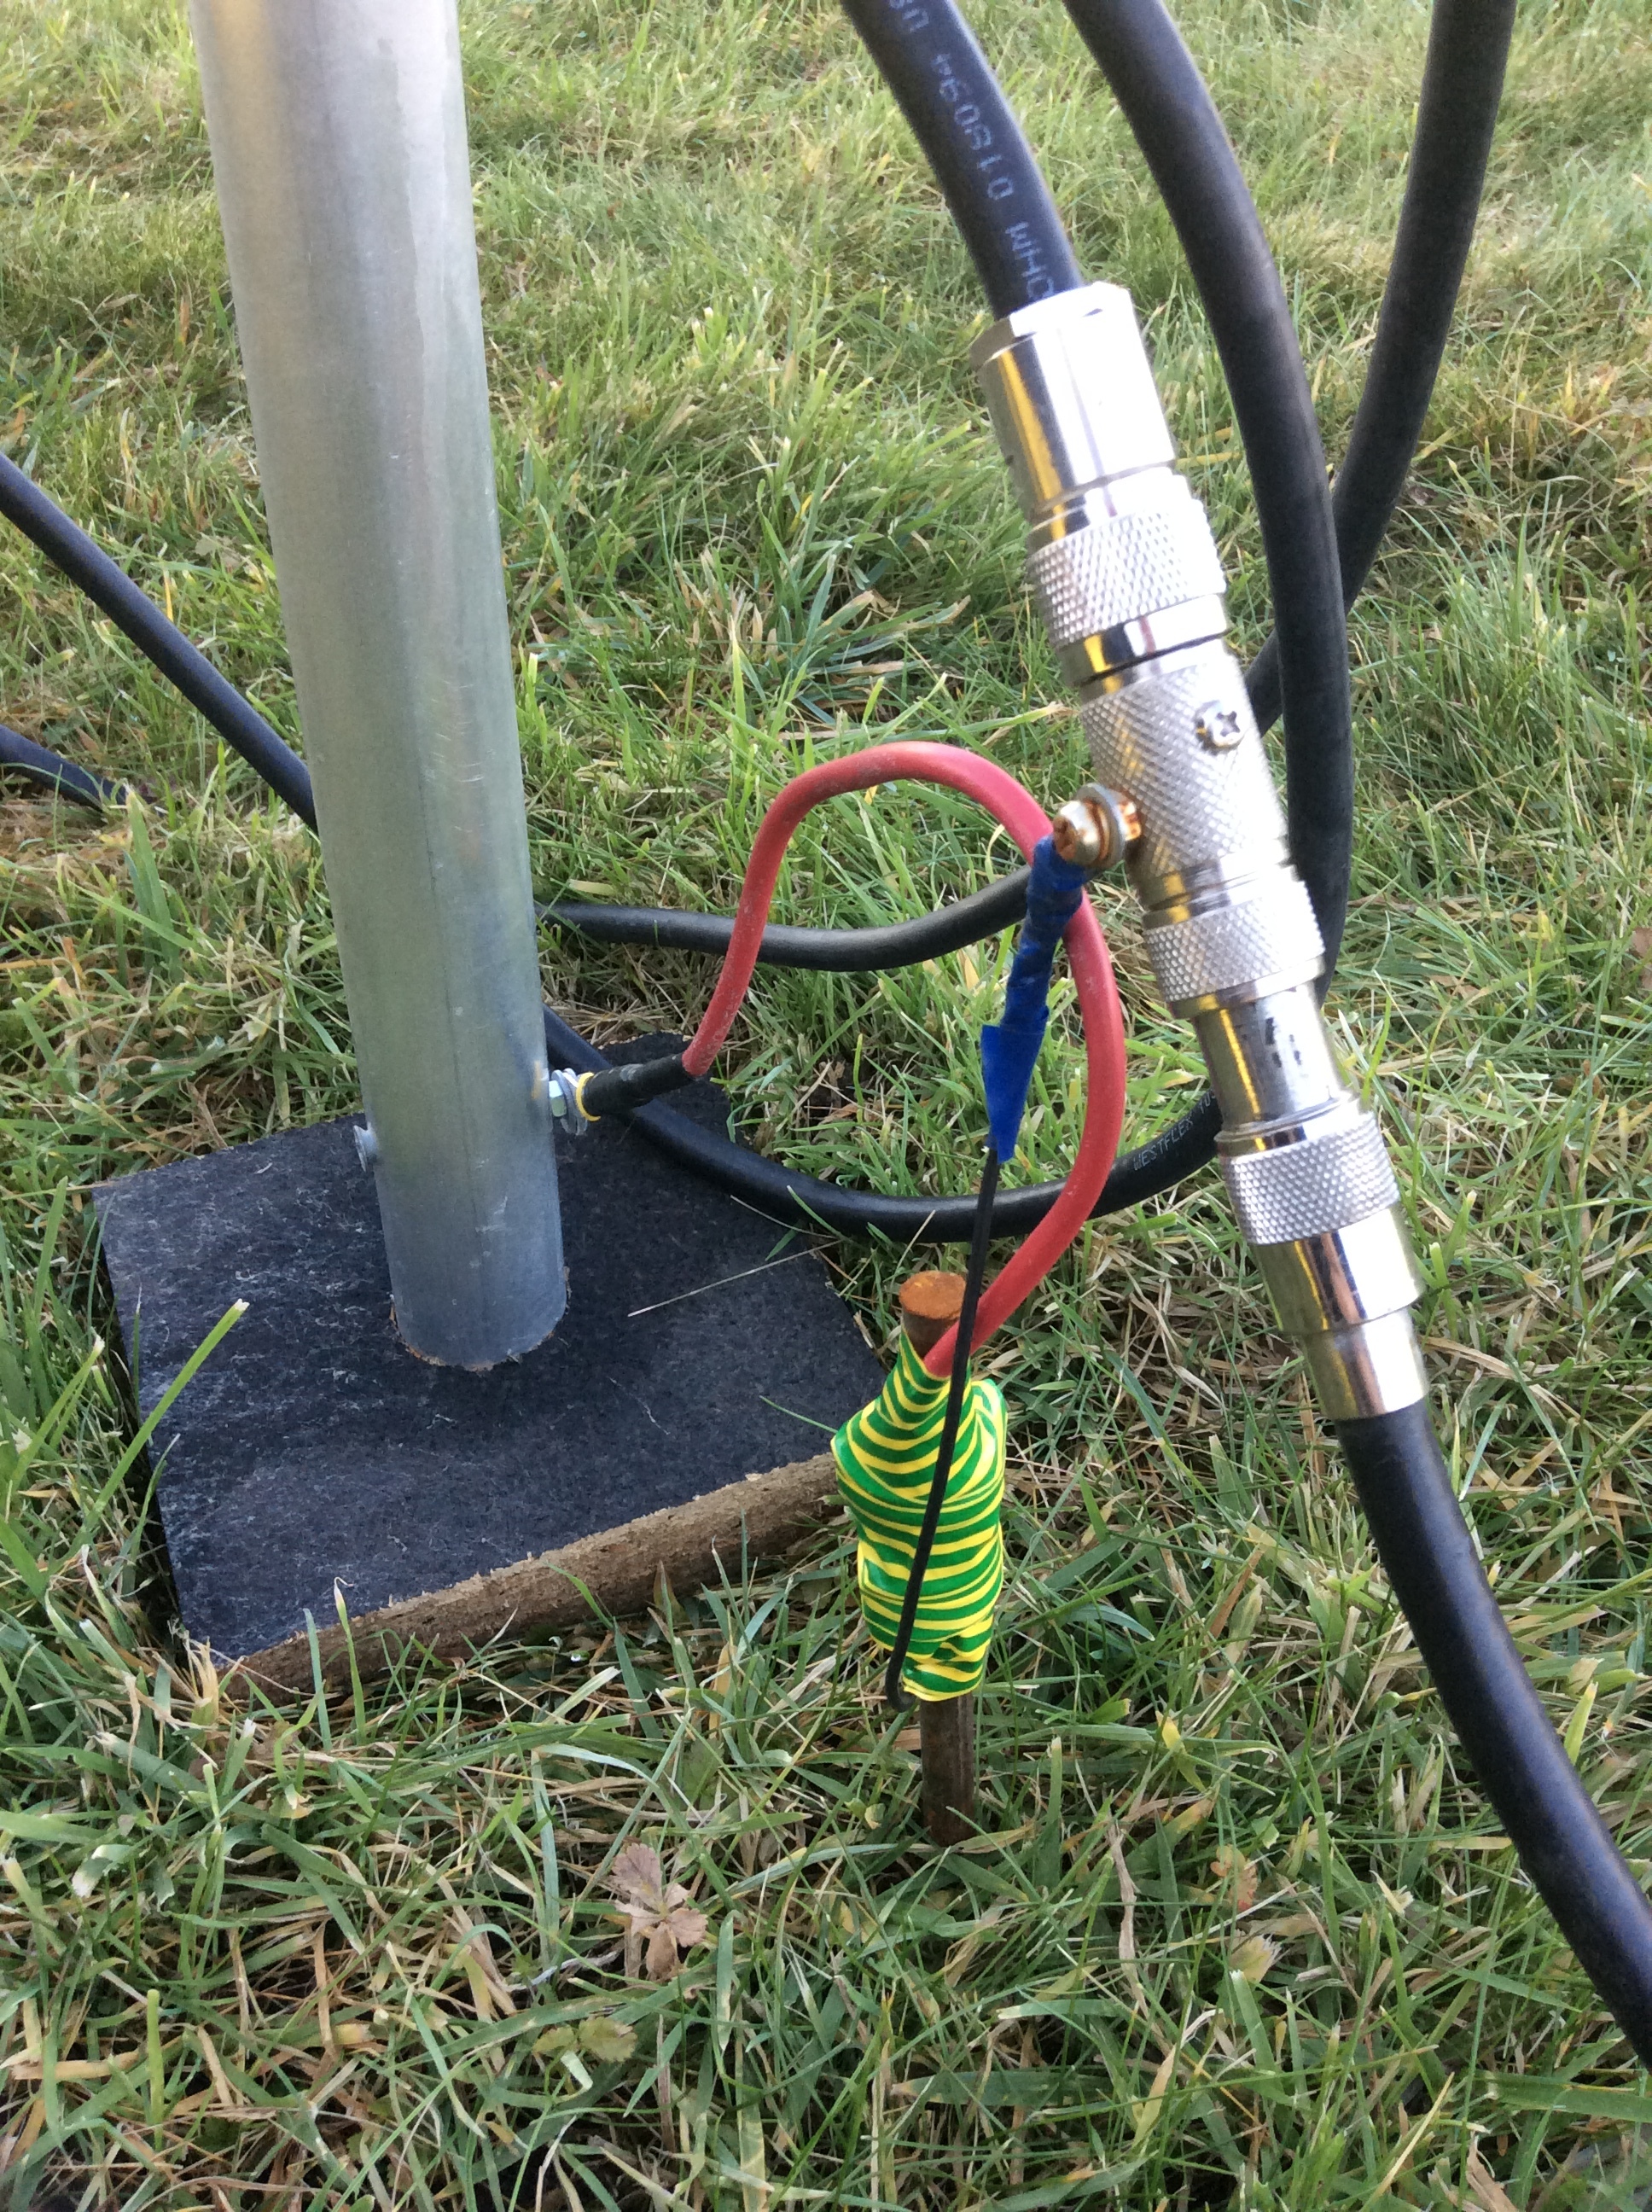
Also earthed at the base of the mast.
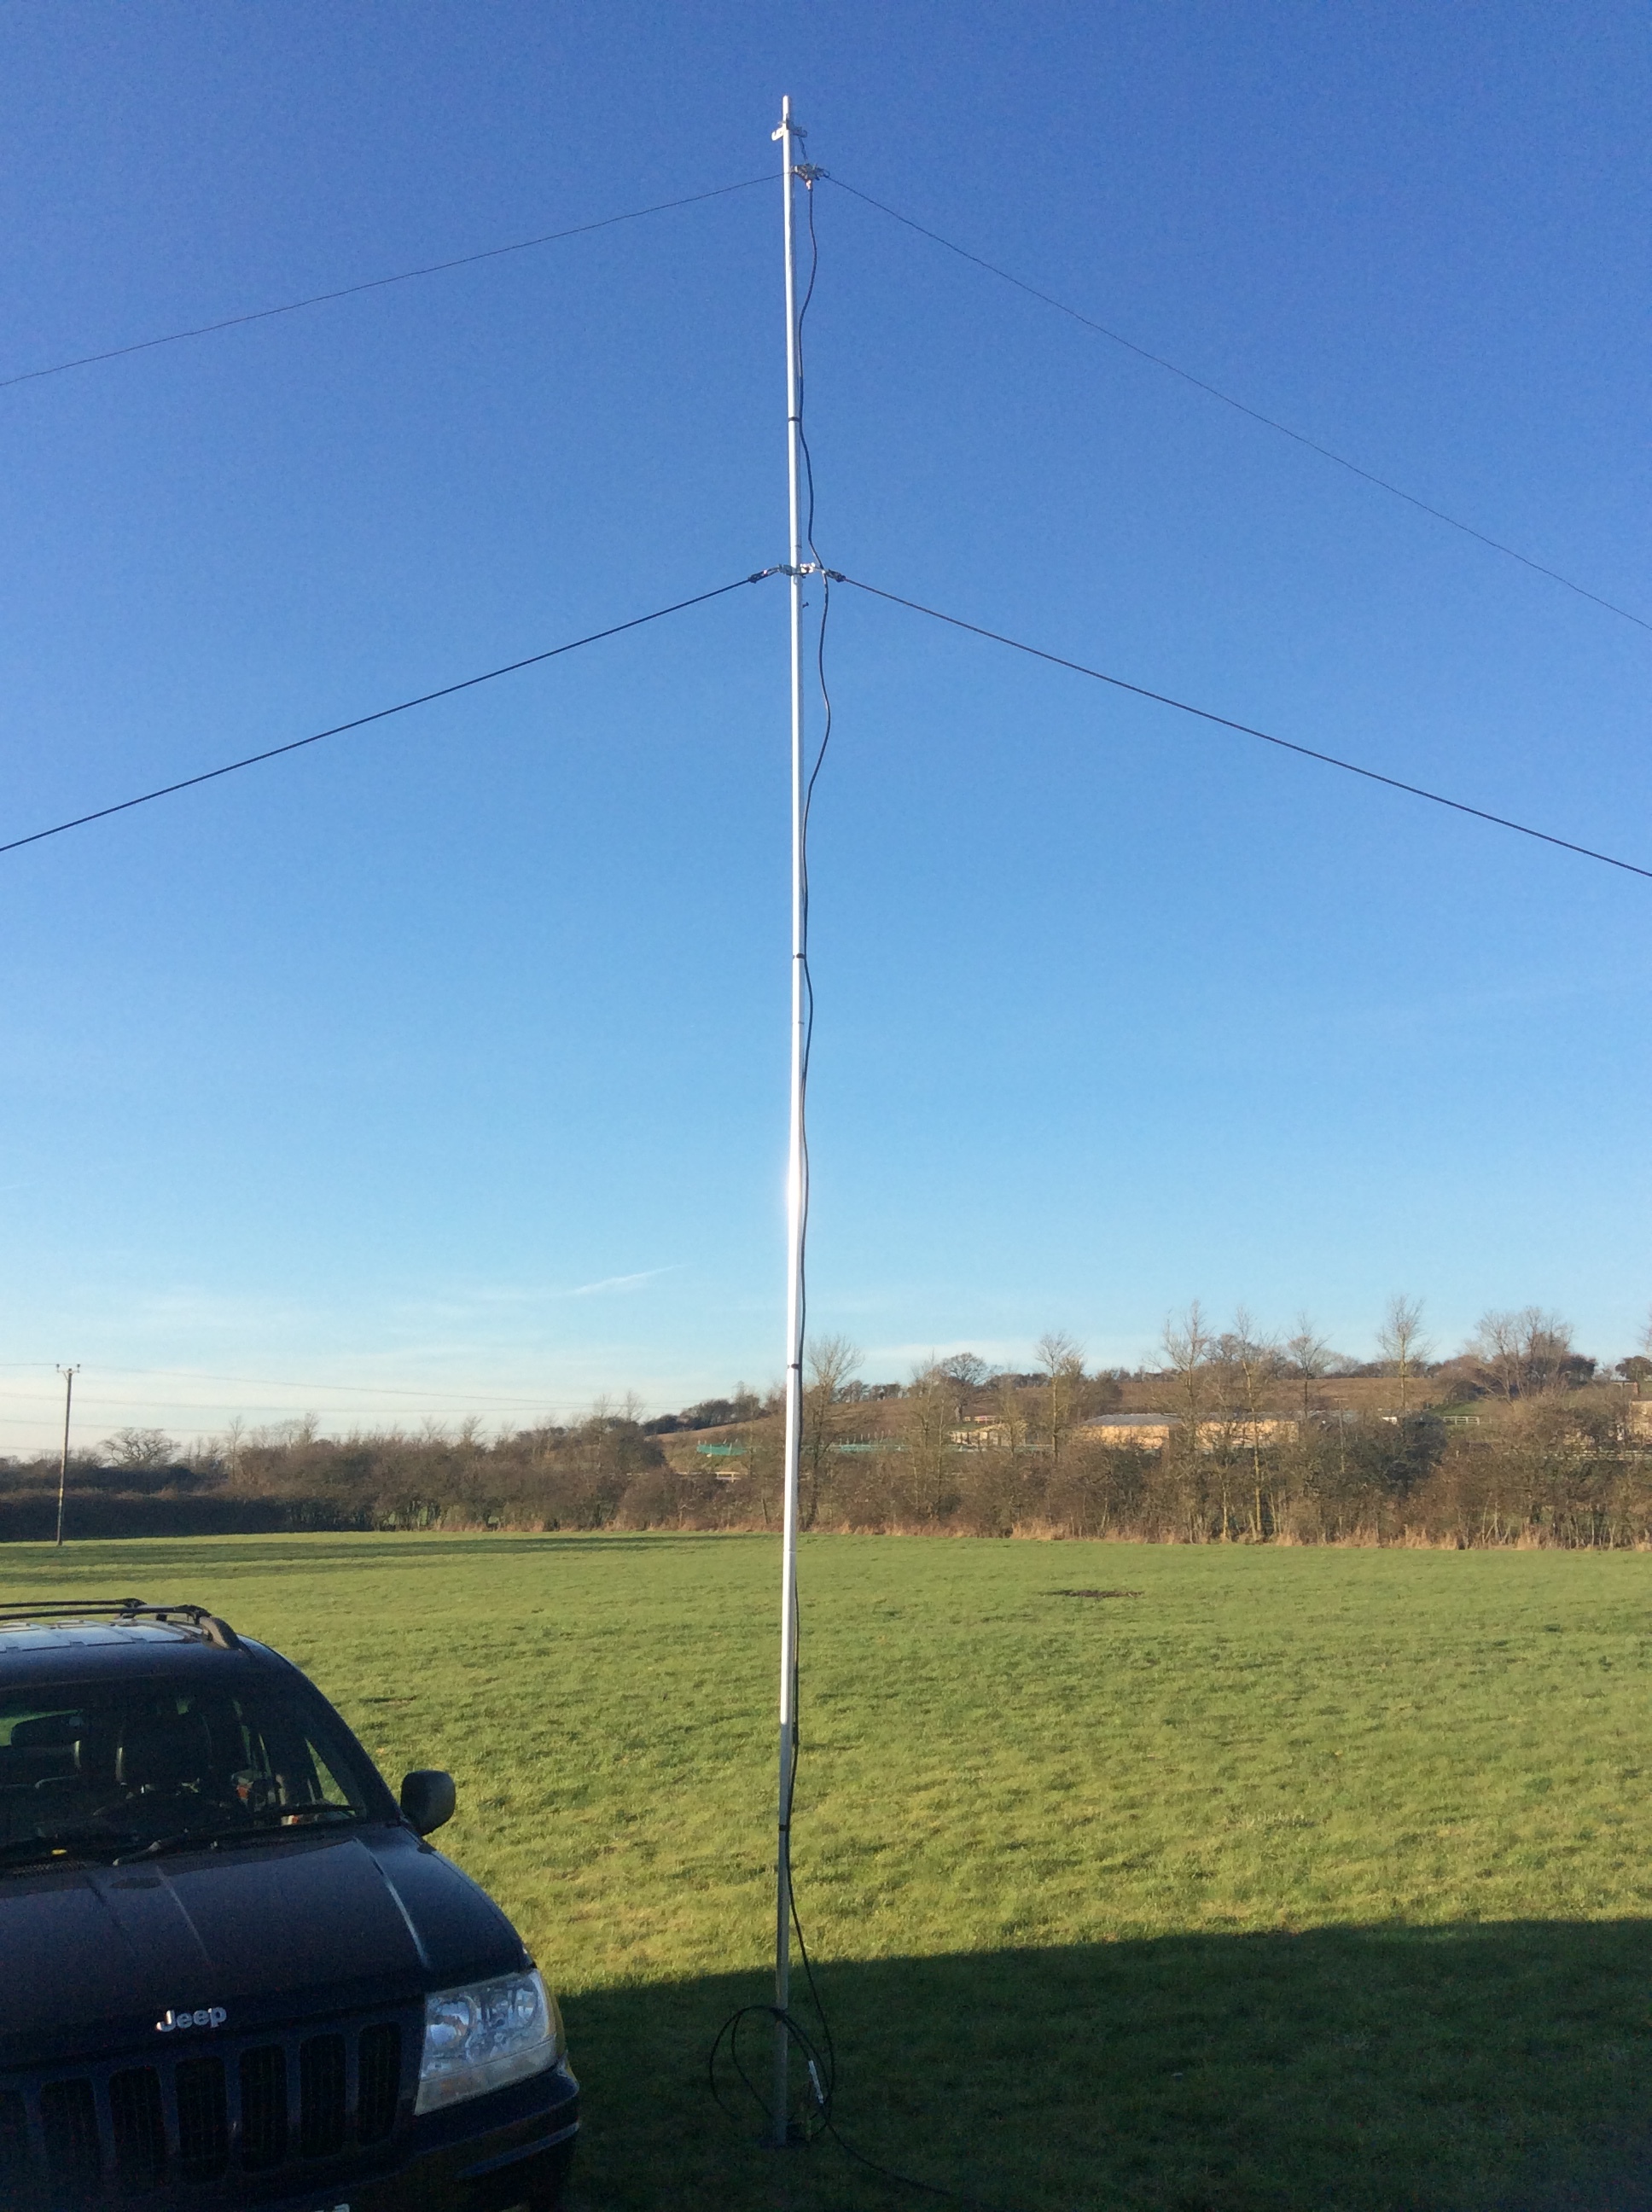
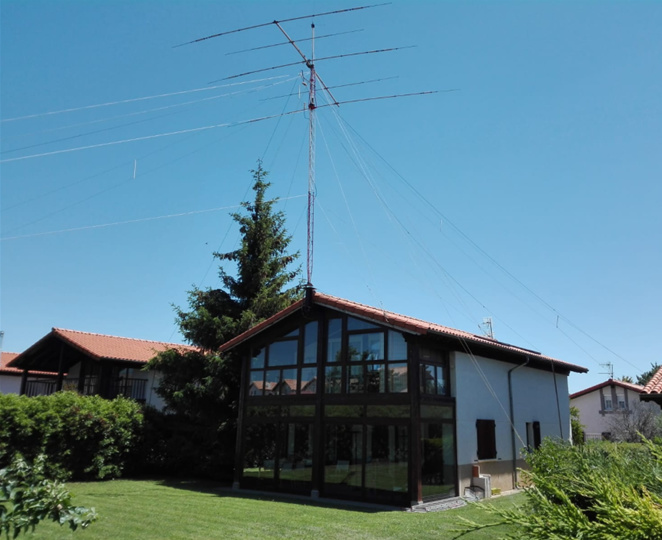
Temporary mast.
For those of you who are unfamiliar with the RemoteRig devices, they basically allow you to place the radio at a remote location (in this case a 3 acre field which I own about 45 minutes drive from my house), and the original control head unit from the radio goes in the shack at home. It basically uses the internet as a very long separation lead.
All sounds relatively simple, but I ran into a lot of problems which needed to be overcome:-
Problem 1
The earlier versions of the RemoteRig don’t natively support the FT-857 without either a modification to the RemoteRig boxes, or modified cables between the RemoteRigs & the Yaesu FT-857 (both the radio & control head).
The later versions of the RemoteRig don’t have this problem. They support the FT-857 without having to manufacture modified cables.
As I purchased the RemoteRig boxes second hand from a well known auction website, mine are the older version which does not support the FT-857D, so I built up the required cables from drawings on the manufacturer’s website.
Problem 2
Having got the radio working perfectly over my own internal LAN connection at home, the time came to try to separate the two halves using the internet & a 4g connection.
Total nightmare!!! I won’t bore you with the details. You can read the earlier posts to find out about this if you are really interested (or very bored).
After sorting out the networking problems, I now have a 4g router running with a fixed public IP address.
The 4g signal isn’t that strong at the radio site, so an external antenna is required.
I can’t remember where I read it, but I recall reading that the router requires a stable 12v power supply. Higher voltages (such as 13-14 volts often seen from leisure batteries and solar chargers) can apparently damage the router. A voltage regulator was installed for the router to overcome this
Problem 3
According to the RemoteRig manufacturer, the Yaesu FT-857 creates a very brief short circuit (or very close to a short circuit) during power on. This can reset the RemoteRig box when you turn the radio on, causing several problems.
Sure enough the radio tried to turn on, then turned itself off when the RemoteRig box lost power. It was impossible to turn the radio on with the radio & RemoteRig box on the same power supply.
According to the manufacturers, the fix for this is to use a separate power supply. For this reason, the RemoteRig box is powered from the regulated power supply that runs the router. This is taken from a separate leisure battery
It means that I have to have a second battery, which is a pain but not the end of the world.
In some ways, this is actually a better arrangement as I want the router and RemoteRig box to stay alive even if the radio fails (so that I can maintain control & turn things off remotely if required).
Problem 4
Damn my choice of radio!!!
Don’t get me wrong…….I like the Yaesu radios, and I like my FT-857. Unfortunately it just seems that there are several quirks with them when it comes to controlling them remotely!
According to the RemoteRigs manual, the FT-857 can reach a state where it becomes unresponsive and the only way to recover it is to remove the power from the radio.
So far this has not happened to me yet, but given the problems if the radio becomes unresponsive (not least the 45 minute drive each way to get to it) I didn’t want to take the chance of this happening and have no way of resetting it.
I had to find a way of doing this remotely without shutting of either the router or the RemoteRig box.
RemoteRigs recommend a relay controlled via the I/O port on the RemoteRig, which can be turned on/off remotely.
According to Yaesu, the radio can draw up to 20 amps, so a reasonably heavy duty relay was added to switch the power to the radio.
Problem 5
The equipment would be outside in some fairly harsh weather conditions, so would need to be protected.
The really expensive or delicate equipment (radio, RemoteRig box and antenna tuner) was built into an old military ammunition box, which is sealed. Any holes that I drilled for cabling were resealed with sealant or rubber grommets.
A separate box was put together to contain the router, solar charger, and possibly later a Raspberry Pi (to run digital modes such as FT8).
The entire system (the two batteries with solar chargers, and the two equipment boxes) is housed inside a large salt bin with a padlock to keep the worst of the weather off of the equipment and hide it from opportunist thieves.
If anyone is contemplating setting up a remote station like this, I feel obliged to include one word of caution for if you are going to enclose batteries like this. Batteries can give off explosive hydrogen gas when charging. The battery bay should be well ventilated for obvious reasons. Just look at what happened to the Hindenburg to see what history teaches us & to understand why this could be a big problem!!!
Problem 6
Powering the system.
The system will be installed on a 3 acre piece of farm land with no utility power or services.
Batteries and solar panels it is then!
After measuring the current draw on the system (from both batteries/power sources) and several calculations later, factoring in significant inefficiencies in the solar panels for our British weather to give me some reserve, I came to the following conclusion:-
I need a 110Ah battery for both the radio & the router to get meaningful use from it. A 150 watt solar panel and a solar controller capable of charging two batteries takes care of charging up the batteries each morning.
With the current setup I get between 1 & 2 hours of use depending on how much power I run (longer if I only receive but don’t transmit).
I plan to add another 110Ah battery for the radio (so a total of 220AH on the radio, and 110Ah for the router) to give me more operating time. Probably also another solar panel as & when budget allows.
The teething problems
Upon initial installation, things seemed to be working well, until the batteries stopped charging and the whole setup started to discharge the batteries. A drive to the field found that the brand new solar charger had failed. That’s what you get for buying cheap from abroad!!!
A replacement solar charger and the system went back to the field. Faultless operation for about 2 days (the estimated duration that the system would stay alive before the batteries died if they were not charged by the solar) and then it died. Not the bloody charge controller again?!?!?!
Another trip to the field with a volt meter revealed that both of the batteries were fully charged. Maybe a fuse had popped……No, the fuses were good. Good voltage was being supplied to both boxes……….continuity along all of the power cables. What’s gone wrong this time then!!!
I stood in the middle of the field scratching my head in total bewilderment. I was just starting to remove the system yet again to take it home for more detailed inspection when I heard some relays start clicking randomly when I juggled the wires. Another check with the multi-meter confirmed that one of the earth wires was bad.
It wasn’t a complete break but the resistance in the earth wire was rising from 0 Ohms between the battery and the negative side of the control (which you would expect to see 0 Ohms), to several Ohms. This was resulting in a voltage drop to around 7-8 volts, causing the system to shut down!!!
I was able to replace the earth wire on site as I had brought plenty of tooling and spares with me.
About a week later, having completed some on air tests with several friends near London, several SOTA chases and numerous contacts around the UK & across Europe on both 40m + 80m, the system now seems to be working flawlessly.
I’m a happy bunny!!!
Next steps
Initially I started with a trapped dipole for 40m & 80m at around 6 meters above the ground. This was always intended to be a temporary measure to iron out the teething problems.
The antenna is actually resonant further down the band on the CW portion, not the SSB portion where I’m trying to use it. This is taken care of by the tuner, but it’s not ideal (as the antenna isn’t as efficient as it could be).
With a bit more time to plan, having proven the basic system & after a couple more paydays have passed, I will think about changing the antenna for something a little better.
My current thinking is a 160m sky loop at around 10 meters above the ground. I’m considering putting up a ¼ wave vertical for 20m and some kind of antenna switching arrangement, maybe also a vertical for 2m………one step at a time though.