It looked like there had been some scientific method applied and the results were reproducible at the time. Since then I think GB3AR has moved site so it probably can’t be shown now from the locations given. However, the results in the article fit well with the observation of such a long path for a LoRa signal.
3 Likes
I am having trouble with VSC and Platformio, So I think I will wait for your Webinstaller, once again thank you for your efforts
73 Tony
1 Like
It’s taken 9 days from ordering for my LoRa boards to make it from China to Evri here in the UK. So another 9 days till it arrives…
1 Like
Hi Richard, ordered mine from Amazon, 6 days from order to door
probably paid a bit more at £33 for a T-Beam Tracker board?
2 Likes
I paid just under £30 for two boards including VAT and delivery. Still need to order the case and battery for the tracker from eBay.
4 Likes
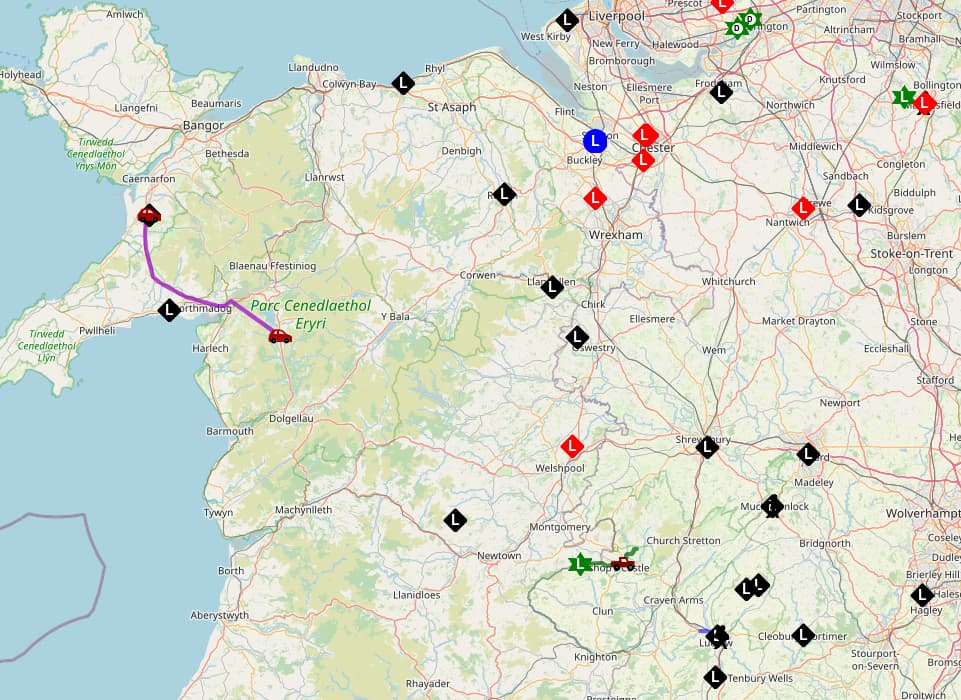
The number of LoRa igates around North Wales and the Midlands is quite amazing (all those symbols with a “L” in them). igates are the fixed stations which receive data from folks using the little trackers. The igates send this data to the internet.
7 Likes

3 Likes
Cheers DM1CM.
1 Like
Arrived today, so only took 10 days from ordering.
5 Likes
Which one did you get ?
Dave
2 Likes
I’m using the Heltec WT too! with that case working well!
Ricardo CA2RXU is making a lot of improvments on that controller in the next times!
73
Julian
4 Likes
Yes, this shows how the number of nodes has grown over the last six months:
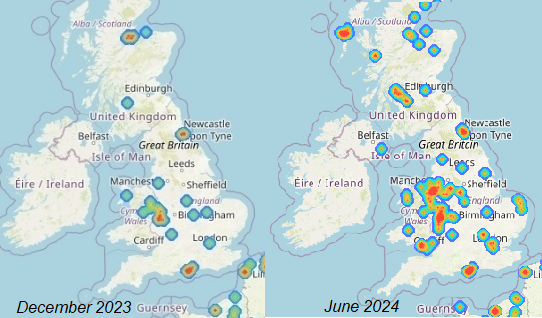
From this map, which shows only the LoRa nodes.
4 Likes
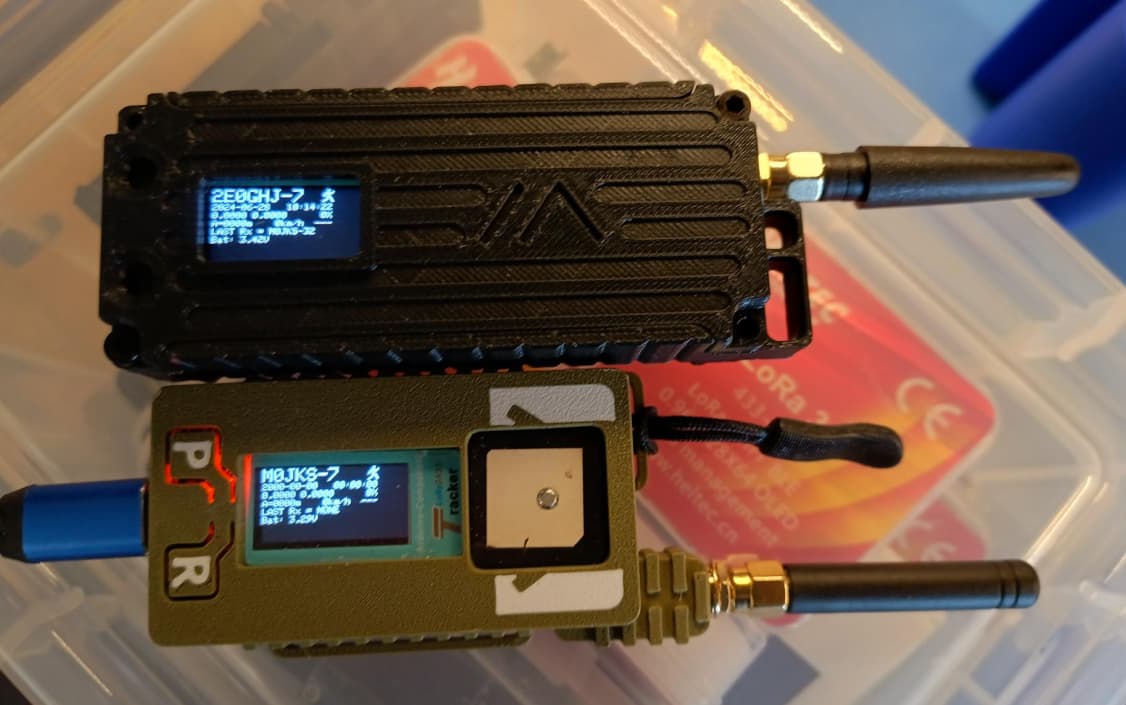
Heltec v3 for iGate. Heltec wireless tracker for the tracker.
1 Like
Like Julian (IN3JIB) posted above, I’ve found this case for the Heltec Wireless Tracker to be pretty good:
If you have access to a 3D printer here are all the design files:
https://www.printables.com/model/616628-heltec-wireless-tracker-case-for-meshtastic/files
Alternatively Tony G is selling the case here:
https://3dchicken.co.uk/products/heltec-v3-case
and here:
https://www.etsy.com/shop/QuantumShadow3D
The case is designed to take a 3.7V 2000mAh 103454 Li-Ion cell, which can be sourced from Amazon:
https://www.amazon.co.uk/dp/B08214DJLJ?psc=1&ref=ppx_yo2ov_dt_b_product_details
or Aliexpress:
The connectors are different - JST-SH 1.25mm and JST-PHR 2mm - so a bit of soldering is required.
It’s a bit larger than the previous case I’ve been using, but the battery is a twice the capacity at 2000mAh vs 1000mAh:
If you can 3D print your own, the cost is around £1.50 for the filament (ASA) and takes about an hour.
Dave
4 Likes
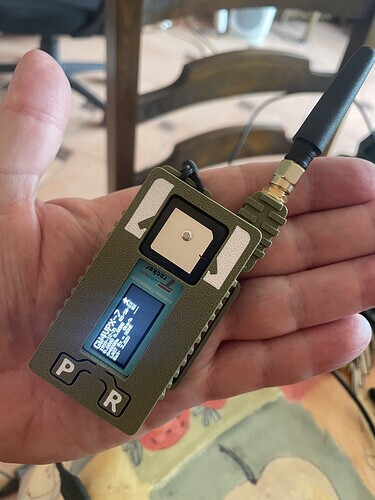
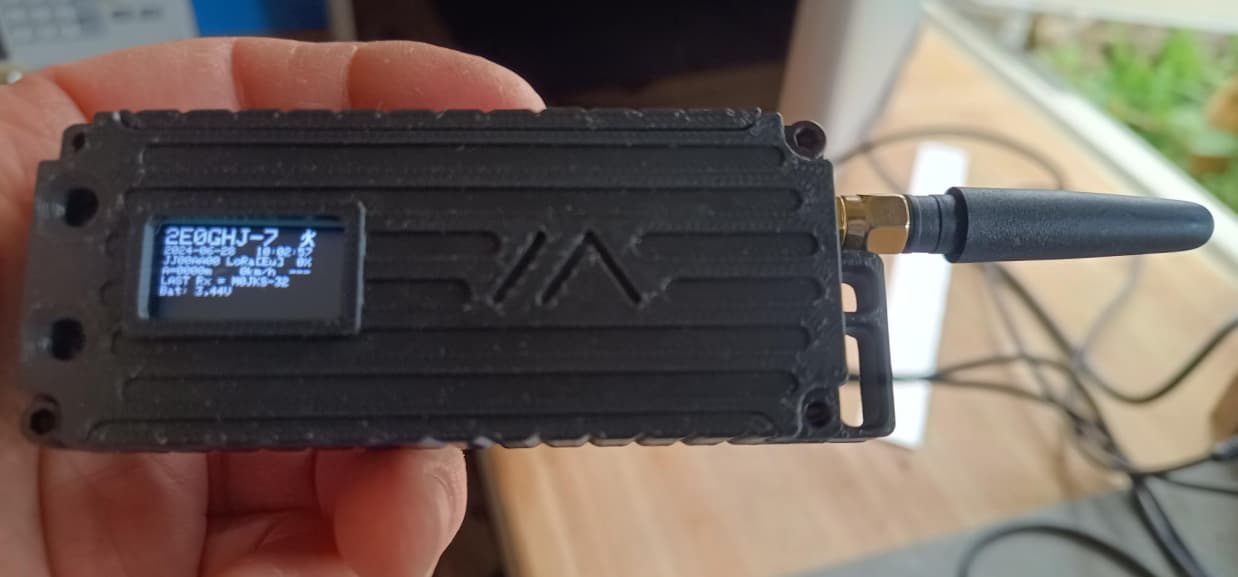
I now have my tracker and RX iGate up and running. The iGate is currently in the loft powered by a USB power bank so obviously I need to set that up in some permanent fashion. I haven’t yet got a case and battery for the tracker so I’ve put that in a plastic box with another USB power bank. I took it for a walk at lunchtime and I was pleased to see my route on aprs.fi when I got home.
Here are some notes on how the installation went. Hopefully it might help anyone else setting this up.
Installing the iGate with Ricardo’s web installer was very straightforward. I had to install the CP2102 drivers but the installer gives you a link for those. On first boot the iGate creates a wifi hotspot. I connected to this with my phone, set up the SSID and password for my wifi access point and rebooted. Now I was able to connect from my PC and complete the configuration.
The tracker was somewhat harder! There is no web installer for this yet so I had to install platformio (I already have VSCode). When it came to importing the project you have to select the board type but the Heltec Wireless Tracker is not listed. Eventually I found the post by M0JKS earlier in this thread that explains what to do. You just select another board (I chose the Heltec Wireless Stick) and then you edit the platformio.ini file to set the default board type. Having got past this I could complete the configuration and upload the firmware. But I could not get the final step of uploading the filesystem to work. It just wouldn’t upload. Ricardo’s instructions say there is a bug in VSCode and closing and reopening it would fix it. But however many times I restarted VSCode, my PC or the board it just wouldn’t work. Then I managed to go down a massive rabbit hole of my PC no longer recognising the board at all and it wouldn’t recognise a Raspberry Pi Pico either. This was eventually fixed by uninstalling USB controllers in device manager. I still couldn’t upload the filesystem though.
Eventually I discovered that it’s necessary to put the Heltec board into boot mode for it to accept anything over the serial port. To get it into boot mode you hold the user button and then press the reset button (or you can hold the user button while inserting the USB cable). I was then able to upload the filesystem and the tracker was running.
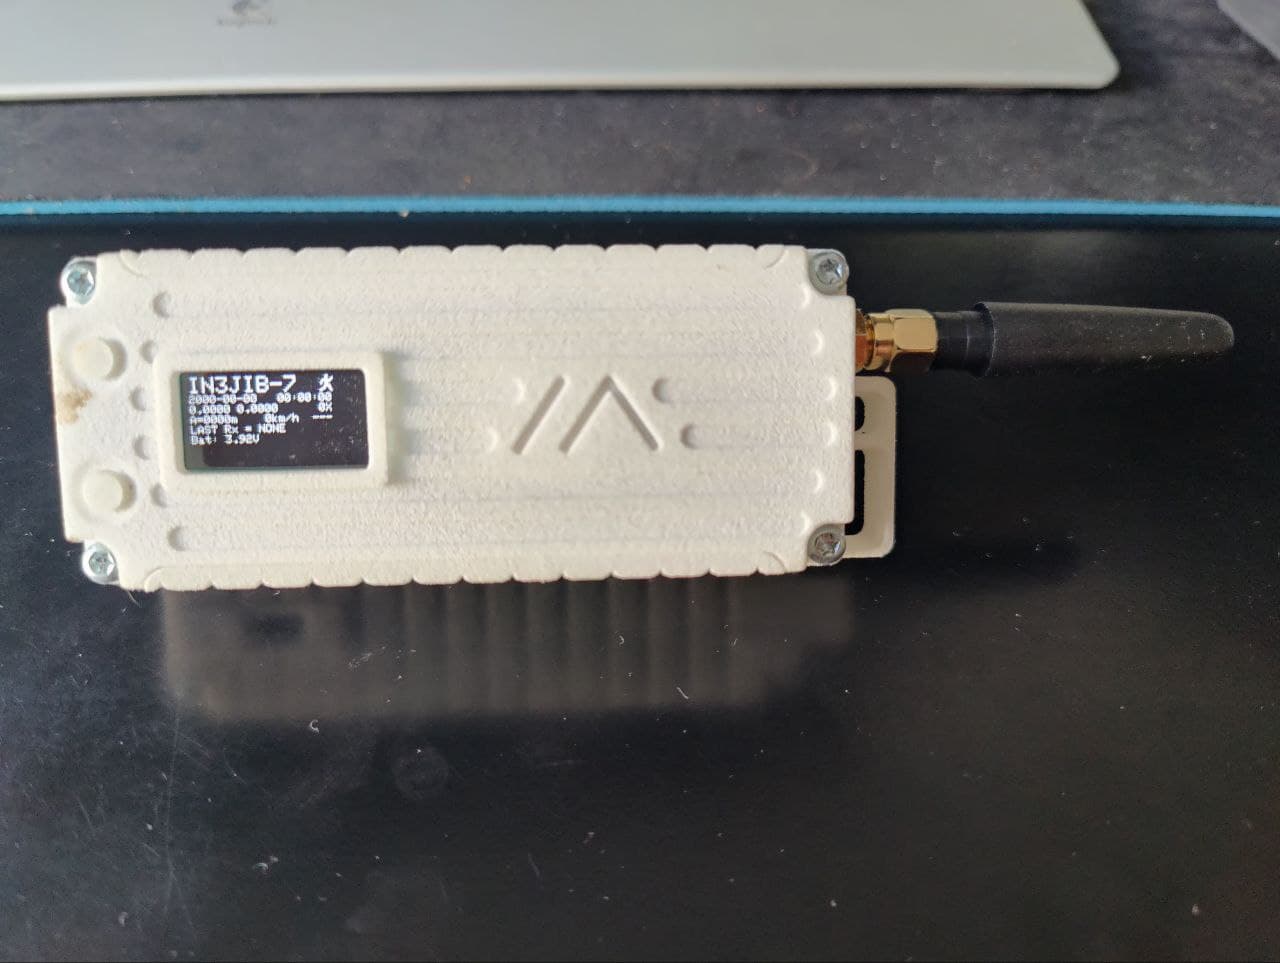
Fairly quickly it picked up the time and then the date from a GPS satellite but it stubbornly insisted I was at lat/lon 0/0. Checking Ricardo’s GPS page suggested that the onboard GPS antenna would struggle to pick up satellites while indoors especially on first power up. So I put the tracker and a USB power bank in a plastic box and left it outside for a while. I don’t know how long it actually took to get a fix but this worked and it now had the correct position. I’d left the iGate on my desk but it hadn’t received a signal from the tracker until I brought the tracker back upstairs. I guess leaving the antenna horizontally on the desk was probably never going to work too well!
Ricardo @CA2RXU, thanks for your excellent software but I think the documentation could do with a couple of improvements. First, if your board is not in the list when you import the project, just edit the platformio.ini file. Second, to upload the filesystem you need to put the board into boot mode - this will depend on the board so perhaps the Heltec wireless tracker is the only one where you need to do this.
6 Likes
nice comments for improvements on the guides
I hope to have soon the web installer for tracker to avoid all the VSCODE explanations and guide too
ESP32S3 boards (mostly heltecs) need to get into boot mode for flashing it.
take into notice that the tracker sends when moving, if you Stand still it will send only once 15 mins
6 Likes
That’s a decidedly non-trivial process, not helped by needing vscode… Somewhere along the way the screen went black, and I can’t figure out how it might be brought back to life. Time to go up the garden with a shovel and pickaxe, ![]()
3 Likes
Hi Rick, Ive been having the same problem, with a T-Beam Board. it won’t accept the filesystem image. VSC on my windows pc will not install Platformio. My Mac laptop did and all is ok till I get to upload system file image. it reports green success, but board reboots to f/w screen
I am going to wait patiently till Ricardo has issued the webinstaller.
2 Likes
VSCode has been quite happy to report success with program upload and with Filesystem upload, but the device itself says absolutely nothing, but instead displays it’s best impression of the darkness of the void. There’s a bright orange LED alight beside the User button,and a pale white one alight beside the Reset button. No other sign of activity at all.
4 Likes
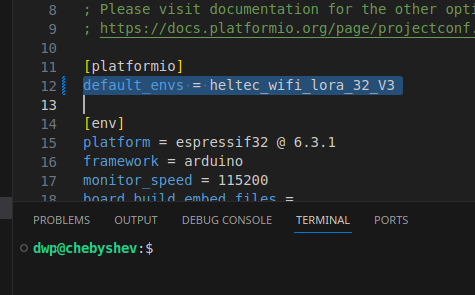
Which board have you got ? Are you building it for the right board. If you have a Heltec LoRA V3 board, that you are trying to set up as a iGate or digirepeater, use this repository:
and in platformio.ini set “default_envs” to “heltec_wifi_lora_32_V3” like so:
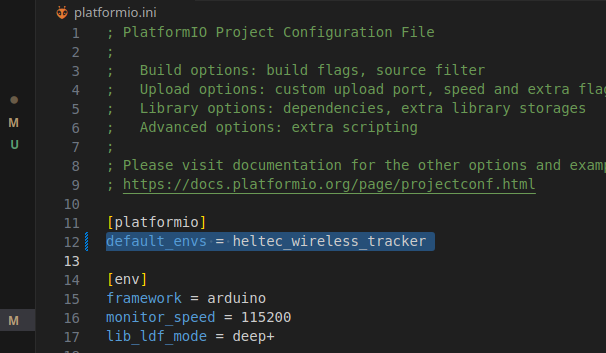
If you have a Heltec Tracker then you need to use the “LoRa_APRS_Tracker.git” repository:
https://github.com/richonguzman/LoRa_APRS_Tracker
and in platformio.ini set “default_envs” to “heltec_wireless_tracker” like so:
If you are tying to configure the Heltec Tracker board, then you need to tweak data/tracker_config.json to include your callsign and set the APRS frequency to 439.9125MHz.
If you are trying to configure the Heltec V3 board, you now no longer need to edit the data/igate_conf.json file. It can all be done from the web interface.
Either way, once “default_envs” is set in platformio.ini, you need to hit the PlatformIO:Buld button (Big Tick icon) on the bottom tool bar:
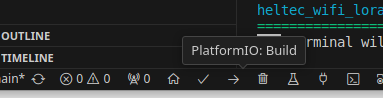
Once compilation is complete (You will see SUCCESS in Green), click the right arrow button next to the tick:
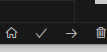
This uploads the elf binaries to ESP via the USB (RS232c at 115200/8/N/1)
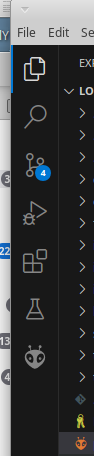
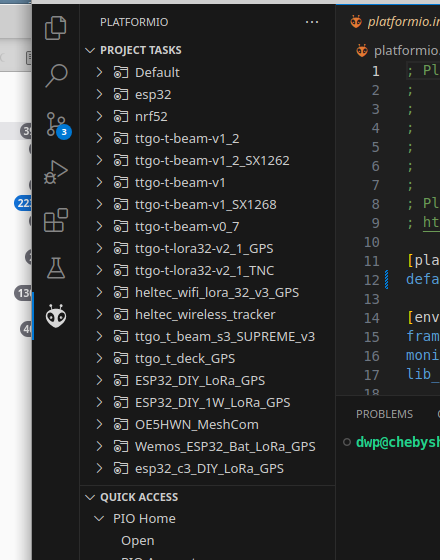
The final step is to upload the config. To do this click the Alien symbol on the left hand panel:
This will give you a selection of boards to upload the config for. Select the correct one (for example “heltec_wifi_load_32_V3” for the Heltec V3 board or “heltec_wireless_tracker” for the Heltec Wireless tracker board:
then select “Upload Filesystem Image”.
3 Likes