The portable Moxon 6m 2El Beam.
Had bit of think about this and decided to get some string make up the dimensions of the Moxom 6m Beam. For the support base needs to be of rectangle and not square to produce the rectangle shape required. Like said make the string into lengths of you would the wires and tip spacers needed to make a 6m Moxon. Set out on some clear ground some bamboo sticks the dimensions of said Moxon.
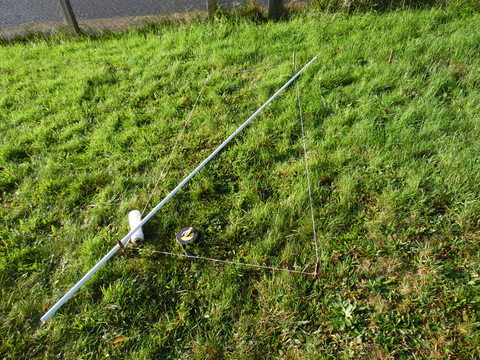
There is a web site on which you can work out values due to different sizes of wire and freq required via Resource not found. This one for portable is .22mm wire from Sota beams nice and light weight and freq set at base of the 6m band of 50.1mhz. Tuner will be required at first till you can tune it in proper like.
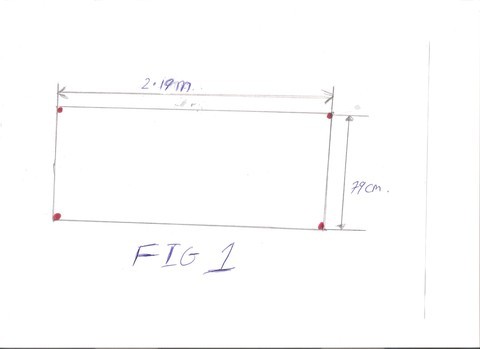
This will give rough size of your beam.
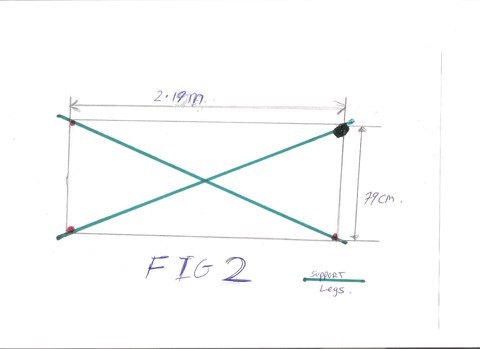
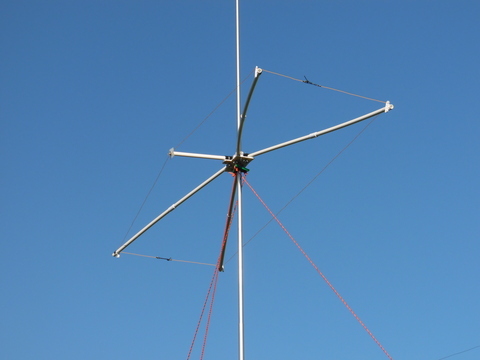
Once this is done draw an X in the middle as in fig 2 to show where the support legs will be and make them 20cm longer than the rectangle box. And can be cut down if need be Once the wire antenna is built. I aim to use some of the old 20mm conduit piping I have kicking about.
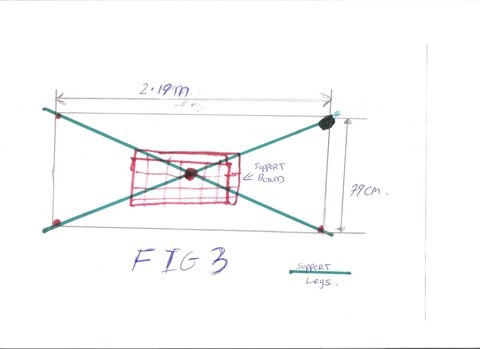
Next the support centre is next to being built again in rectangle shape made out of good old plastic chopping board Fig 3. Again size will be sorted out by placing on top of the cross the hole in middle. For your pole size is determined by diameter of your pole and how high your antenna to go up the telescopic pole. But not too high as top bits of poles tend to bend easy and break so recommend less about 2/3rds of mast high. This will now give you your Frame work and support base to hang your Moxon wires off it.
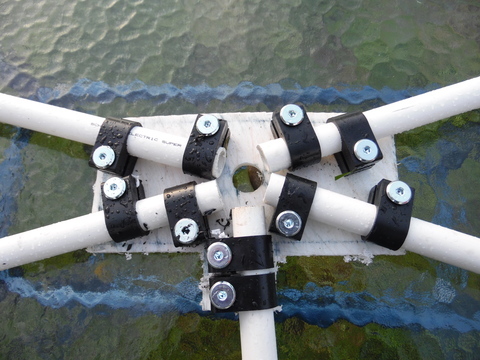
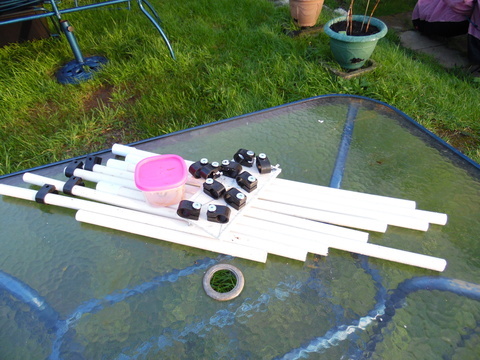
Make the main support legs at least 2.40m long, so it slightly too big for the cross your going to make. Cut in half so there 1.2m long and make up four legs, so you have the four legs of your cross. Now cut again so there only 60cm long and buy some Heavy Gauge Conduit Couplings 20mm to make the joiners, four in all required and glue in the first one BUT not the second one as you need to pop that one in and out when erecting and dismantling. Whole idea is to make it compact and easy to put away and erect.
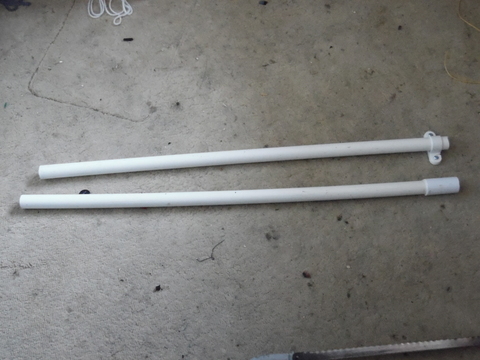
One support leg ready to go out of 4
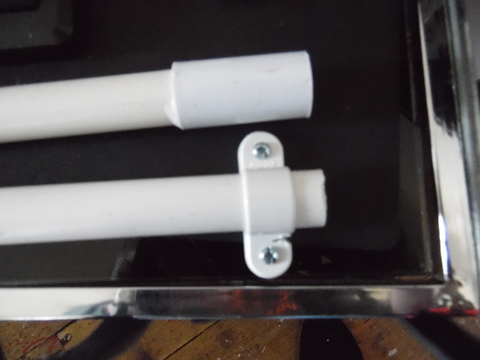
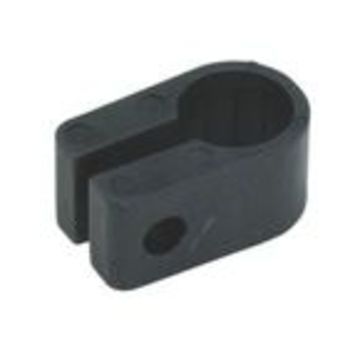
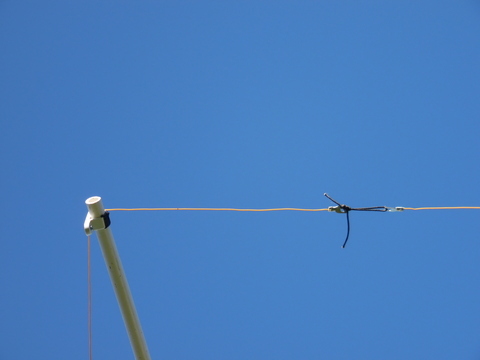
Little tip decided to use conduit saddles as the wire supports on end of the support legs, now to make them a little tighter. So that can move but not on own and keep wire taught wrap some insulation tape around the hoop this will reduce the size of the loop and make tighter grip on the support pole but will slide with some extra effort. But not move when in place is the idea and it works in practise. Don’t forget to cut a little slot on where you wire will sit and hook into.
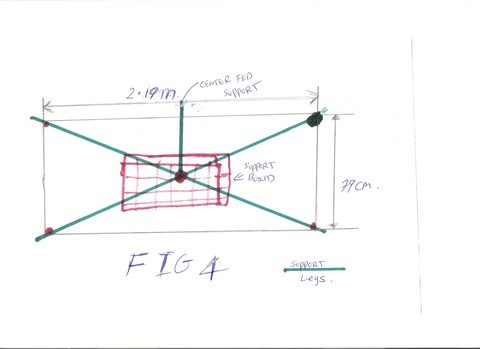
Next step is make a support leg for the DP to hang off and run the coax down to the pole again making it little longer than the rectangle so can be trimmed back if need be as in Fig 4make it about 60cm long once wire is in place can be trimmed down as same with the X frame work once your happy with it.
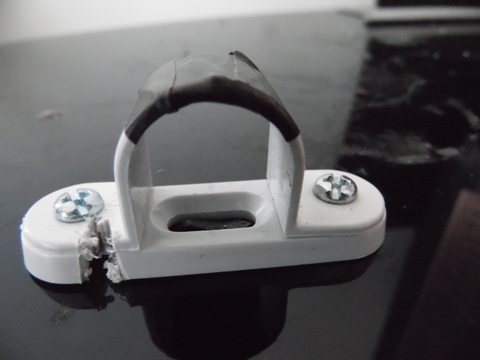
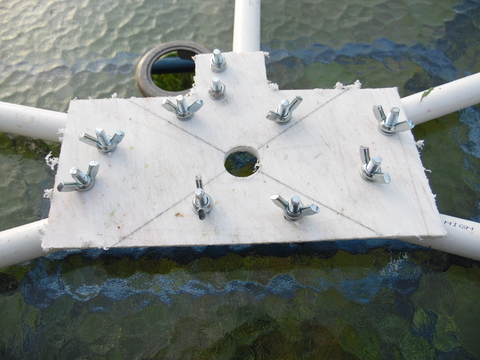
Once you know where to place the legs and centre hole is drilled, mark out on each leg is to rest up and using armoured cable cleats add onto the conduit and then put hole in board and push through a M6 bolt long enough to pass through the cleat and out other side of the support board and tighten down with M6 wing nuts. This allows wing nut to tighten and lock in place and release the support leg when dismantling and keeping the weight down at same time. Now you want 2 cleats per leg that’s 10 in all. Not need to over tighten either a nip will hold them in place.
Now make up your Di pole with centre ready to input coax or feeder. Make your reflector and the gaps between the reflector and DP is called the spacer tips. Again dimensions can be worked out on the Resource not found web site depending on size of wire you wish to use does effect the beam size.
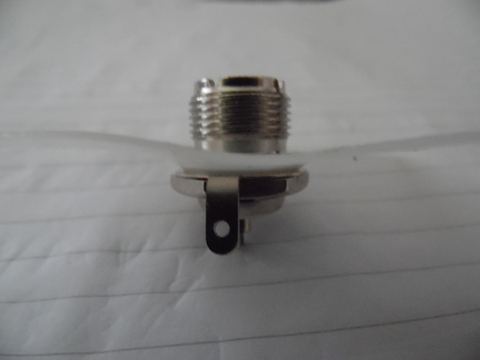
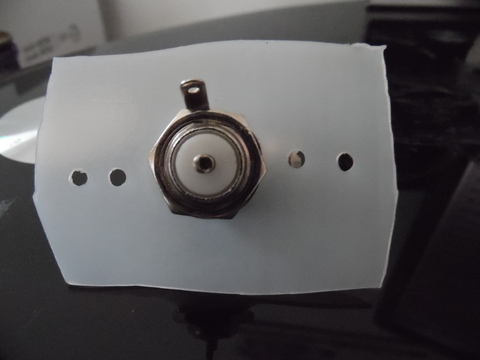
Next Job make up your Moxon Di pole centre bit using a PLL plug female and find a good hardy bit of plastic as I cut out from a OLD fabric conditioner bottle, strong, light weight and sturdy. Put in main hole to put in your PLL female coax connector plug and then either side couple tiny holes big enough to pass through your dimension of cable you are using on either side as photo’s show. Then you are ready to size up you lengths of wire and solder onto the PLL plug and thread through the support holes.
Now make up your Di pole with centre ready to input coax or feeder. Make your reflector and the gaps between the reflector and DP is called the spacer tips. Again dimensions can be worked out on the Resource not found web site depending on size of wire you wish to use does effect the beam size.
Next Job make up your Moxon Di pole centre bit using a PLL plug female and find a good hardy bit of plastic as I cut out from a OLD fabric conditioner bottle, strong, light weight and sturdy. Put in main hole to put in your PLL female coax connector plug and then either side couple tiny holes big enough to pass through your dimension of cable you are using on either side as photo’s show. Then you are ready to size up you lengths of wire and solder onto the PLL plug and thread through the support holes.
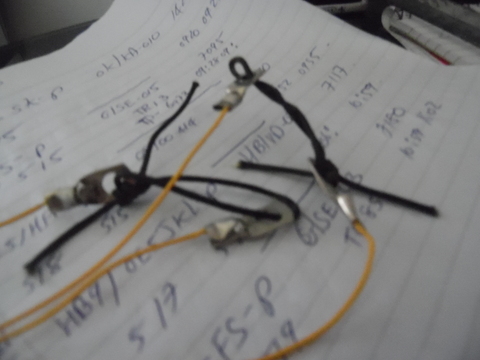
Take your 6mm ring crimps and solder them onto the ends of the wire of reflector making sure the ends of the tips are within the spec length of the antenna as there part of it. Do same with the Di pole and I used some left over Kevlar rope to make the spacer tips.
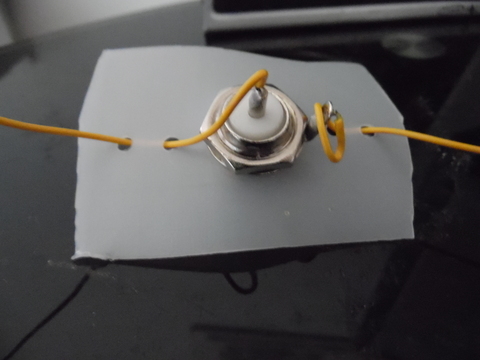
Centre piece made up with coax support and the feeder point for RG8X coax
The underside with M6 wing nuts to lossen and pull out the support poles and tighten when in place.
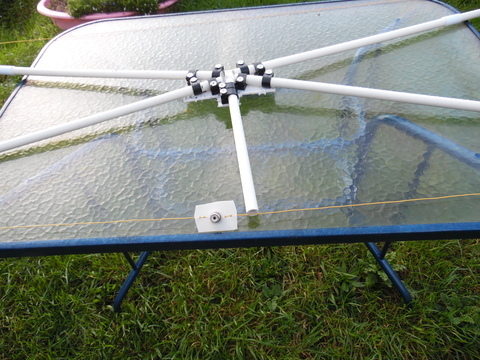
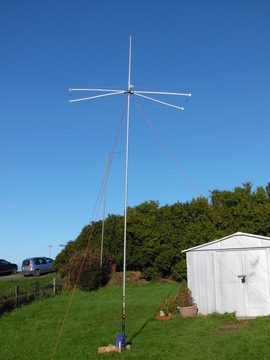
The Moxon 6m dismantled and ready to pack away OR ready to assemble ready for use.
And here it is ready op fire up on. But the clever thing is next to make up a 2m version and set up the wire support saddle clips in same way but will sit on the first of the sections of the 20m conduit. It may be possible to have both up at once. But if they engage one another, then the 6m wire can come off and take off the outer extensions conduit poles. Then pop on the 2m wire for the Moxon. Like said whole idea is one frame work, two antennas interchangeable and quick and keeping the load light for carrying about when between summits and good choice of antennas.
As you can see the saddle clips hold the wire in place nicely and can be moved about to tighten and hold in place the wire of the Moxon beam. And when they be come to easy to slide add more insulation tape to the hoop, simples.
One fully portable 6m Moxon beam that breaks down into a bag easy carried off and easy to assemble in about ten minutes. And yes it does turn quite easy. But keep the poles reasonable tight or it may drop on you.
But most of all have fun with that beam somewhere other than where you live mine one day will operate from a summit or two and WAB Square’s on 6m and 2m bands.
Re:- photo sizing was done via http://www.resize.it/resize-landscape-photo.html
Karl M3FEH-p


 : why don’t I make a Hex that does 10m and have the 6m under Neath as like in the Hex beam and may be at later date add extensions for other bands once it been up there a while sneaky like it and on top mount the 2m moxon. hmmmmmmmmmmm as still got the Hex beam bits and bobs from the old build.