Multiband Fuchskreis EFHW matching unit (just finished)

Hi all,
just finished constructing my first Multiband Fuchskreis EFHW matching unit from QRP shop in Berlin:

http://www.qrp-shop.biz/epages/qrp-shop.sf/de_DE/?ObjectPath=/Shops/qrp-shop/Products/Vfuchs

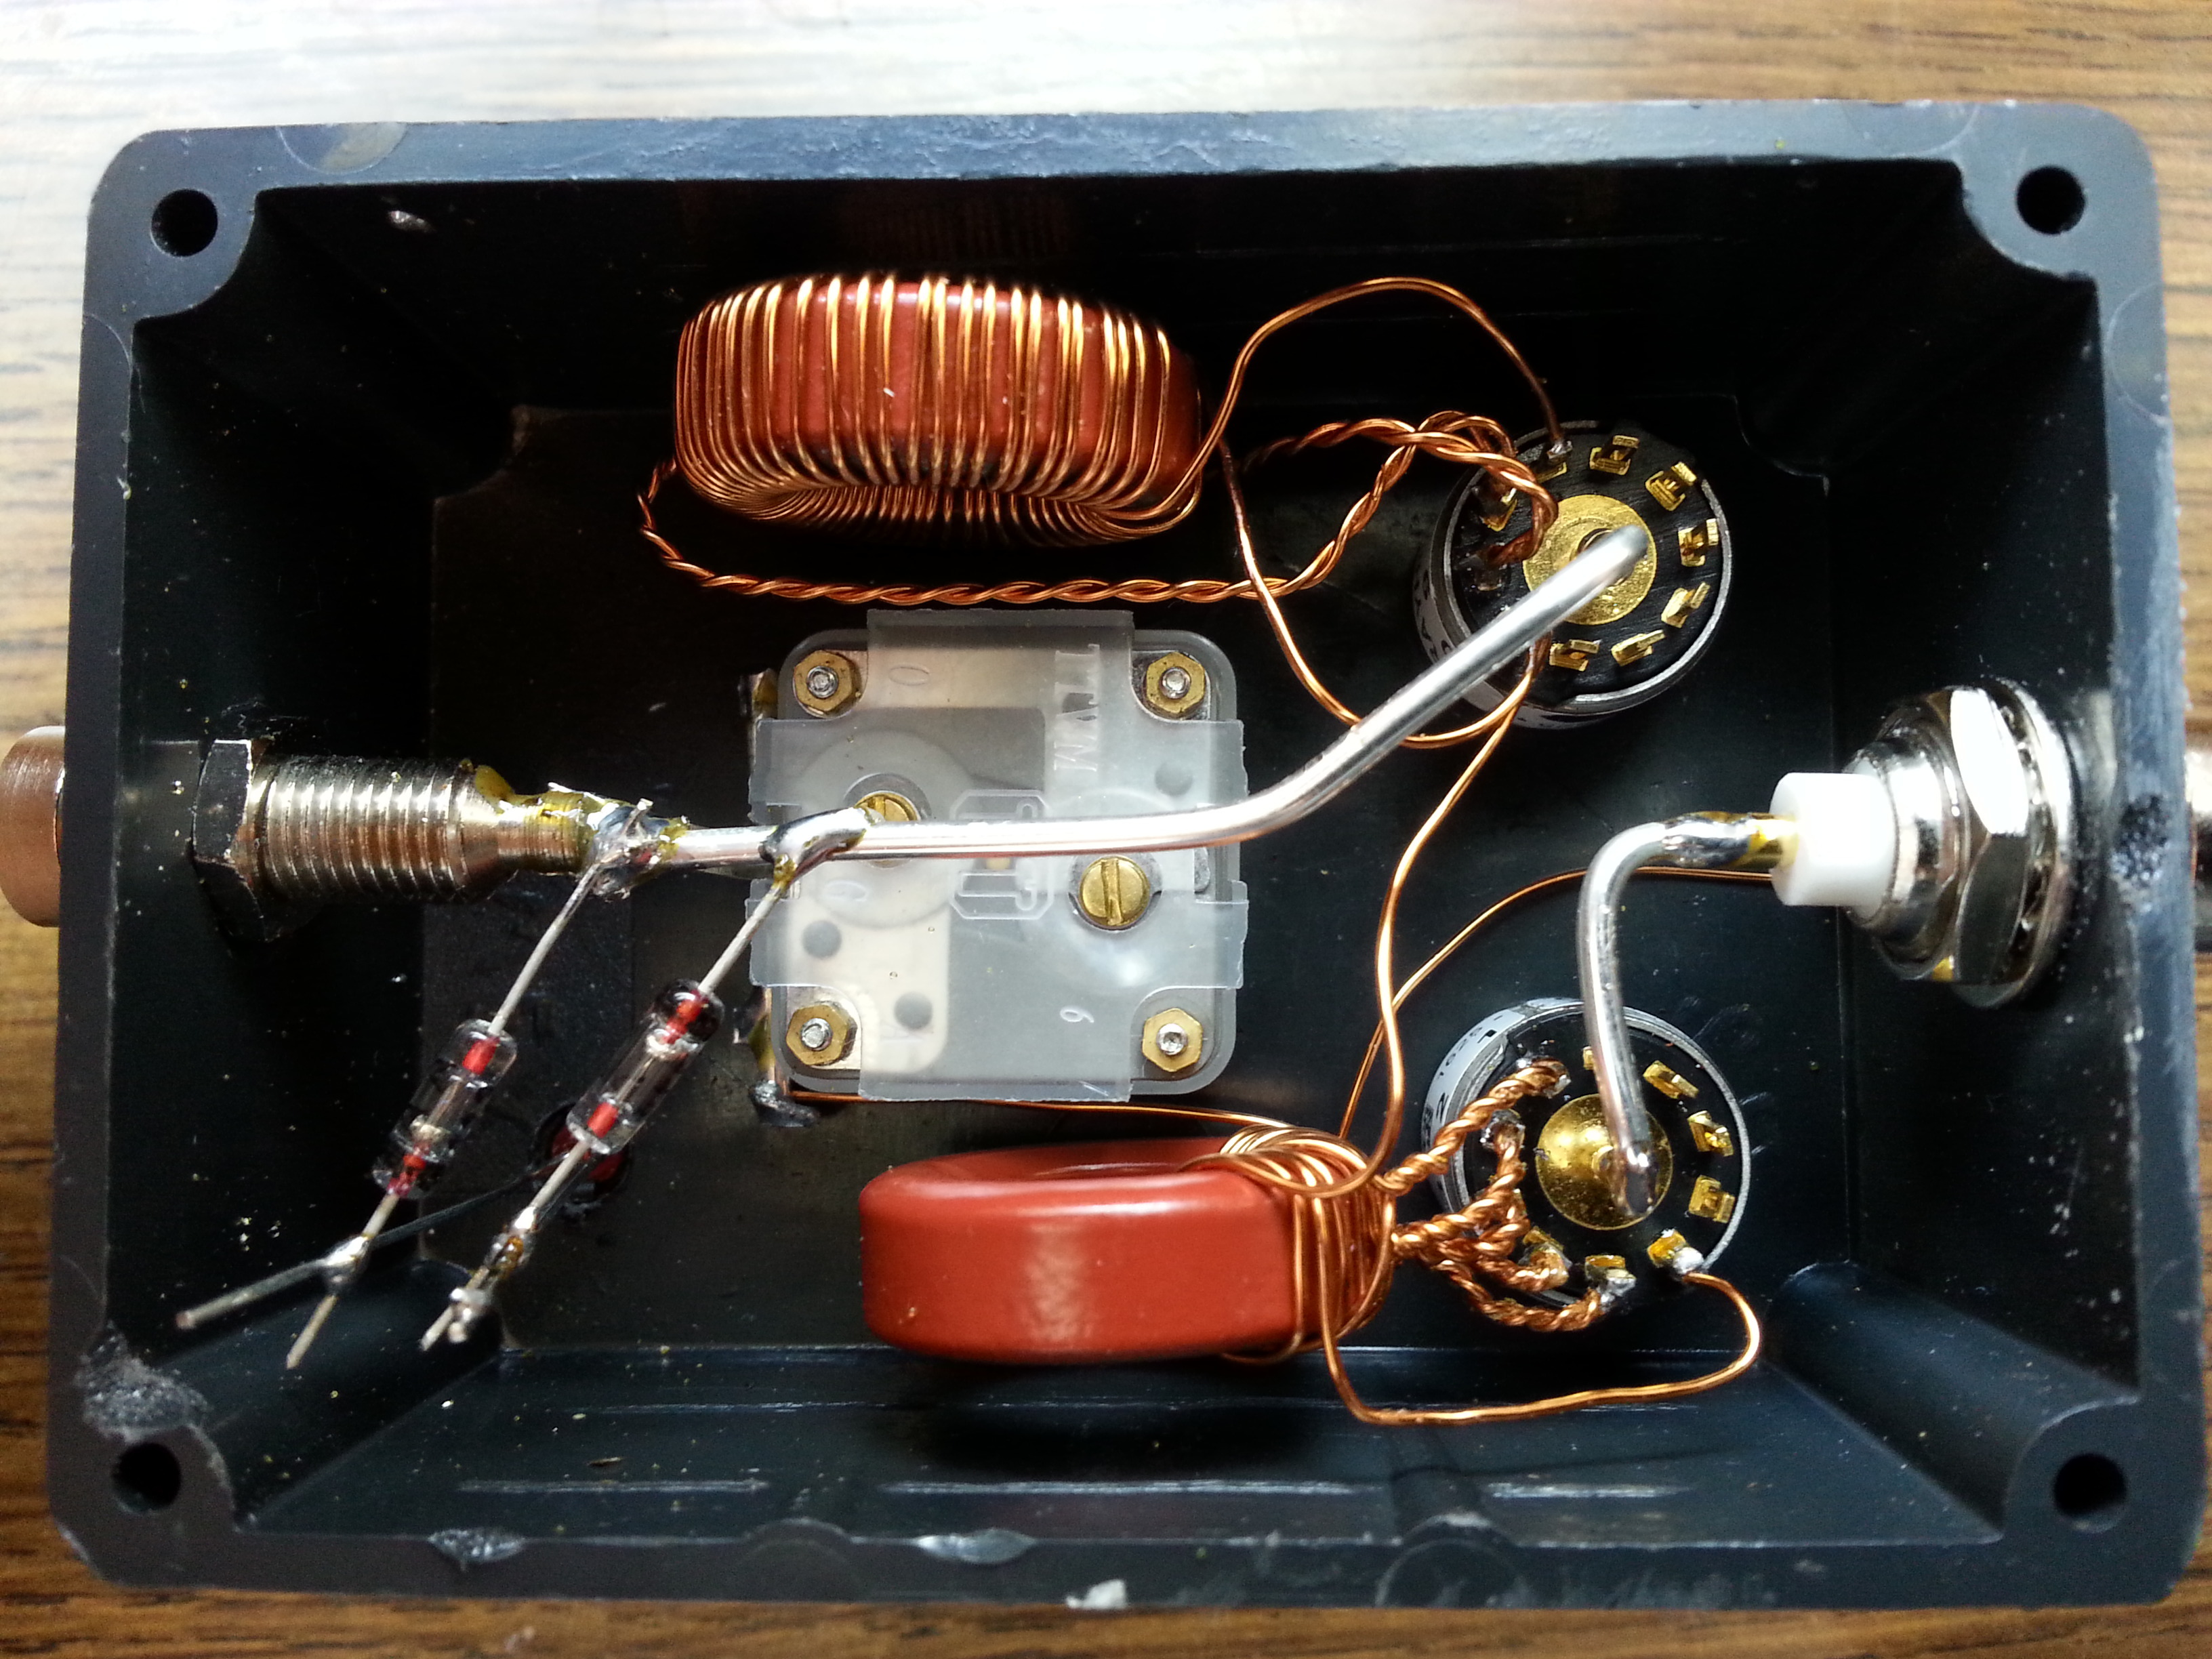
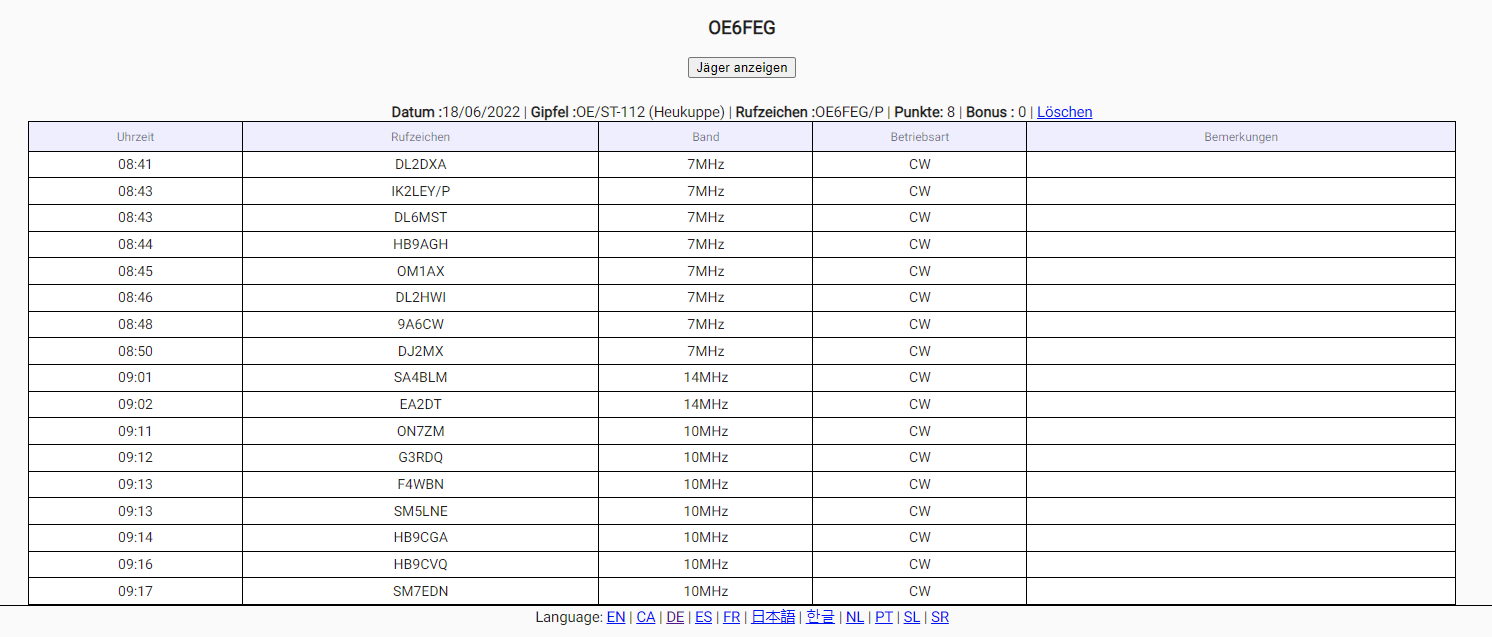
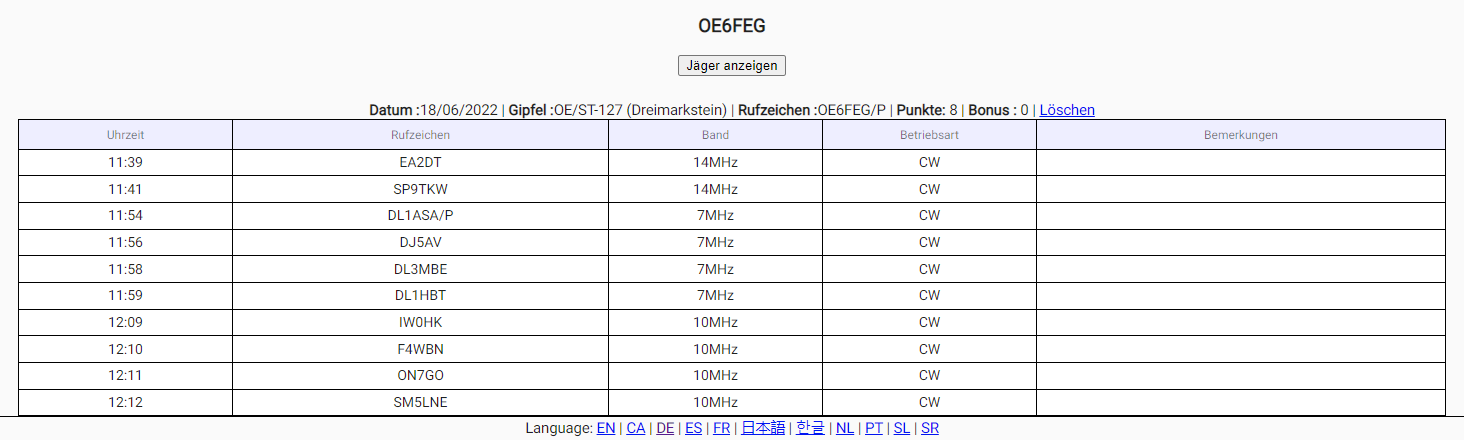
The one I have just finished is actually for a friend, I thought is would be a good way to gain experience by building one for someone else first. The results are OK:

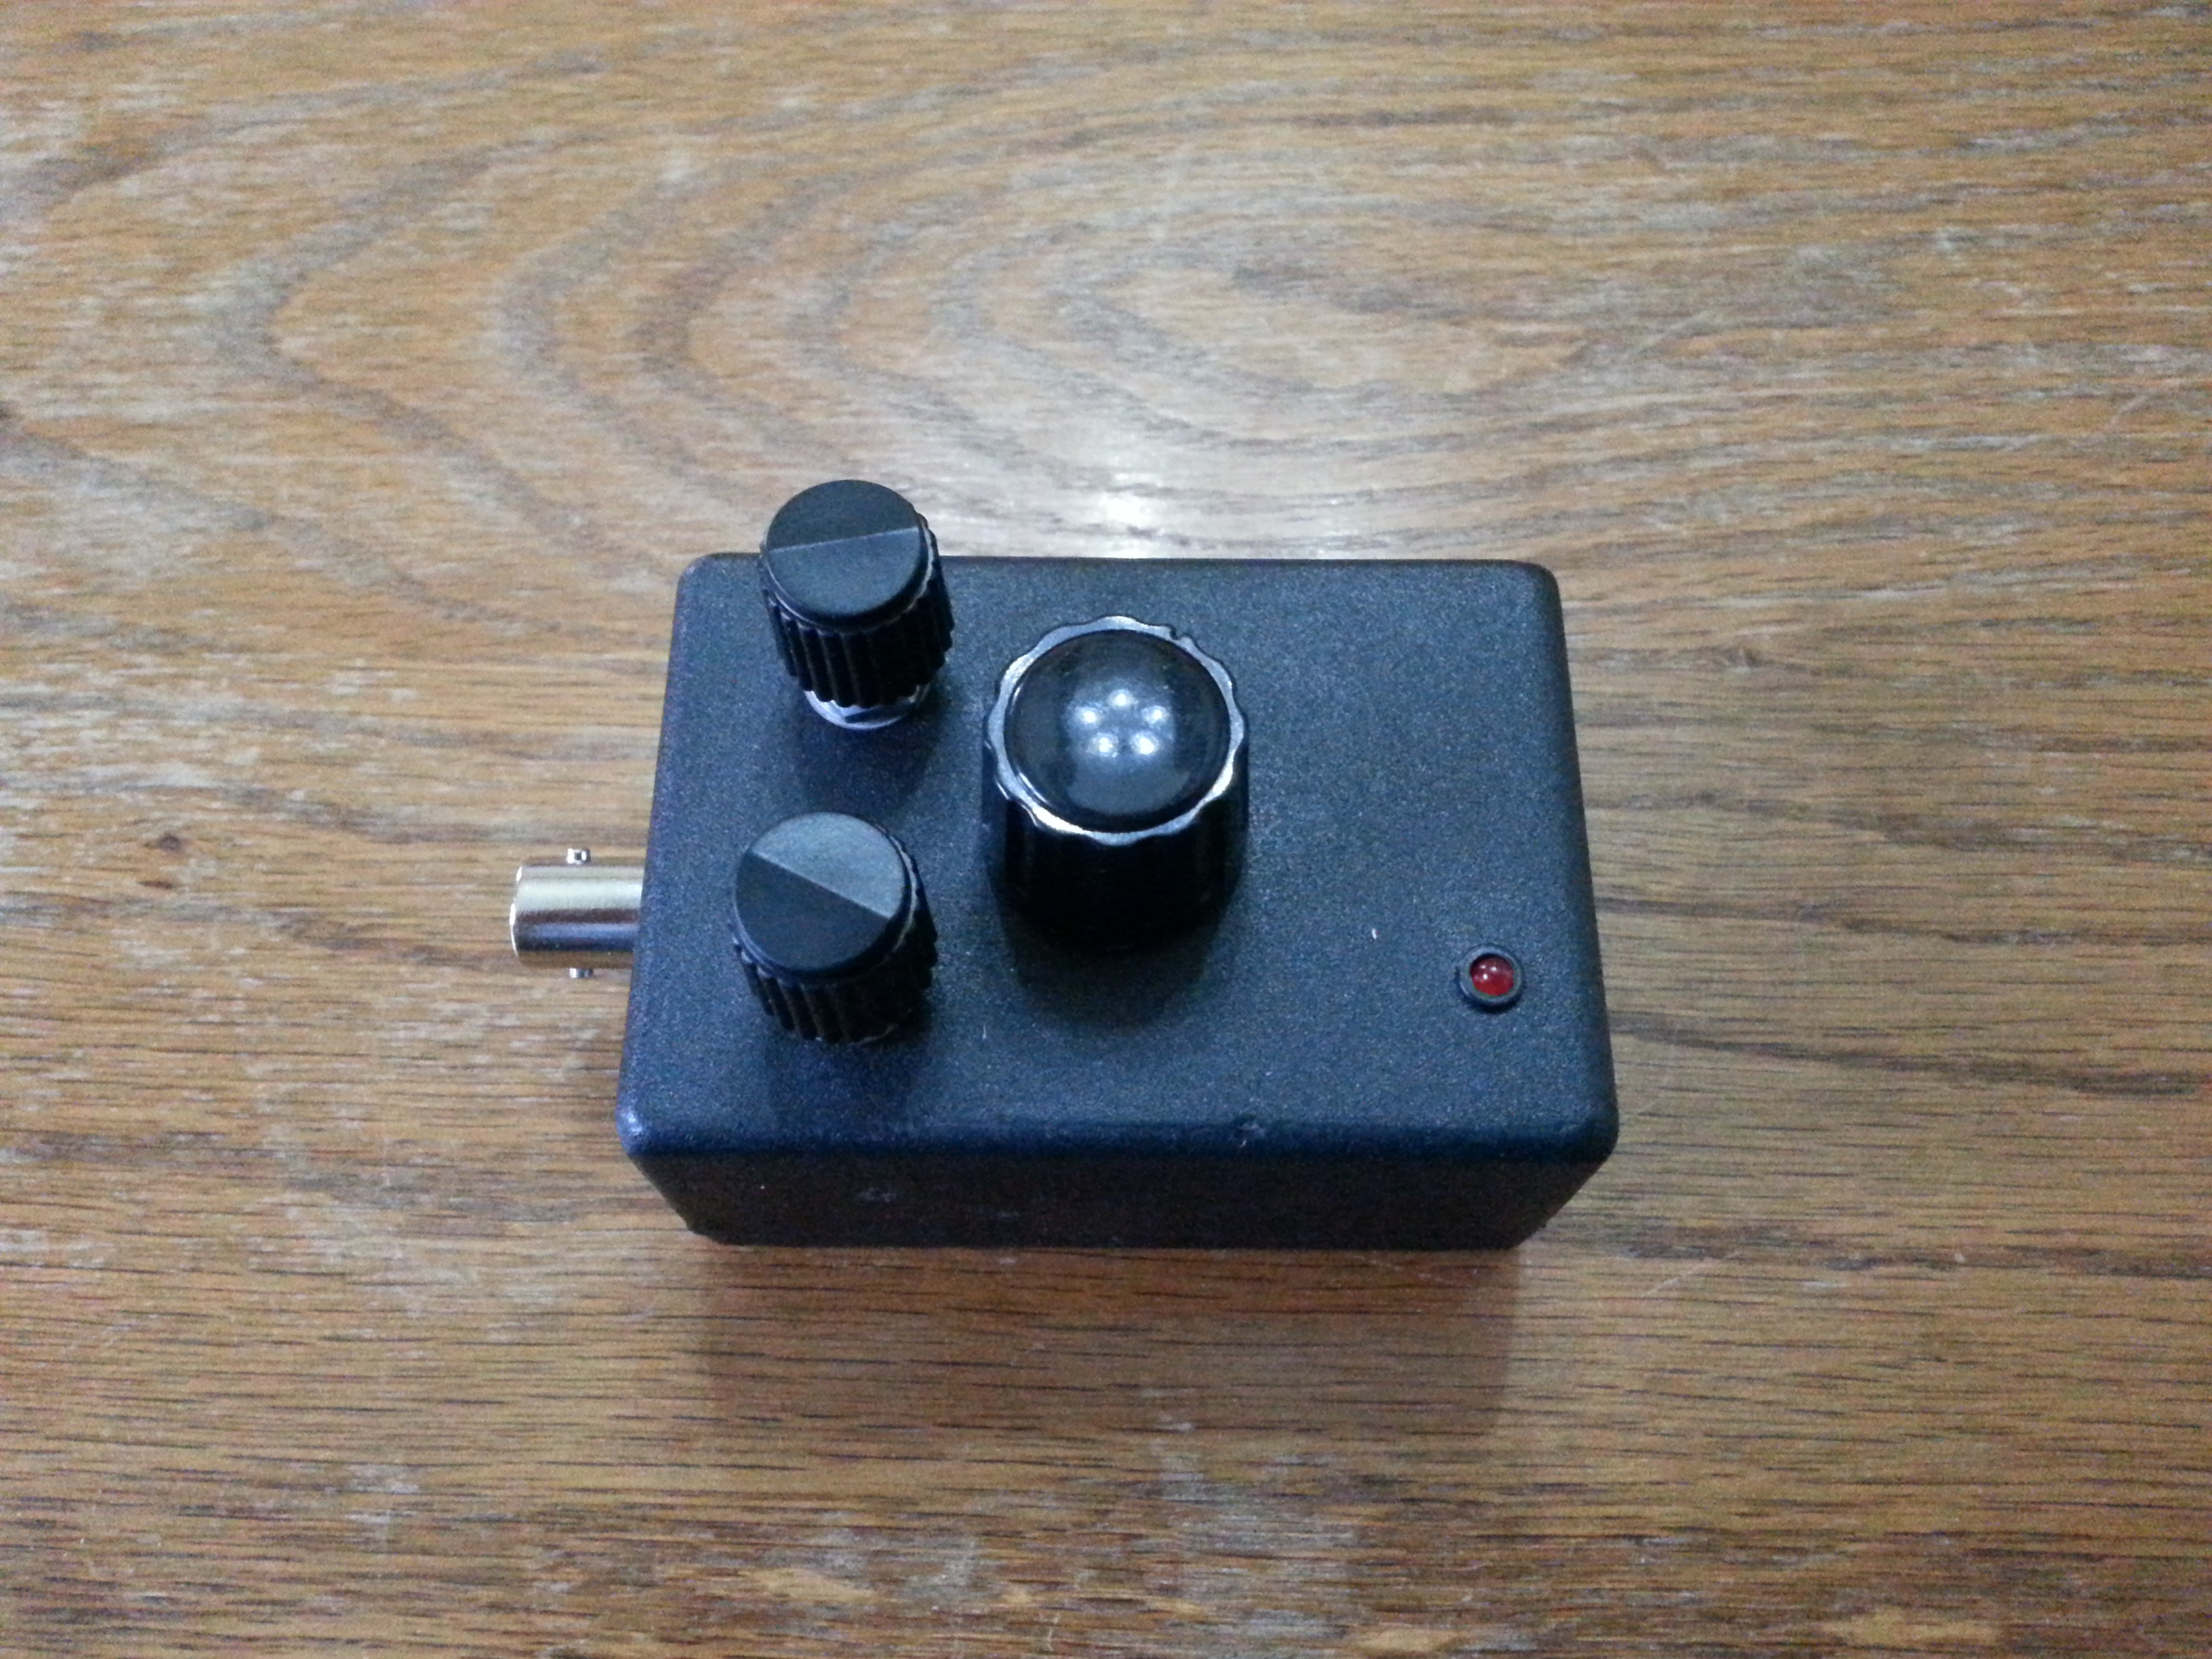
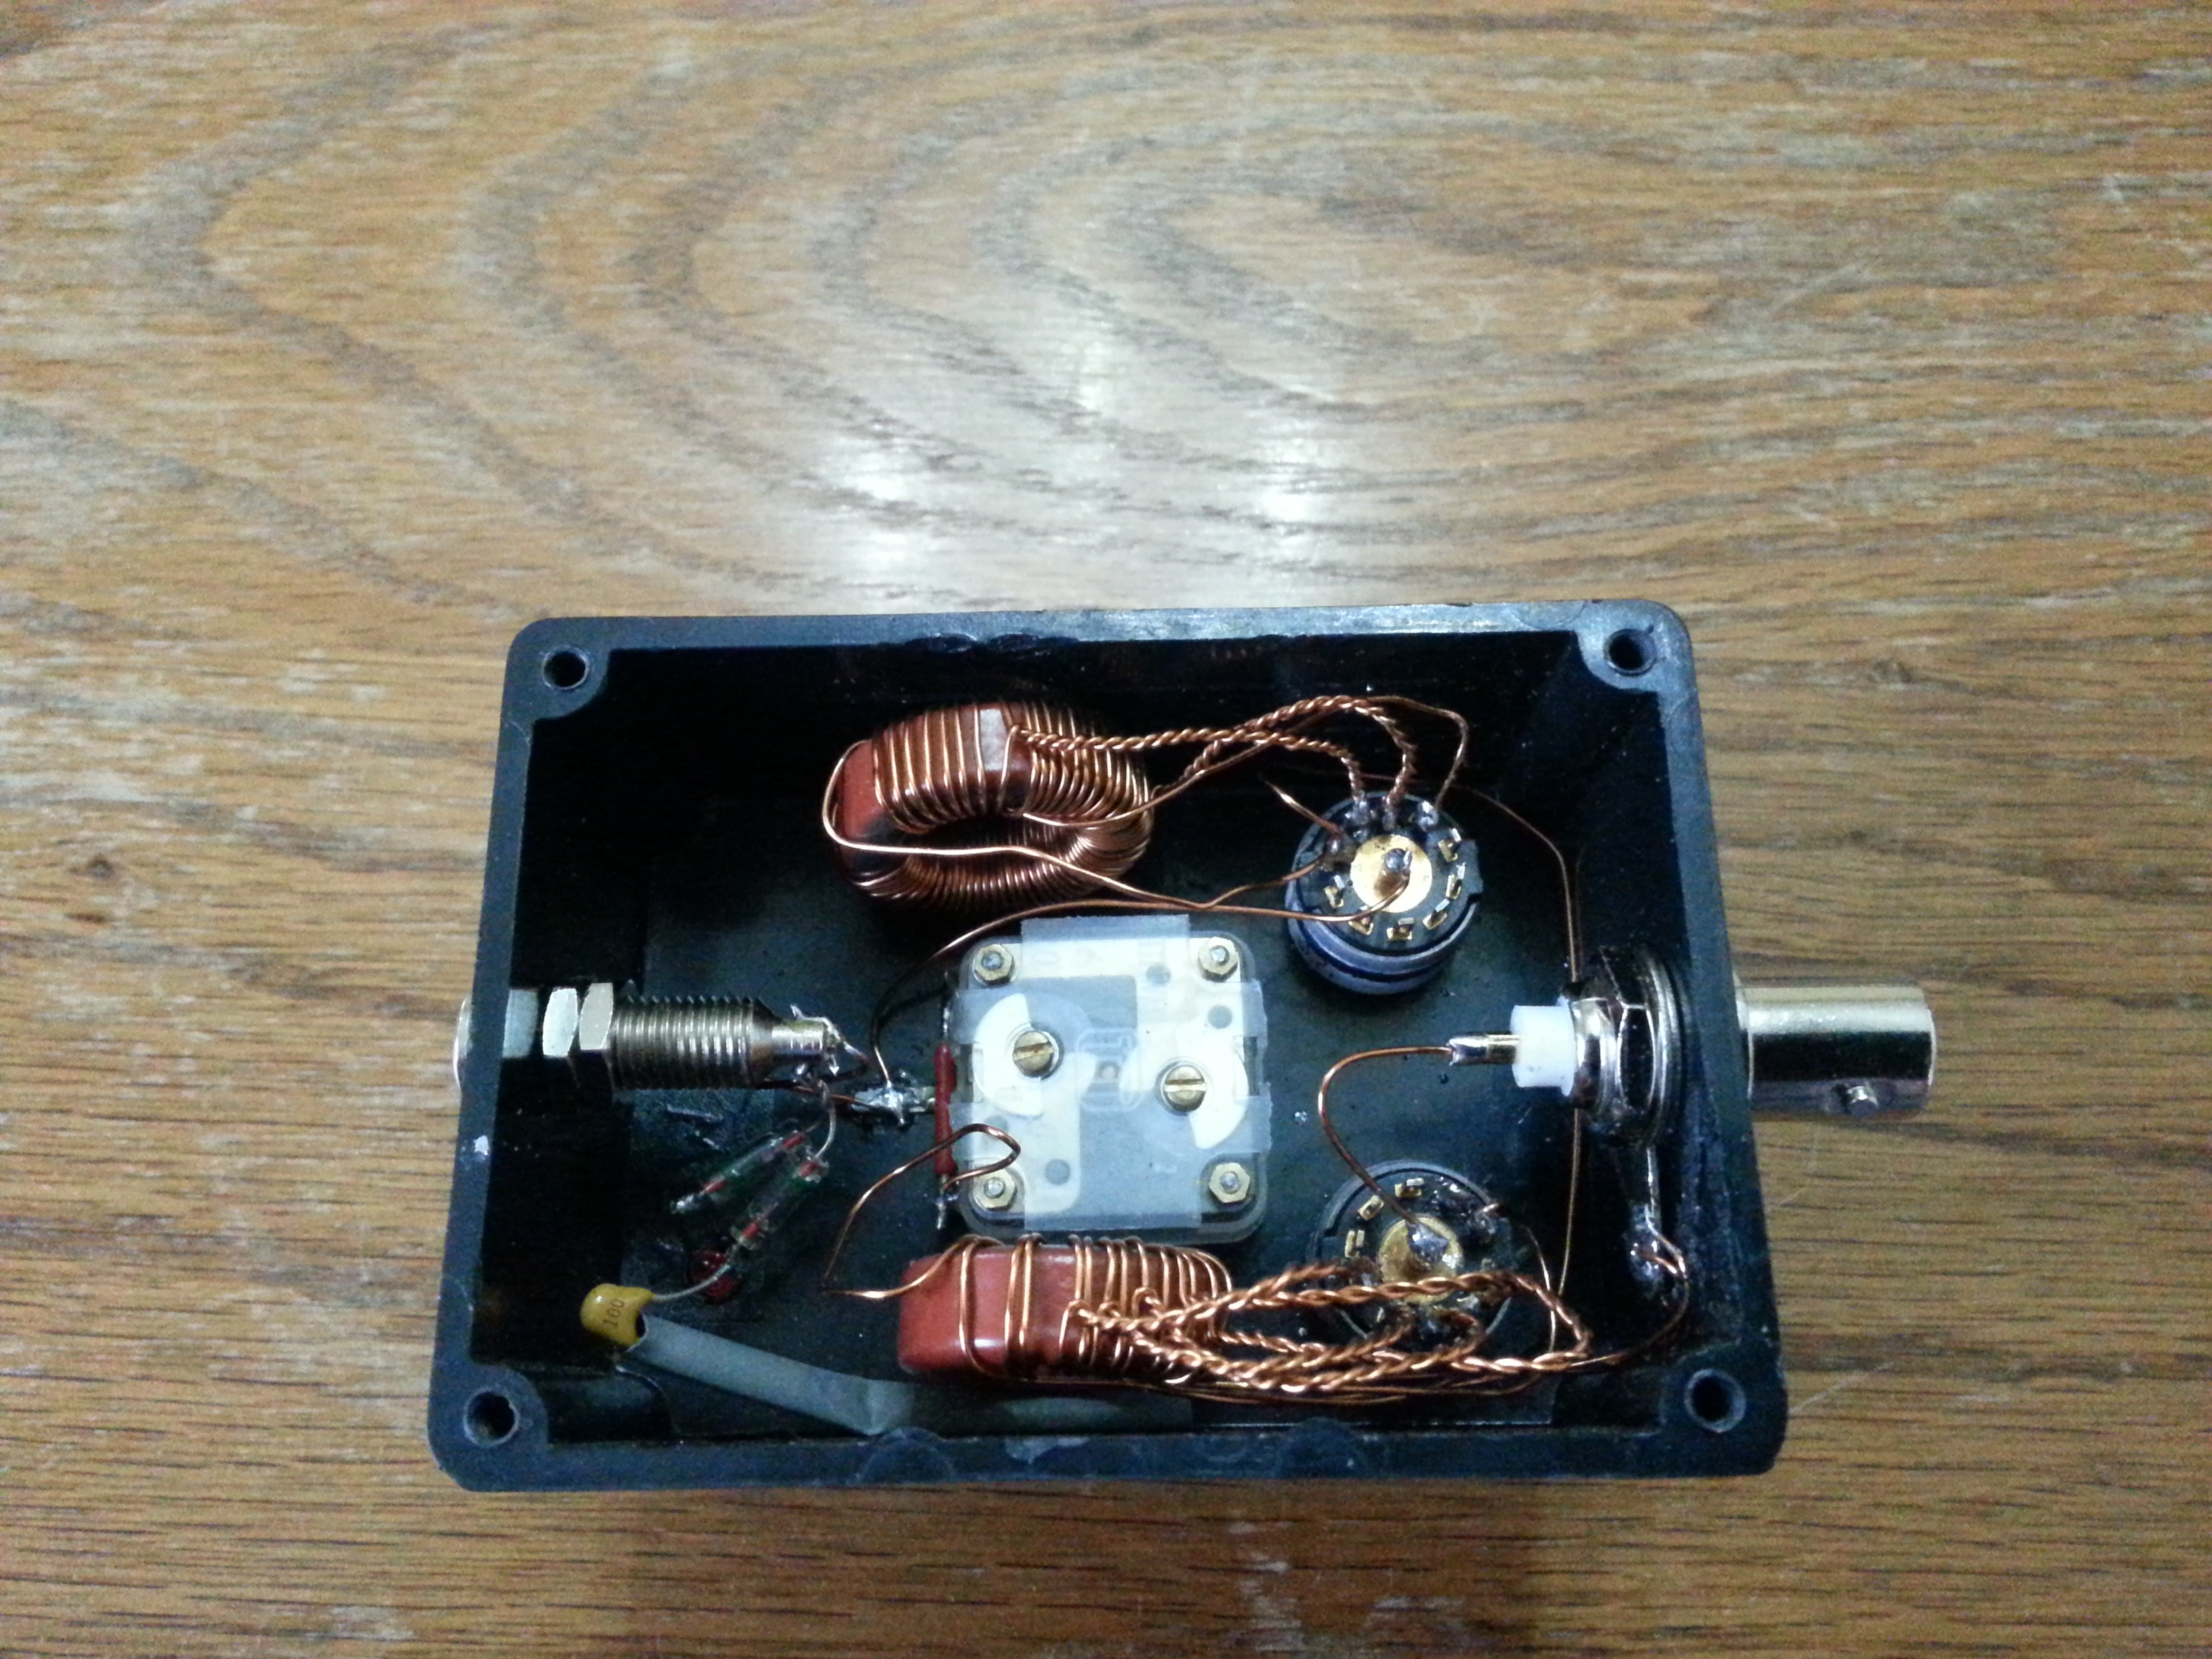
The wiring inside could be simplified somewhat, and the lead lengths shortened, but it works fine. I know it’s nothing special inside, so I won’t be at all offended by any comments suggesting improvements. It just goes to show how forgiving this kit is. It is fairly straightforward to build and could be done in a morning by most competent hams. I learnt quite a lot while building it, so the next one should be much better. There is a set of English instructions available for this kit:

http://www.qrpproject.de/UK/multifuchs.htm

I found them to be very comprehensive and well translated, however, it is important always to refer to the circuit diagram to make sure everything is exactly as it should be before soldering. I had to rewind one of the toroids, so now I have to wait for more enamelled wire before I can finish off the next one. The variable capacitor has changed since the manual was written; the new one needs two of the tabs to be connected together in order to get enough capacitance for the low bands. This was the only thing that was not translated into English, so a working knowledge of German certainly helped here. One very interesting thing I learned from G3UNA whilst visiting England was that the rotary switches used in these kits are in fact made by Grayhill; approx cost per switch is normally over €35, so someone picked up a job lot somewhere along the line:

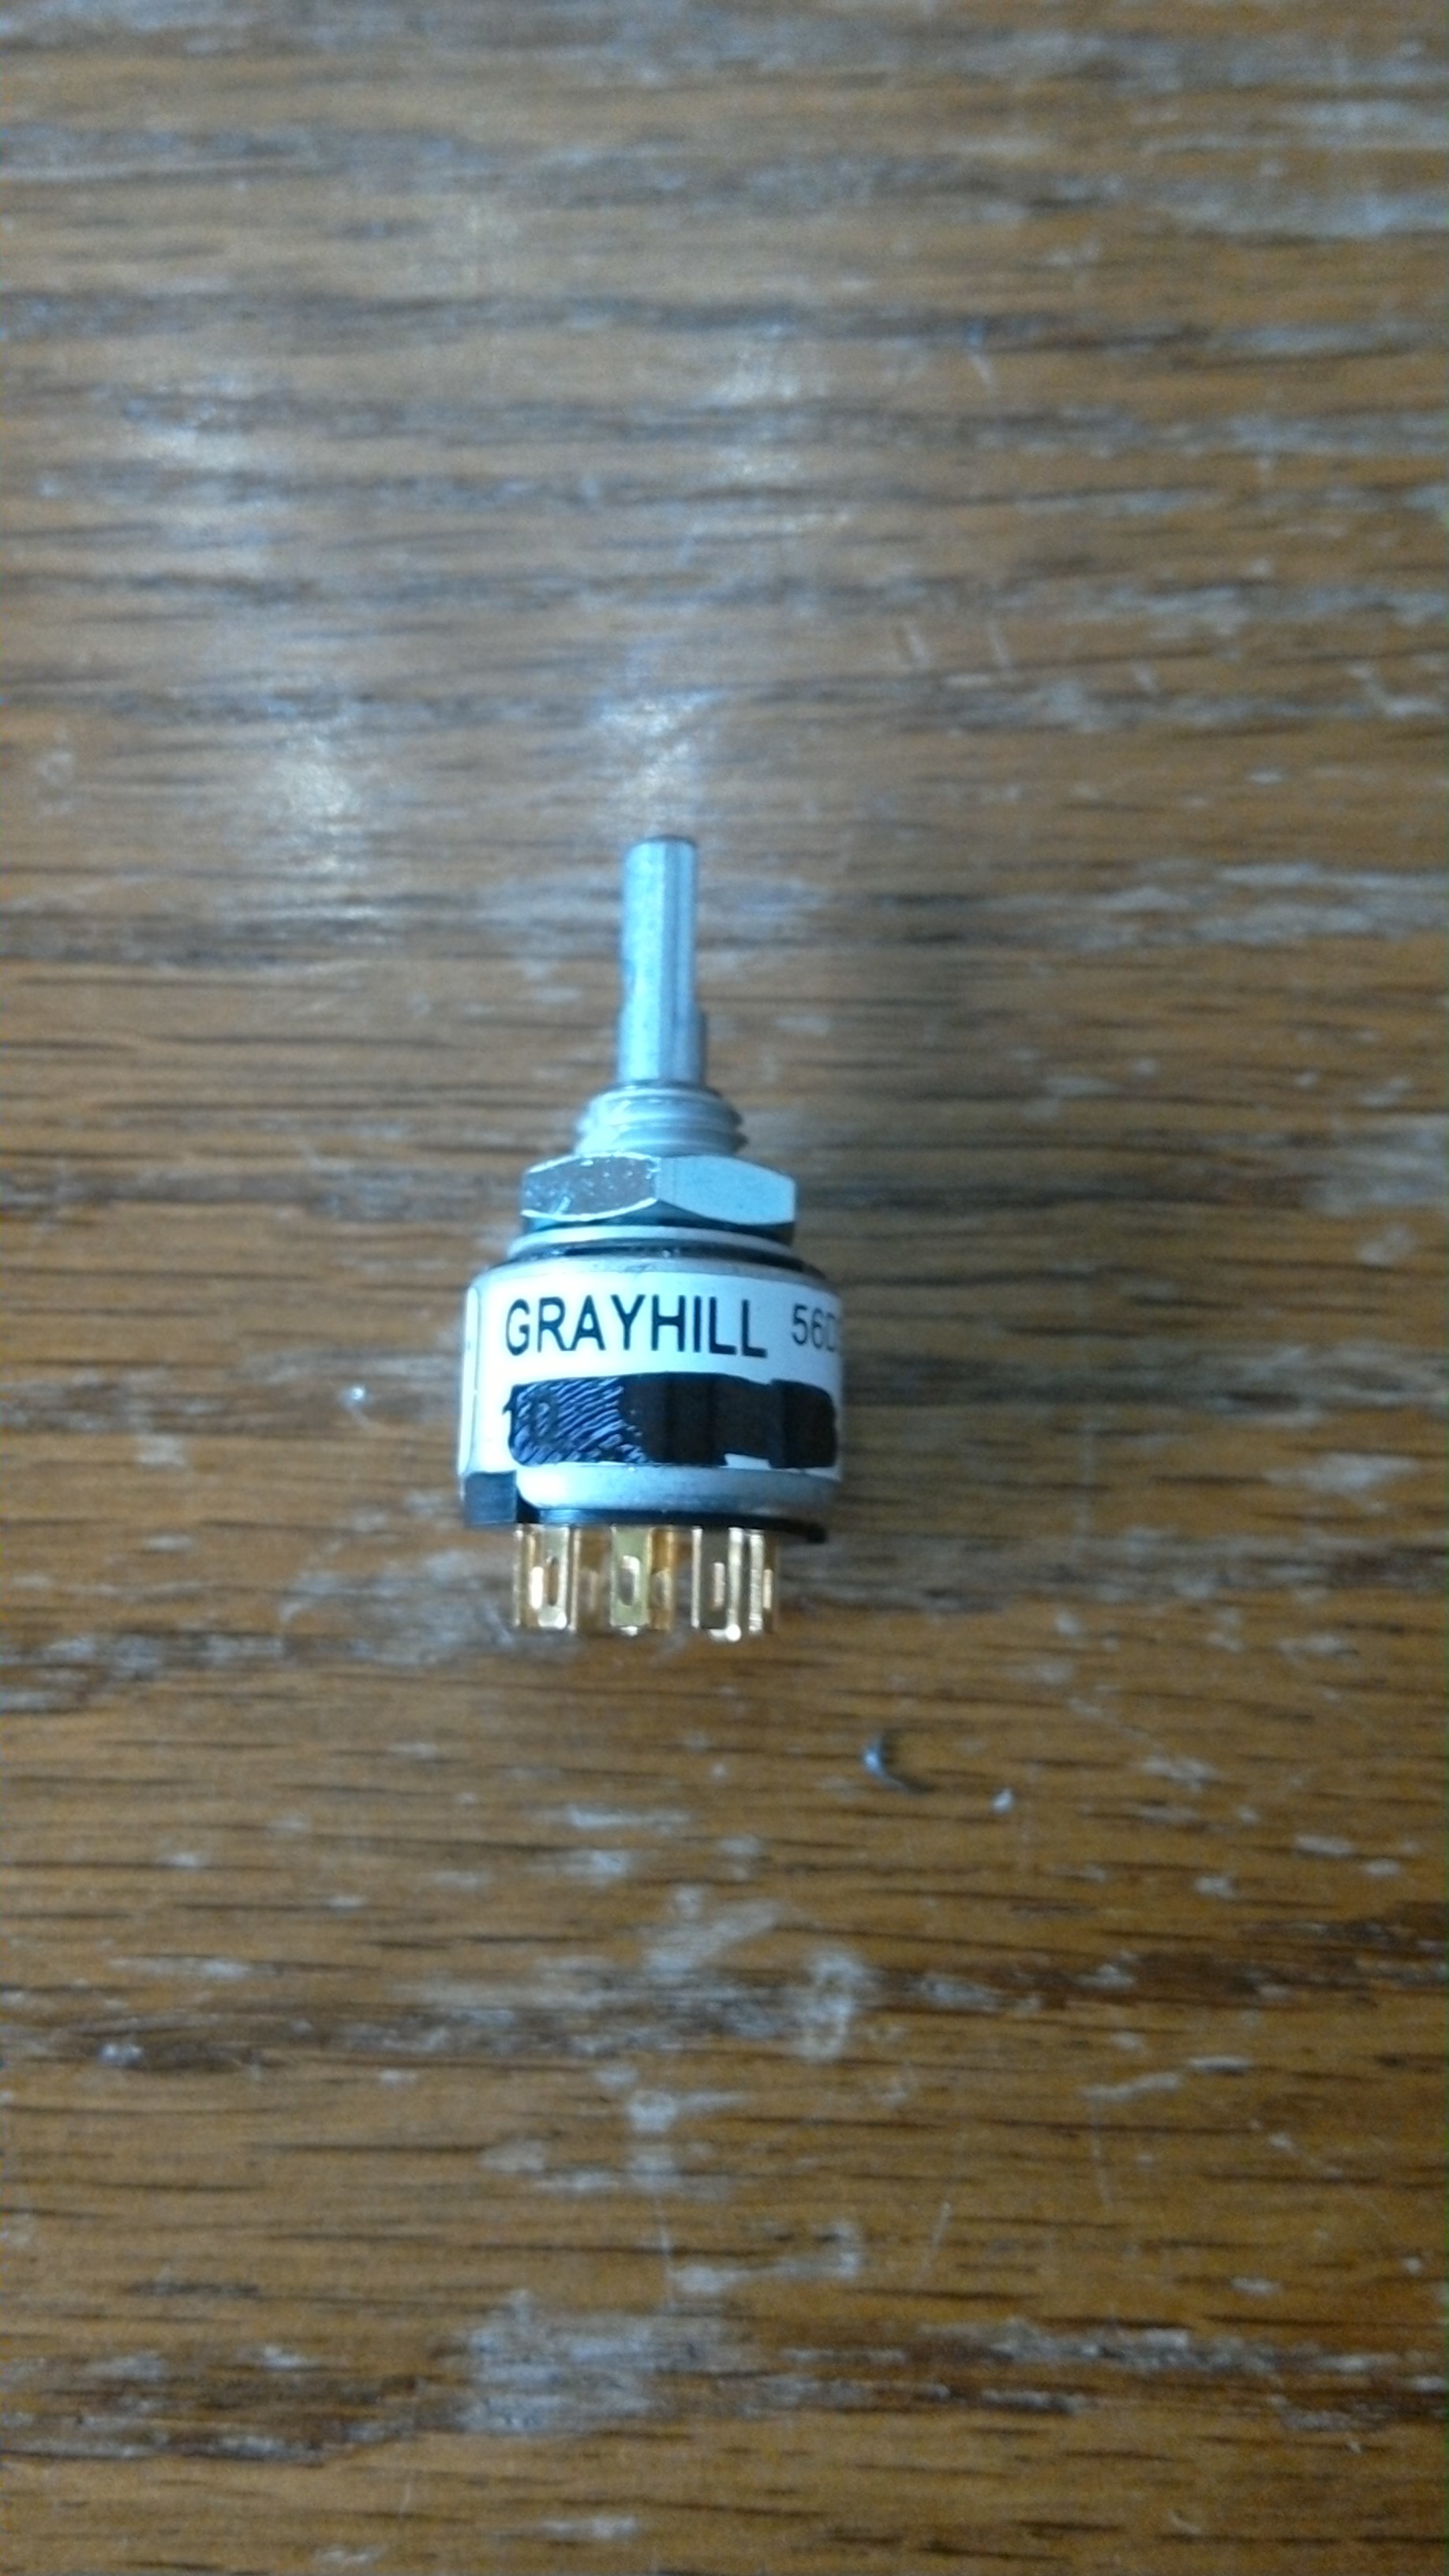
Part number: 56D36-01-1-AJN

With the total cost of the kit at €37, these little units are incredible value! Can’t wait till the MTR3b gets here; the KX3 is nice, but it’s a bit heavy if you are planning on camping overnight. Ultralight SOTA here we come!

               73 es 55 de OE6FEG / M0FEU
                                                     Matt

P.S.
Looking up the switch by part number on the internet showed a unit price of €9. Including VAT and shipping the total cost for a pair came to €45, so G3UNA must have had a similar switch in mind. Still, they’re nice switches.

5 Likes

I finished mark II (the unit I will keep) this evening:

I bought a set of helping hands to do this version, and I think it shows in the finished article, which is a lot better that the first. I may rework the first one for my friend as I feel a bit guilty seeing the difference between the two. I actually wired the coupling toroid differently than in the photo, although there is not much difference visually. In the photo I had copied the wiring (with 3 extra turns) that another friend had done that he said gave a better resonance on 80m. When I tried it out, I found I couldn’t get below 2:1 on 20m, so I took it apart and rewired it exactly according to the instructions. It now tunes all bands better than 1.3:1 and I get 1.2:1 on most. So follow the instructions seems to be the lesson here.
I found it way easier to put together if the taps are soldered to the switches outside the box and then the rotary switches installed one at a time. After that, the BNC goes in; then the variable capacitor and all the remaining connections are made: dead easy!
One modification my friend made that I did decide to keep was the use of a blue or white LED instead of the supplied red LED. A blue or white LED is much easier to see in daylight and completely obviates the need for the coupling capacitor in the first version. I used a super-bright Nichia LED that cost another €2. In some ways it works a bit too well, as it shines even when the tune is way out. It’s not so easy to decide when it is at its brightest. Perhaps someone with more knowledge of LEDs can find a more suitable one; blue may be a better option. I’ll only be using it with the new MTR3b, so the right switch positions can be easily marked in white paint or something; perhaps luminous paint for when operating at night.
The other modification I made was to move the variable capacitor further back towards the banana plug, which is allowed to protrude more out of the enclosure. I went about 42mm from the front of the enclosure where the BNC is instead of dead centre at 36mm as shown in the instructions, but other variations are possible. The reason for this is that with the variable capacitor further back, there is more room around the various knobs and switches, which makes tuning easier.
Now it’s just a matter of waiting for the MTR3b to make it through customs where is has been languishing since the 20/05!
73 de OE6FEG / M0FEU
Matt

4 Likes

I have reworked the English instruction manual to reflect both the recent changes in some of components and my own experience in making the Fuchskreis.

Hope people find it useful. QRP Project will be making the file available on their own website in the near future. For those interested in the weight, the finished unit weighs 95 grams.

         Cheers
                    Matt
4 Likes

Hi Matt,

Thanks. I’m not a fan of EF wires but will build the ATU and add a wire for use as a back-up.

Instructions saved.

73
Ron
VK3AFW

Just a quick update to this topic. The shaft on the supplied variable capacitor does not turn easily in the body of the component. If you intend to build the kit, don’t forget to put a small drop of sewing machine oil / WD40 on the part where the shaft of the control knob enters the body of the component before installation. It will make the shaft much easier to turn, and thus, the finished kit much easier to tune. I have added this note to the English assembly manual which is still available at the One drive link above.
de OE6FEG / M0FEU
Matt

1 Like

I’ve just started a series of videos looking at construction of the Fuchskreis in more detail:

Any feedback on what you would like to see or have answered would be gratefully received. Stay tuned for parts 2 and 3.

               73 de OE6FEG
                         Matt
2 Likes

Hello all,
For very small boxes that could attach directly to a rig, consider using a BULKHEAD MOUNTING BNC PLUG, instead of a receptacle and a plug / plug adaptor. These items are not popular, but are available.
Example: Amphenol RF BNC BULKHEAD PLUG, P/N 112420. In stock at Mouser Electronics.
https://www.mouser.com/datasheet/2/18/112420-712478.pdf
All Best, Ken

2 Likes

Hi Matt @OE6FEG
It’s different as your posted here : A Versatile Tuner for SOTA Activations by KX0R - #44 by OE6FEG ?
73 Éric

I found the second variable capacitor in series with L1 does not work well in the Fuchskreis. Possibly because the Fuchskreis uses separate toroids for inductance and coupling. The series variable capacitor did have a big positive effect on tuning, but only above 7 MHz. The SWR was raised significantly below 7 MHz, making a tune on 80m out of the question. For these videos, I’m just concentrating on the normal Fuchskreis kit with a few tweaks. That is also simpler for first time builders.
73 de OE6FEG
Matt

Just finished part 2 of the video series:

            73 de OE6FEG
                      Matt
6 Likes

Part 3 is finally here, hope you find it useful:

               73 de OE6FEG
                        Matt
4 Likes

I made an interesting discovery regarding this tuner at the weekend. As I am back on the bike, I am packing my MTR3b to keep the weight down. Last year, I swapped out my 20m wire for a 15m wire, so that the antenna would be a half-wave on 30m rather than 40m. I was not originally impressed with 30m, OE6RDD had always complained that the Fuchskreis did not work well on 30m with a 20m wire, where it would be around a 5/8 - 3/4 wave. He recommended rolling up a few metres in the reel to shorten it. For that reason, I kind of gave up on 30m and satisfied myself with 20 and 40m. However, after switching my antennas to make them resonant on 30 (ie. 15m long) rather than 40m, I have never looked back and 30 is now easily my favourite band. The only problem is that the MTR3b is tri-band and I would like to have good performance on all of the bands if possible.
I solved this last year by adding a link for 20m, so that I could shorten the antenna to an exact half-wave on 20m. This worked very well and I viewed 40m as a justifiable sacrifice in order to have these 2 bands. The antenna was made of very thin switching wire and eventually broke. I replaced it with slightly thicker wire but did not add the link.
This year, whilst playing about in the park, I noticed that I still have a perfect tune on 40m, even though it is a 3/8 wave rather than a half-wave. As my other antennas have radiated well as 3/8 waves, I decided to give it a try on the Heukuppe on Saturday. I wasn’t disappointed:

Reports were generally around the 559 mark and very satisfactory for 4 watts through a 3/8 wave. I got similar results in the afternoon on the Dreimarkenstein:

What I did notice, is that 14 MHz had less contacts, although that could just be down to conditions on the day. The antenna is 3/4 wave on 20m, but I have no idea if this could have any negative effect on radiation; certainly I don’t see why off the top of my head. That said, I may add another link at 10m to make the antenna a perfect half-wave on 20m and give me as good performance as I think you can expect from such a set up. I had always just assumed that the tuner must be used with an exact half wave of wire, or multiple thereof. I think it’s good to know that it will still tune and transmit well on other lengths. In particular, changing the length of the wire slightly (generally shortening it in my case) can help you get the SWR down if it is a bit high on certain bands.
More than anything, I prefer the shorter wire length when the antenna is a resonant 1/2 wave on 30m. It also means that the antenna is proportionately higher off the ground when on the resonant band and using a 5m mast, although again, I wouldn’t like to say how much effect this has on radiation.
73 de OE6FEG
Matt

1 Like